
On this article, we’ll introduce modifications to the v-model directive in Vue 3. Then, we’ll step by a tutorial, demonstrating methods to use a number of v-model bindings to simplify the method of constructing advanced types in Vue.
Bounce forward:
What’s the v-model directive?
The Vue v-model directive allows two-way information binding on kind enter components, such because the enter component, textarea component, and choose component on any Vue part.
It handles information updates in two methods:
- when the worth of the enter modifications, the
v-modeldisplays the worth onto the state contained in the part - when the state of the part modifications, the
v-modeldisplays the modifications onto the shape enter components
The v-model directive makes use of distinct properties and emits completely different occasions for various enter components by default:
worthproperty andenteroccasion fortextual contentandtextareacomponentscheckedproperty andchangeoccasion for checkboxes and radio buttons- worth as a prop and
changeoccasion for choose fields
A easy enter component in a customized part will look one thing like this:
<enter
    kind="textual content"
    :worth="modelValue"
    @enter="$emit(replace:modelValue, $occasion.goal.worth)"
>
And its props will probably be outlined like so:
props: {
        modelValue: {
            kind: String,
            default: '',
            required: true
        }
}
Within the father or mother part, the customized part can be used like this:
<CustomComponent v-model:modelValue="identify" />

// or the shorthand

<CustomComponent v-model="identify" />
Within the customized part, the v-model directive assumes an inner property has been outlined with the identify modelValue and emits a single occasion referred to as replace:modelValue.
You aren’t restricted to the default naming conference; it’s possible you’ll use a special identify of your selecting. Having descriptive names for our v-model bindings allows us to make use of much less code when attempting to learn and outline what properties are connected to the father or mother part.
Simply you should definitely be constant when choosing naming properties. Right here’s an instance of a customized identify, fullName, used for the modelValue property:
<enter
    kind="textual content"
    :worth="fullName"
    @enter="$emit(replace:fullName, $occasion.goal.worth)"
>
props: {
        fullName: {
            kind: String,
            default: '',
            required: true
        }
}
<CustomComponent v-model:fullName="fullName" />

// or the shorthand

<CustomComponent v-model="fullName" />
How does v-model deal with information binding?
The v-model directive has three modifiers that can be utilized for information binding: .lazy, .quantity, and .trim. Let’s take a more in-depth look.
.lazy
By default, v-model syncs with the state of the Vue occasion after every enter occasion is emitted. However with the .lazy modifier, the v-model permits the sync to happen after every change occasion.
Right here’s an instance exhibiting use of the .lazy modifier:
<enter v-model.lazy="message" />
.quantity
The .quantity modifier, then again, permits us to mechanically convert a person entry to a quantity. An HTML enter’s default worth is at all times a string, so this modifier may be tremendous useful. If the worth can’t be parsed right into a quantity, the unique worth is returned.
Right here’s an instance exhibiting use of the .quantity modifier:
<enter v-model.quantity="numPapayas" kind="quantity" />
.trim
The .trim modifier, because the identify suggests, mechanically trims whitespace from the person enter.
Right here’s an instance exhibiting use of the .trim modifier:
<enter v-model.trim="message" />
How is the v-model in Vue.js 3 completely different from Vue.js 2?
For those who’re acquainted with utilizing the v-model directive in Vue 2, you perceive how advanced it was with regard to creating types.
In Vue 2 we had been solely allowed to make use of one v-model per part. To assist two-way information binding in advanced elements, a full-blown payload needed to be utilized on the v-model.
The part would deal with the state of all of the enter components and a single payload object can be generated to signify the state of the part. An occasion with the connected payload would then be emitted to the father or mother part.
This methodology created points when it got here to creating Vue UI libraries as a result of it wasn’t at all times clear what was included within the payload. Builders had no selection however to loop by the payload object to establish what properties had been included.
Fortuitously, Vue 3 gives builders with extra flexibility and energy in relation to constructing customized elements that assist two-way information binding. In Vue 3, we’re allowed as many v-model directives as we’d like. This may be fairly handy, as we’ll show later on this article.
A number of v-model directive bindings tutorial
Let’s see how we will use a number of v-model directive bindings to simplify a fancy Vue kind.
For our instance, we’ll use a checkout kind that lists the person’s first identify, final identify, and e-mail deal with, adopted by some fields associated to billing and supply.
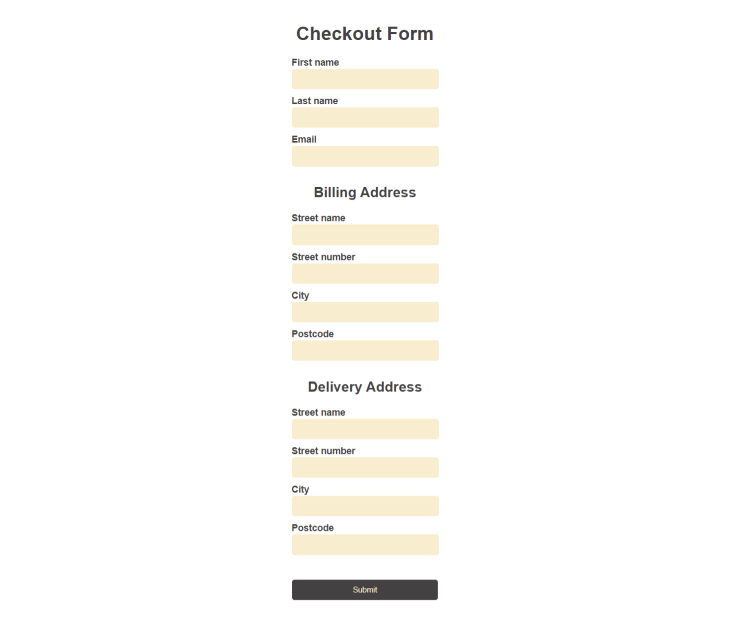
Creating the reusable part
The billing and supply sections embrace the road identify, avenue quantity, metropolis, and postcode.
However, since a person’s billing and supply deal with are sometimes the identical, let’s create a reusable deal with part for the shape.
First, we’ll arrange the Vue app utilizing the next command:
vue create <project-name>
Then, we’ll create a reusable part, AddressFieldGroup.vue, inside a elements folder inside our src folder.
This reusable part will probably be imported into our App.vue file. With the v-model, this reusable part will probably be certain to a customized part within the App.vue file.
Let’s take a more in-depth have a look at the reusable part, AddressFieldGroup.vue:
AddressFieldGroup.vue
<template>
  <part class="deal with">
    <h2>{{ label }}</h2>
    <div class="address__field">
      <label for="streetName">Road identify</label>
      <enter
        kind="textual content"
        id="streetName"
        :worth="streetName"
        @enter="$emit('replace:streetName', $occasion.goal.worth)"
        required
      />
    </div>
    <div class="address__field">
      <label for="streetNumber">Road quantity</label>
      <enter
        kind="textual content"
        id="streetNumber"
        :worth="streetNumber"
        @enter="$emit('replace:streetNumber', $occasion.goal.worth)"
        required
      />
    </div>
    <div class="address__field">
      <label for="metropolis">Metropolis</label>
      <enter
        kind="textual content"
        id="metropolis"
        :worth="metropolis"
        @enter="$emit('replace:metropolis', $occasion.goal.worth)"
        required
      />
    </div>
    <div class="address__field">
      <label for="postcode">Postcode</label>
      <enter
        kind="textual content"
        id="postcode"
        :worth="postcode"
        @enter="$emit('replace:postcode', $occasion.goal.worth)"
        required
      />
    </div>
  </part>
</template>

<script>
export default {
  identify: "AddressFieldGroup",
  props: {
    label: {
      kind: String,
      default: "",
    },
    streetName: {
      kind: String,
      default: "",
    },
    streetNumber: {
      kind: String,
      default: "",
    },
    metropolis: {
      kind: String,
      default: "",
    },
    postcode: {
      kind: String,
      default: "",
    },
  },
};
</script>
Within the above code, the part component with class identify deal with is reused (as we’ll see a bit later on this article) to create the Billing Handle and Supply Handle within the father or mother part.
The label prop provides every deal with part its related identify and 4 enter fields: streetName, streetNumber, metropolis, and postcode. The props for every enter area together with the label are outlined within the script tag.
The label prop will probably be handed from the customized part, AddressFieldGroup, to its father or mother part within the App.vue file in an effort to present every deal with group with a singular label or identify (e.g., Billing Handle or Supply Handle).
Creating the CheckoutForm
Now, we’ll create the Checkout Type inside our App.vue file and import the AddressFieldGroup.vue into the App.vue file as nicely:
App.vue
<template>
  <div class="app">
    <kind @submit.stop="handleSubmit" class="checkout-form">
      <h1>Checkout Type</h1>
      <div class="address__field">
        <label for="firstName">First identify</label>
        <enter kind="textual content" id="firstName" v-model="kind.firstName" required />
      </div>
      <div class="address__field">
        <label for="lastName">Final identify</label>
        <enter kind="textual content" id="lastName" v-model="kind.lastName" required />
      </div>
      <div class="address__field">
        <label for="e-mail">Electronic mail</label>
        <enter kind="e-mail" id="e-mail" v-model="kind.e-mail" required />
      </div>
      <AddressFieldGroup
        label="Billing Handle"
        v-model:streetName="kind.billingAddress.streetName"
        v-model:streetNumber="kind.billingAddress.streetNumber"
        v-model:metropolis="kind.billingAddress.metropolis"
        v-model:postcode="kind.billingAddress.postcode"
      />
      <AddressFieldGroup
        label="Supply Handle"
        v-model:streetName="kind.deliveryAddress.streetName"
        v-model:streetNumber="kind.deliveryAddress.streetNumber"
        v-model:metropolis="kind.deliveryAddress.metropolis"
        v-model:postcode="kind.deliveryAddress.postcode"
      />
      <div class="address__field">
        <button kind="submit">Submit</button>
      </div>
    </kind>
  </div>
</template>

<script>
import AddressFieldGroup from "./elements/AddressFieldGroup";
import { reactive } from "vue";

export default {
  identify: "CheckoutForm",
  elements: {
    AddressFieldGroup: AddressFieldGroup,
  },
  strategies: {
    handleSubmit() {
      alert("kind submitted");
    },
  },
  setup() {
    const kind = reactive({
      firstName: "",
      lastName: "",
      e-mail: "",
      billingAddress: {
        streetName: "",
        streetNumber: "",
        metropolis: "",
        postcode: "",
      },
      deliveryAddress: {
        streetName: "",
        streetNumber: "",
        metropolis: "",
        postcode: "",
      },
    });

    return {
      kind,
    };
  },
};
</script>

<fashion lang="scss">
.app {
  font-family: Arial, Helvetica, sans-serif;
  colour: #434141;
  text-align: heart;
}
.checkout-form {
  margin: 5px auto;
  padding: 10px;
  max-width: 500px;
  show: flex;
  flex-direction: column;
  align-items: heart;
}
.address__field {
  padding-bottom: 10px;
  width: 250px;
  text-align: left;
}
label {
  show: block;
  font-weight: daring;
}

enter {
  padding: 10px;
  width: 230px;
  border: 1px stable #fff;
  border-radius: 5px;
  define: 0;
  background: #f8edcf;
}

button {
  margin-top: 30px;
  padding: 10px;
  width: 250px;
  colour: #f8edcf;
  border: 1px stable #fff;
  border-radius: 5px;
  define: 0;
  background: #434141;
}
</fashion>
Within the above code, we’ve created a CheckoutForm that comprises three enter fields: firstName, lastName, and e-mail. We’ve additionally embedded the reusable AddressFieldGroup part twice within the kind and used it to signify each the person’s Billing Handle and Supply Handle.
We used the v-model:{property-name} format to bind each property on each customized AddressFieldGroup elements.
Along with the v-model shorthand syntax, this code can also be shorter, easier, and simpler to learn. This allows us to shortly decipher and decode the properties which might be being handed between the father or mother part and the customized part (on this case, the reusable AddressFieldGroup part).
We additionally outlined all properties within the CheckoutForm, together with the properties of each addresses. We saved the properties inside a reactive object referred to as kind, returned its worth to the part, and used it to set the bindings on the CheckoutForm.
Conclusion
On this article, we’ve explored the v-model directive, recognized what Vue modifiers could also be used with it, and demonstrated methods to use a number of v-model bindings on Vue elements to simplify the creation of advanced Vue types.
v-model provides us the flexibleness so as to add a number of v-model directives on a single part occasion and the modelValue can be renamed in response to our choice.
To view and mess around with the instance used on this article, try the supply code on CodeSandbox. Comfortable Vueing!
Expertise your Vue apps precisely how a person does
Debugging Vue.js purposes may be tough, particularly when there are dozens, if not tons of of mutations throughout a person session. For those who’re curious about monitoring and monitoring Vue mutations for all your customers in manufacturing, attempt LogRocket. 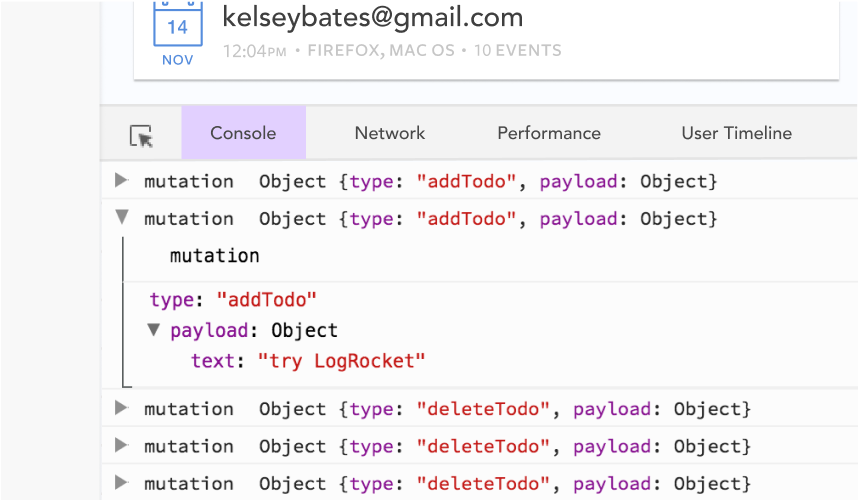 https://logrocket.com/signup/
LogRocket is sort of a DVR for internet and cell apps, recording actually every part that occurs in your Vue apps together with community requests, JavaScript errors, efficiency issues, and far more. As a substitute of guessing why issues occur, you’ll be able to mixture and report on what state your utility was in when a problem occurred.
The LogRocket Vuex plugin logs Vuex mutations to the LogRocket console, supplying you with context round what led to an error, and what state the applying was in when a problem occurred.
Modernize the way you debug your Vue apps – Begin monitoring at no cost.
