
With Web3, it’s attainable to construct decentralized purposes on a blockchain community, giving customers full possession of their very own knowledge. The blockchain community makes use of sensible contracts to deal with all of the backend logic of decentralized purposes.
As the most well-liked, programmable blockchain community, Ethereum permits builders to construct and manipulate decentralized purposes (DApps), decentralized finance (DeFi), sensible contracts, and non-fungible tokens (NFTs).
On this article, we’ll cowl the fundamentals of utilizing Web3 in Vue purposes, together with the set up course of and interacting with sensible contracts. To comply with together with this text, you’ll want the next:
- Understanding of the Vue CLI
- Fundamental understanding of Web3
- Familiarity with Solidity sensible contracts and information of find out how to deploy them
Desk of contents
What’s Web3?
Web3 is a brand new technology of the web that’s primarily based on blockchain expertise, selling decentralization and token-based economics. Calling sensible contracts and sending transactions make up many of the interactions on a blockchain community.
What are sensible contracts?
A wise contract is a self-executing pc software program that lives on a blockchain community. The blockchain executes a wise contract as quickly as it’s deployed. When the contract is executed, it creates interfaces that DApps use to increase their performance.
Take into account the next easy Solidity sensible contract:
// SPDX-License-Identifier: GPL-3.0
pragma solidity >=0.8.0;

contract Contract {
    string personal textual content;

    perform converse() public view returns (string reminiscence) {
        return textual content;
    }

    perform changeText(string reminiscence newText) public {
        textual content = newText;
    }
}
Whenever you deploy the contract above to the blockchain community, it creates two interface strategies, converse, which returns a textual content string, and changeText, which adjustments the string that converse returns.
Mission setup
If you have already got a Vue challenge prepared for integration, you’ll be able to skip this part. When you don’t, create the challenge utilizing the next command for npx bundle supervisor:
npx vue create web3-project
When you use the Yarn bundle supervisor, use the next command as a substitute:
yarn vue create web3-project
Within the menu prompts, choose both Vue3 or Vue2. It doesn’t matter which one you select as a result of you’ll be able to combine Web3 in each of them the identical approach. After creating the challenge, write the next code in your App.vue file:
<template>
  <div>
    <!-- connect-wallet button is seen if the pockets will not be linked -->
  <button v-if="!linked">Join pockets</button>
    <!-- call-contract button is seen if the pockets is linked -->
    <button v-if="linked">Name contract</button>
    {{ contractResult }}
  </div>
</template>

<script>

export default {
  title: 'App',

  knowledge() {
    return {
      linked: false,
      contractResult: '',
    }
  },
}
</script>
In App.vue, we now have two buttons; the primary is for connecting a pockets, and the second is for calling a wise contract technique.
The name contract button is hidden till the person connects their pockets to the online software. Our software makes use of the linked state variable to avoid wasting the pockets connection state.
Organising Web3
In your challenge listing, run the command beneath to put in the Web3 bundle utilizing npm:
npm set up web3
When you’re utilizing Yarn, run the next command as a substitute:
yarn add web3
After putting in the bundle, we import Web3 into the App.vue file and run the challenge to check its compatibility:
...
<script>
import Web3 from 'web3'
export default {
  title: 'App',
…
When you don’t obtain any error messages moreover Web3 is imported however by no means used, Web3 is appropriate together with your framework. However, if the framework generates different errors, you must swap to an older model of Vue. Web3 compatibility issues come up with the Webpack 5 module, which Vue 3 makes use of.
Connecting our pockets
MetaMask is an software that permits customers to retailer and join their wallets to Web3 purposes. Metamask may be put in in all main browsers. By connecting their pockets to a web site, a person can do the next:
- Purchase and promote tokens on a web site
- Handle digital belongings on a blockchain community
- Make transactions to accounts on a web site
- Work together with sensible contracts on a blockchain community
Whenever you set up the MetaMask extension in your browser, the extension creates a window.ethereum object. Web3 purposes use the window.ethereum object to entry the person’s pockets and hook up with the Ethereum community.
The window.ethereum.request() technique prompts the person to attach their MetaMask pockets:
ethereum.request({ technique: 'eth_requestAccounts' })
We are able to use this immediate to register a pockets join occasion to our join pockets button. Add the next code to your App.vue file:
<template>
  <div>
    <!-- "join" click on occasion is registered -->
>    <button v-if="!linked" @click on="join">Join pockets</button>
    <button v-if="linked">Name contract</button>
    {{ contractResult }}
  </div>
</template>

<script>
export default {
  title: 'App',

  knowledge() {
    return {
      linked: false,
      contractResult: '',
    }
  },

>  strategies: {

>    join: perform () {
>        // this connects to the pockets
>
>      if (window.ethereum) { // first we examine if metamask is put in
>        window.ethereum.request({ technique: 'eth_requestAccounts' })
>          .then(() => {
>            this.linked = true; // If customers efficiently linked their pockets
>          });
>      }
>    }
>  }
}
</script>
When the person clicks the join pockets button, a MetaMask immediate seems, permitting the person to pick out the accounts they wish to join. After the person connects their pockets, the linked state variable within the App.vue file turns into true.
Work together with deployed sensible contracts
Deployed sensible contracts create interfaces that Web3 purposes work together with. To entry these interfaces, we have to provide Web3 with the ABI, an outline of the sensible contract’s interface, and the contract tackle, the situation of the contract on the Ethereum community.
Earlier than writing this text, I deployed a wise contract on the Rinkeby take a look at community. I’ll use its ABI and tackle within the following instance, but when you have already got a deployed sensible contract, you should utilize that contract’s tackle and ABI as a substitute of those included right here.
To work together with deployed contracts, create an occasion of Web3 utilizing the window.ethereum object:
let web3 = new Web3(window.ethereum);
Then, create a reference to the deployed contract utilizing its ABI and tackle:
let contract = new web3.eth.Contract(abi, contractAddress)
After initializing the contract, you’ll be able to work together with it. If the contract has an interface technique known as greet, we name it utilizing the code beneath:
contract.strategies.greet().name()
Now, we’ll modify the name contract button to name a contract with the greet technique of your deployed contract:
<!-- vue -->
<button v-if="linked" @click on="callContract">Name contract</button>
Subsequent, create a callContract technique within the Vue object that the name contract button calls:
callContract: perform () {
  // technique for calling the contract technique
  let web3 = new Web3(window.ethereum);
  let contractAddress="0xC0B2D76aB95B7E31E241ce713ea1C72d0a50588e";

  let abi = JSON.parse(`[{"inputs": [],"stateMutability": "nonpayable","sort": "constructor"},{"inputs": [],"title": "greet","outputs": [{"internalType": "string","name": "","type": "string"}],"stateMutability": "view","sort": "perform"}]`);


  let contract = new web3.eth.Contract(abi, contractAddress);

  contract.strategies.greet().name()
    .then(end result => this.contractResult = end result);
}
The callContract technique shall be registered because the button’s click on occasion and can name the greet technique within the deployed sensible contract:
<template>
  <div>
    <button v-if="!linked" @click on="join">Join pockets</button>

    <!-- "callContract" occasion handler is added -->
>    <button v-if="linked" @click on="callContract">Name contract</button>

    <!-- shows the results of the contract -->
    {{ contractResult }}
  </div>
</template>

<script>
import Web3 from 'web3'

export default {
  title: 'App',

  knowledge() {
    return {
      linked: false,
      contractResult: '',
    }
  },

  strategies: {

    join: perform () {
      let ethereum = window.ethereum;
      if (ethereum) {
      ethereum.request({ technique: 'eth_requestAccounts' })
       .then(() => {
            this.linked = true;
          });
      }
    },

>    callContract: perform () {
>        // technique for calling the contract technique
>      let web3 = new Web3(window.ethereum);
>      let contractAddress="0xC0B2D76aB95B7E31E241ce713ea1C72d0a50588e";

>      let abi = JSON.parse(`[{"inputs": [],"stateMutability": "nonpayable","sort": "constructor"},{"inputs": [],"title": "greet","outputs": [{"internalType": "string","name": "","type": "string"}],"stateMutability": "view","sort": "perform"}]`);


>      let contract = new web3.eth.Contract(abi, contractAddress);

>      contract.strategies.greet().name()
>        .then(end result => this.contractResult = end result);
>    }

  }
}
</script>
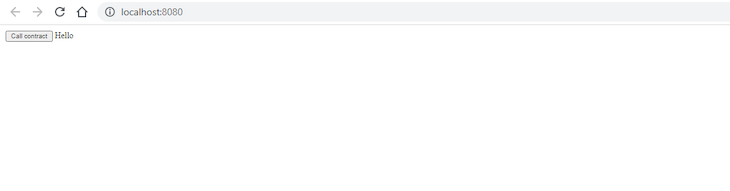
After the person connects their pockets and calls the contract, the app ought to look one thing just like the picture beneath:
Conclusion
On this article, we discovered find out how to use Vue to create a Web3 app utilizing the Ethereum blockchain community, join a MetaMask pockets, and work together with sensible contracts. As you’ll be able to see, integrating Web3 right into a Vue software is pretty easy so long as you’re accustomed to Solidity. Web3 gives main advantages for privateness and knowledge possession, and we explored a few of the instruments and ideas that make up this course of, like sensible contracts.
Expertise your Vue apps precisely how a person does
Debugging Vue.js purposes may be tough, particularly when there are dozens, if not a whole bunch of mutations throughout a person session. When you’re excited by monitoring and monitoring Vue mutations for your whole customers in manufacturing, strive LogRocket. 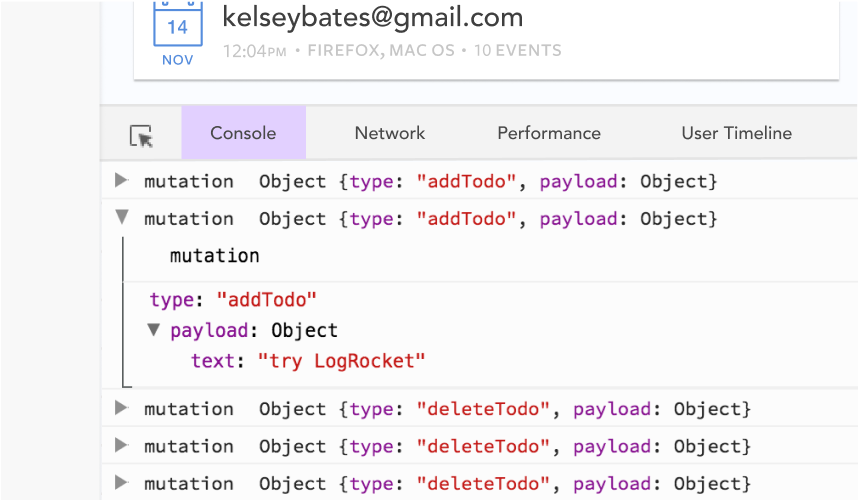 https://logrocket.com/signup/
LogRocket is sort of a DVR for net and cell apps, recording actually all the pieces that occurs in your Vue apps together with community requests, JavaScript errors, efficiency issues, and rather more. As an alternative of guessing why issues occur, you’ll be able to mixture and report on what state your software was in when a difficulty occurred.
The LogRocket Vuex plugin logs Vuex mutations to the LogRocket console, providing you with context round what led to an error, and what state the applying was in when a difficulty occurred.
Modernize the way you debug your Vue apps – Begin monitoring without cost.
