
Sensible contracts are applications saved on the blockchain that run when sure situations are predetermined or referred to as. Sensible contracts are used to automate agreements, eradicate intermediaries, and create a extra decentralized community free from exterior affect.
On this article, we’ll check out a selected technique known as nested contracts, or contracts with a contract. Particularly, we’ll overview how one can create a number of contracts and name features from inside a father or mother contract. We’ll exhibit how one can name a nested contract from the father or mother contract and in addition how one can name it from an exterior contract. All the good contract examples used on this article are written in Solidity.
Let’s dive in.
Leap forward:
Conditions
So as to observe together with the tutorial portion of this text, you must have the next:
Why nest a contract inside a contract?
There are a number of explanation why it might be advantageous to incorporate a sensible contract inside one other good contract:
- Safety: Nesting contracts will help isolate the chance of vulnerabilities; when all contract variables are included inside one good contract, it’s simpler to overlook an error or weaknesses that could possibly be exploited by a nasty actor
- Segmentation: A number of contracts allow us to interrupt the principle contract into smaller items with much less advanced logic
- Reusable code: Many primary contract features are available within the type of open supply, reusable logic by means of corporations like OpenZeppelin; making the most of their code can present vital growth time financial savings
Can good contracts work together with one another?
Sensible contracts are in a position to create or deploy different contracts. They’ll additionally name features of different good contracts. On this article, we’ll look at two examples of calling a nested good contract:
- Contract inside a contract: When contracts are nested inside one essential contract, they or their features could be referred to as from one of many different contracts
- Calling a nested contract from an exterior contract: Contracts may also be referred to as externally; for instance, you can use a constructor perform to name an exterior contract
Demo: Calling a nested good contract from the father or mother contract
For our first instance, let’s create after which deploy a toddler contract inside a father or mother contract.
Creating the nested contract
To start out, we’ll open Remix and create the father or mother contract. For this instance, we’ll make a mortgage contract; anybody might name this contract and request a mortgage.
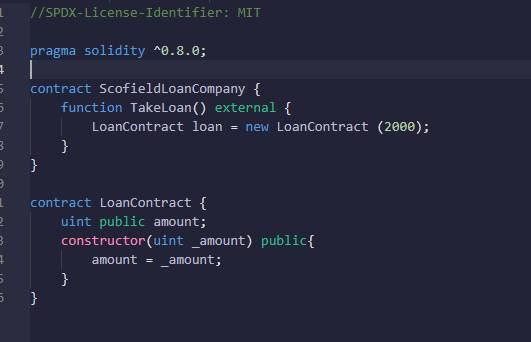
The primary line of the contract is our License. This is essential, as not calling it would elevate an error:
//SPDX-License-Identifier: MIT
pragma solidity ^0.8.0;
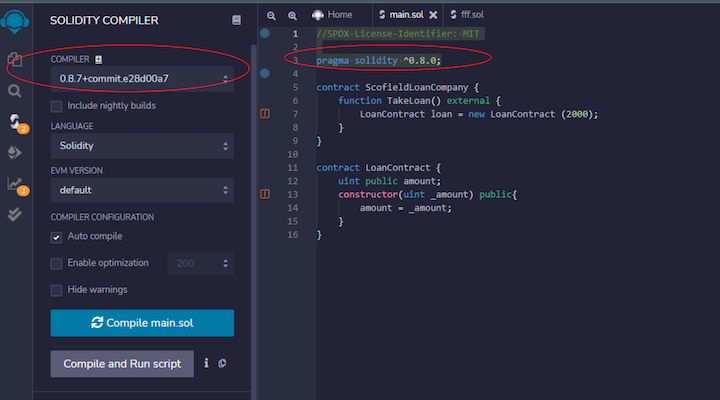
We’re utilizing Remix as a compiler, and it has completely different variations. Confirm the model that you simply’re utilizing; if the model doesn’t tally with the compiler, you’ll get an error. On this instance, we’re utilizing Remix model ^0.8.0 and above. The ^ image signifies “above”.
As proven under, the ParentLoanCompany contract takes a perform referred to as TakeLoan that takes exterior attributes. Exterior modules can be utilized to introduce customized or third-party APIs to a Web3 occasion. Exterior modules are merely lessons whose strategies and properties could be made out there throughout the Web3 occasion.
contract ParentLoanCompany {
    perform TakeLoan() exterior {
        LoanContract mortgage = new LoanContract (2000);
    }
}
We used the exterior attribute to be able to name our baby contract.
Earlier than we do this, let’s create our baby contract contained in the father or mother contract:
 contract ChildLoanContract {
    uint public quantity;
    constructor(uint _amount) public{
        quantity = _amount;
    }
}
Our ChildLoanContract is the contract that the consumer straight interacts with, and we name the kid contract into the father or mother contract. Let’s overview the essential particulars of the kid contract:
uint public quantity;
    constructor(uint _amount) public{
We should make Solidity conscious that this contract offers with cash. To take action, we name the uint, which is an unsigned integer, and we make it public.
We create a constructor that runs first, and as soon as when the contract is known as, we give an argument of _amount, which implies whoever calls this perform should specify the quantity they want to borrow.
Lastly, we name quantity = _amount; which implies no matter quantity the consumer places in turns into the mortgage quantity that’s made public.
Now, let’s return to the ParentLoanCompany contract and add the under code snippet to attach each contracts.
LoanContract mortgage = new LoanContract (2000);
We name the ChildLoanContract by calling the LoanContract and provides it a reputation mortgage. This is essential once we wish to later name the handle of the borrower. That is equal to new which is the perform that creates a brand new contract of sort LoanContract.
Deploying the nested contract
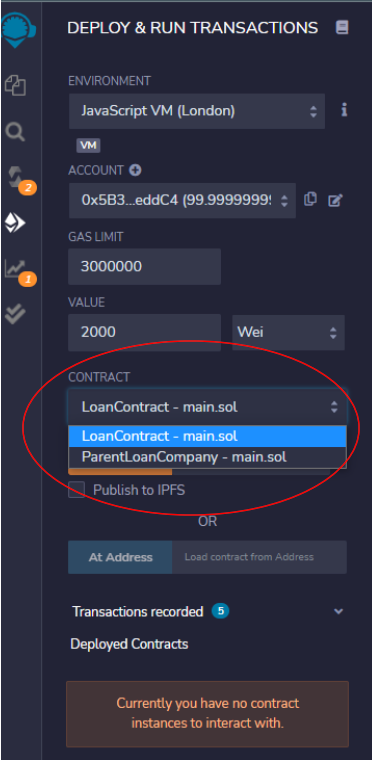
After deploying the ParentLoanCompany contract with the Remix IDE, we must always see two contracts on the Contract panel.
Demo: Calling a nested good contract from an exterior contract
Now, let’s check out how an exterior contract can name a nested contract.
Creating the contracts
Identical to the earlier instance, the primary line of code is our License. If we don’t present this, Remix will throw an error.
Subsequent, we specify our model and compiler; Remix makes use of this compiler to check our challenge and if the compiler and the model are completely different we’ll get an error.
// SPDX-License-Identifier: MIT
pragma solidity ^0.8.0;
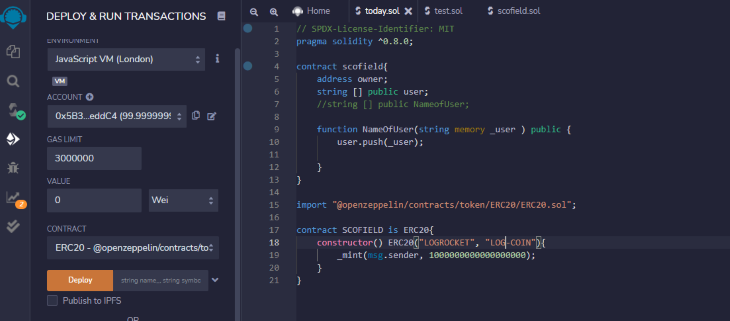
We’ll create a contract, referred to as scofield, that enables the consumer to retailer an handle within the string [] public consumer array.
We additionally create an argument within the NameOfUser perform that shops the identify {that a} caller of the contract supplies contained in the _user.
contract scofield{
    handle proprietor;
    string [] public consumer;
    perform NameOfUser(string reminiscence _user ) public {
        consumer.push(_user);
    }
}
Now, let’s create the nested contract.
We’ll create one other contract inside the identical file that mints our coin, LOGROCKET. The coin’s image is LOG_COIN. This coin can be minted utilizing a contract we imported from OpenZeppelin.
In our scofield contract, we’ll import the OpenZeppelin contract and paste the next command into our Remix editor:
import "@openzeppelin/contracts/token/ERC20/ERC20.sol";
Subsequent, we name the exterior COINMAKER contract. We specify that it’s an ERC-20 contract, after which we name a constructor perform which we give an argument of identify of coin, LOGROCKET, and image of coin, LOG-COIN.
Our constructor perform should run earlier than every other perform. It has a _mint argument which tells the contract what number of cash the msg.sender can mint. We specified that the msg.sender can mint 1000000000000000000 Wei, which is the smallest Ethereum unit.
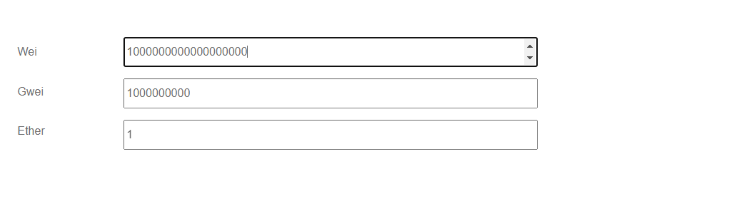
Changing Ethereum currencies
As a aspect observe, we must always speak for a second about Ethereum items. On this contract, we’re creating one Ether, however we’re utilizing the smallest Ethereum unit (Wei) to symbolize the worth.
Right here’s a helpful software for changing completely different Ethereum items, akin to Wei, Gwei, Finney, and Ether.
Deploying and calling the nested contract
Now it’s time to deploy our contract. Within the Remix DEPLOY & RUN panel, we see the contract dropdown and a listing of contracts. These contracts are pulled in alongside our COINMAKER and scofield contracts, that are the 2 contracts we created.
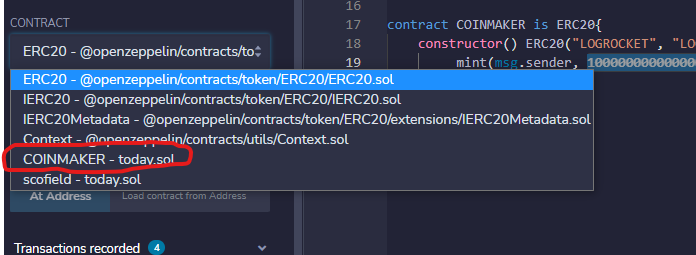
Now, let’s deploy the COINMAKER contract.
When you attempt to deploy with out first putting in your MetaMask pockets, you’ll see one thing like this:

Subsequent, let’s speak concerning the gasoline charge and testnet faucet. To transact this contract, you may request take a look at ETH from a testnet. Within the article, I used Rinkeby, but it surely’s being depreciated. When you choose, you should use Goerli as an alternative.
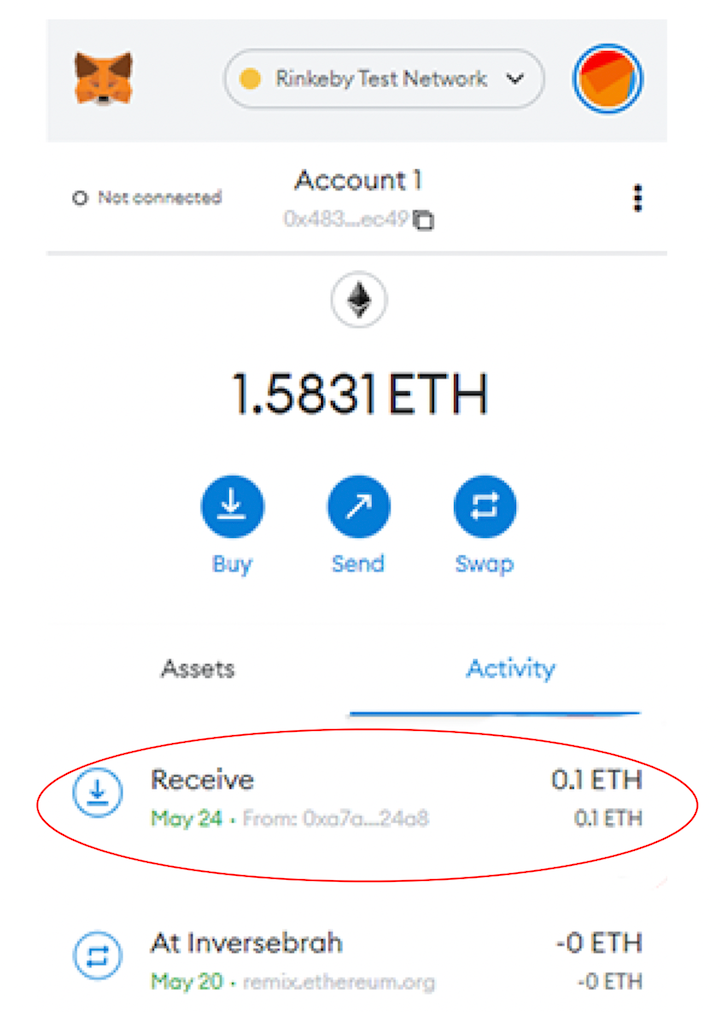
As proven within the above picture, you’ll get 0.1 ether from the testnet, which can be greater than sufficient to pay the gasoline charge. Nonetheless, you may make the request a couple of instances if you wish to hold working towards.
Earlier than deploying the contract, be sure you change the Atmosphere from Javascript VM to Injected Web3.
Now, let’s deploy the contract once more. This time you must see the next MetaMask notification:
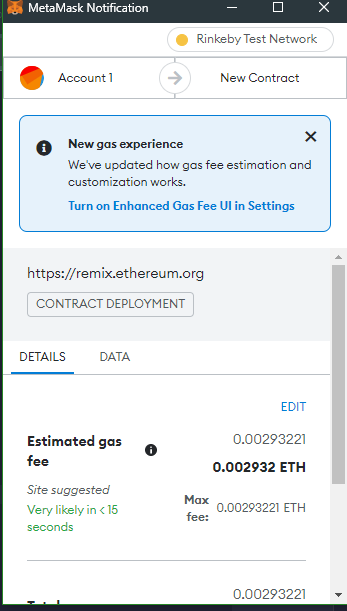
On the backside of the panel, we see that the creation of COINMAKER is pending.
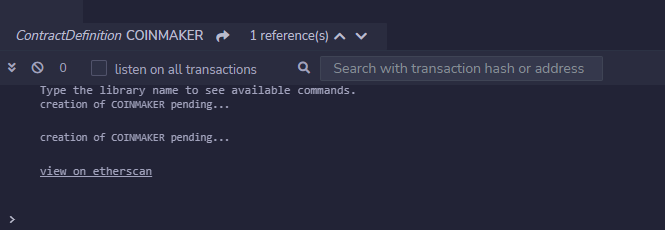
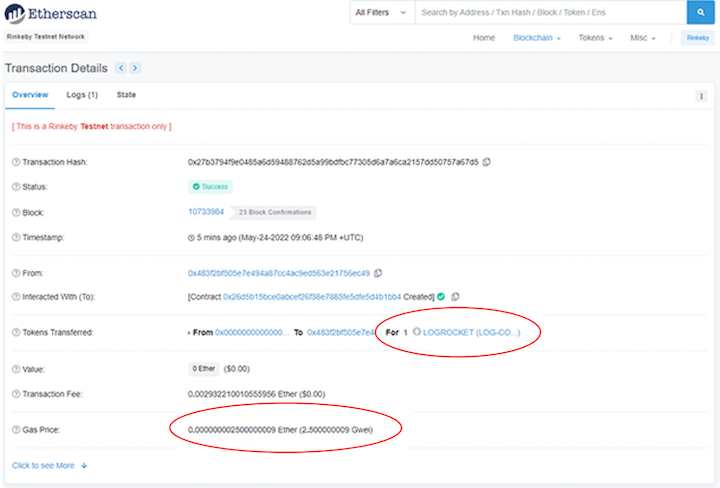
Subsequent, click on on view on etherscan. This may open Etherscan, the place we are able to see the coin we simply created.
We are able to see the identify of the token, LOGROCKET, in addition to the quantity of gasoline that was used to deploy this contract.
Click on on the identify of the token to see extra particulars:
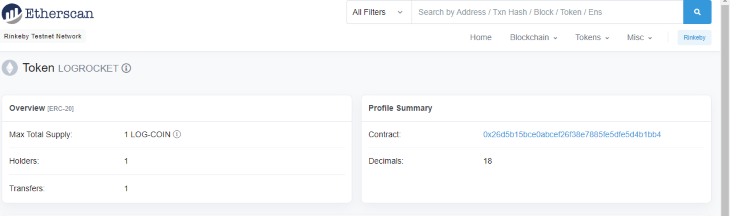
Right here we are able to see the variety of folks holding the token (only one proper now).
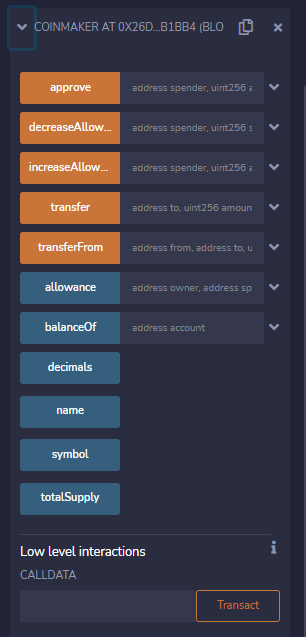
Now, let’s get again to our contract.
Every perform inside our contract has a objective. Right here’s a abstract:
Approve: Permits the sender to maintain a certain quantity of funds on the blockchain with an handle that may withdraw that specified quantityDecreaseAllowance: Permits us to lower the quantity we set within theApproveperform, so the contract created would possibly cut back the desired quantity if was scheduled too excessiveIncreaseAllowance: Will increase the allotted funds within the blockchainSwitch: Permits the contract proprietor to switch funds within the contract to a different consumerTransferFrom: Permits the proprietor to switch from theApproveperform, slightly than from the proprietor funds, after being authorized into the blockchain
That’s it; you simply created your individual Web3 coin!
Conclusion
Utilizing a number of good contracts can present extra safety to tasks. On this article, we used the instance of a mortgage good contract to exhibit calling a nested contract from the father or mother contract. We additionally used the instance of a customized coin minting contract to exhibit calling an exterior contract from a nested contract.
Creating contracts inside contracts, or nested good contracts, is beneficial for limiting what a consumer can do, and what they’ll name.
WazirX, Bitso, and Coinsquare use LogRocket to proactively monitor their Web3 apps
Shopper-side points that impression customers’ potential to activate and transact in your apps can drastically have an effect on your backside line. When you’re focused on monitoring UX points, mechanically surfacing JavaScript errors, and monitoring sluggish community requests and part load time, attempt LogRocket.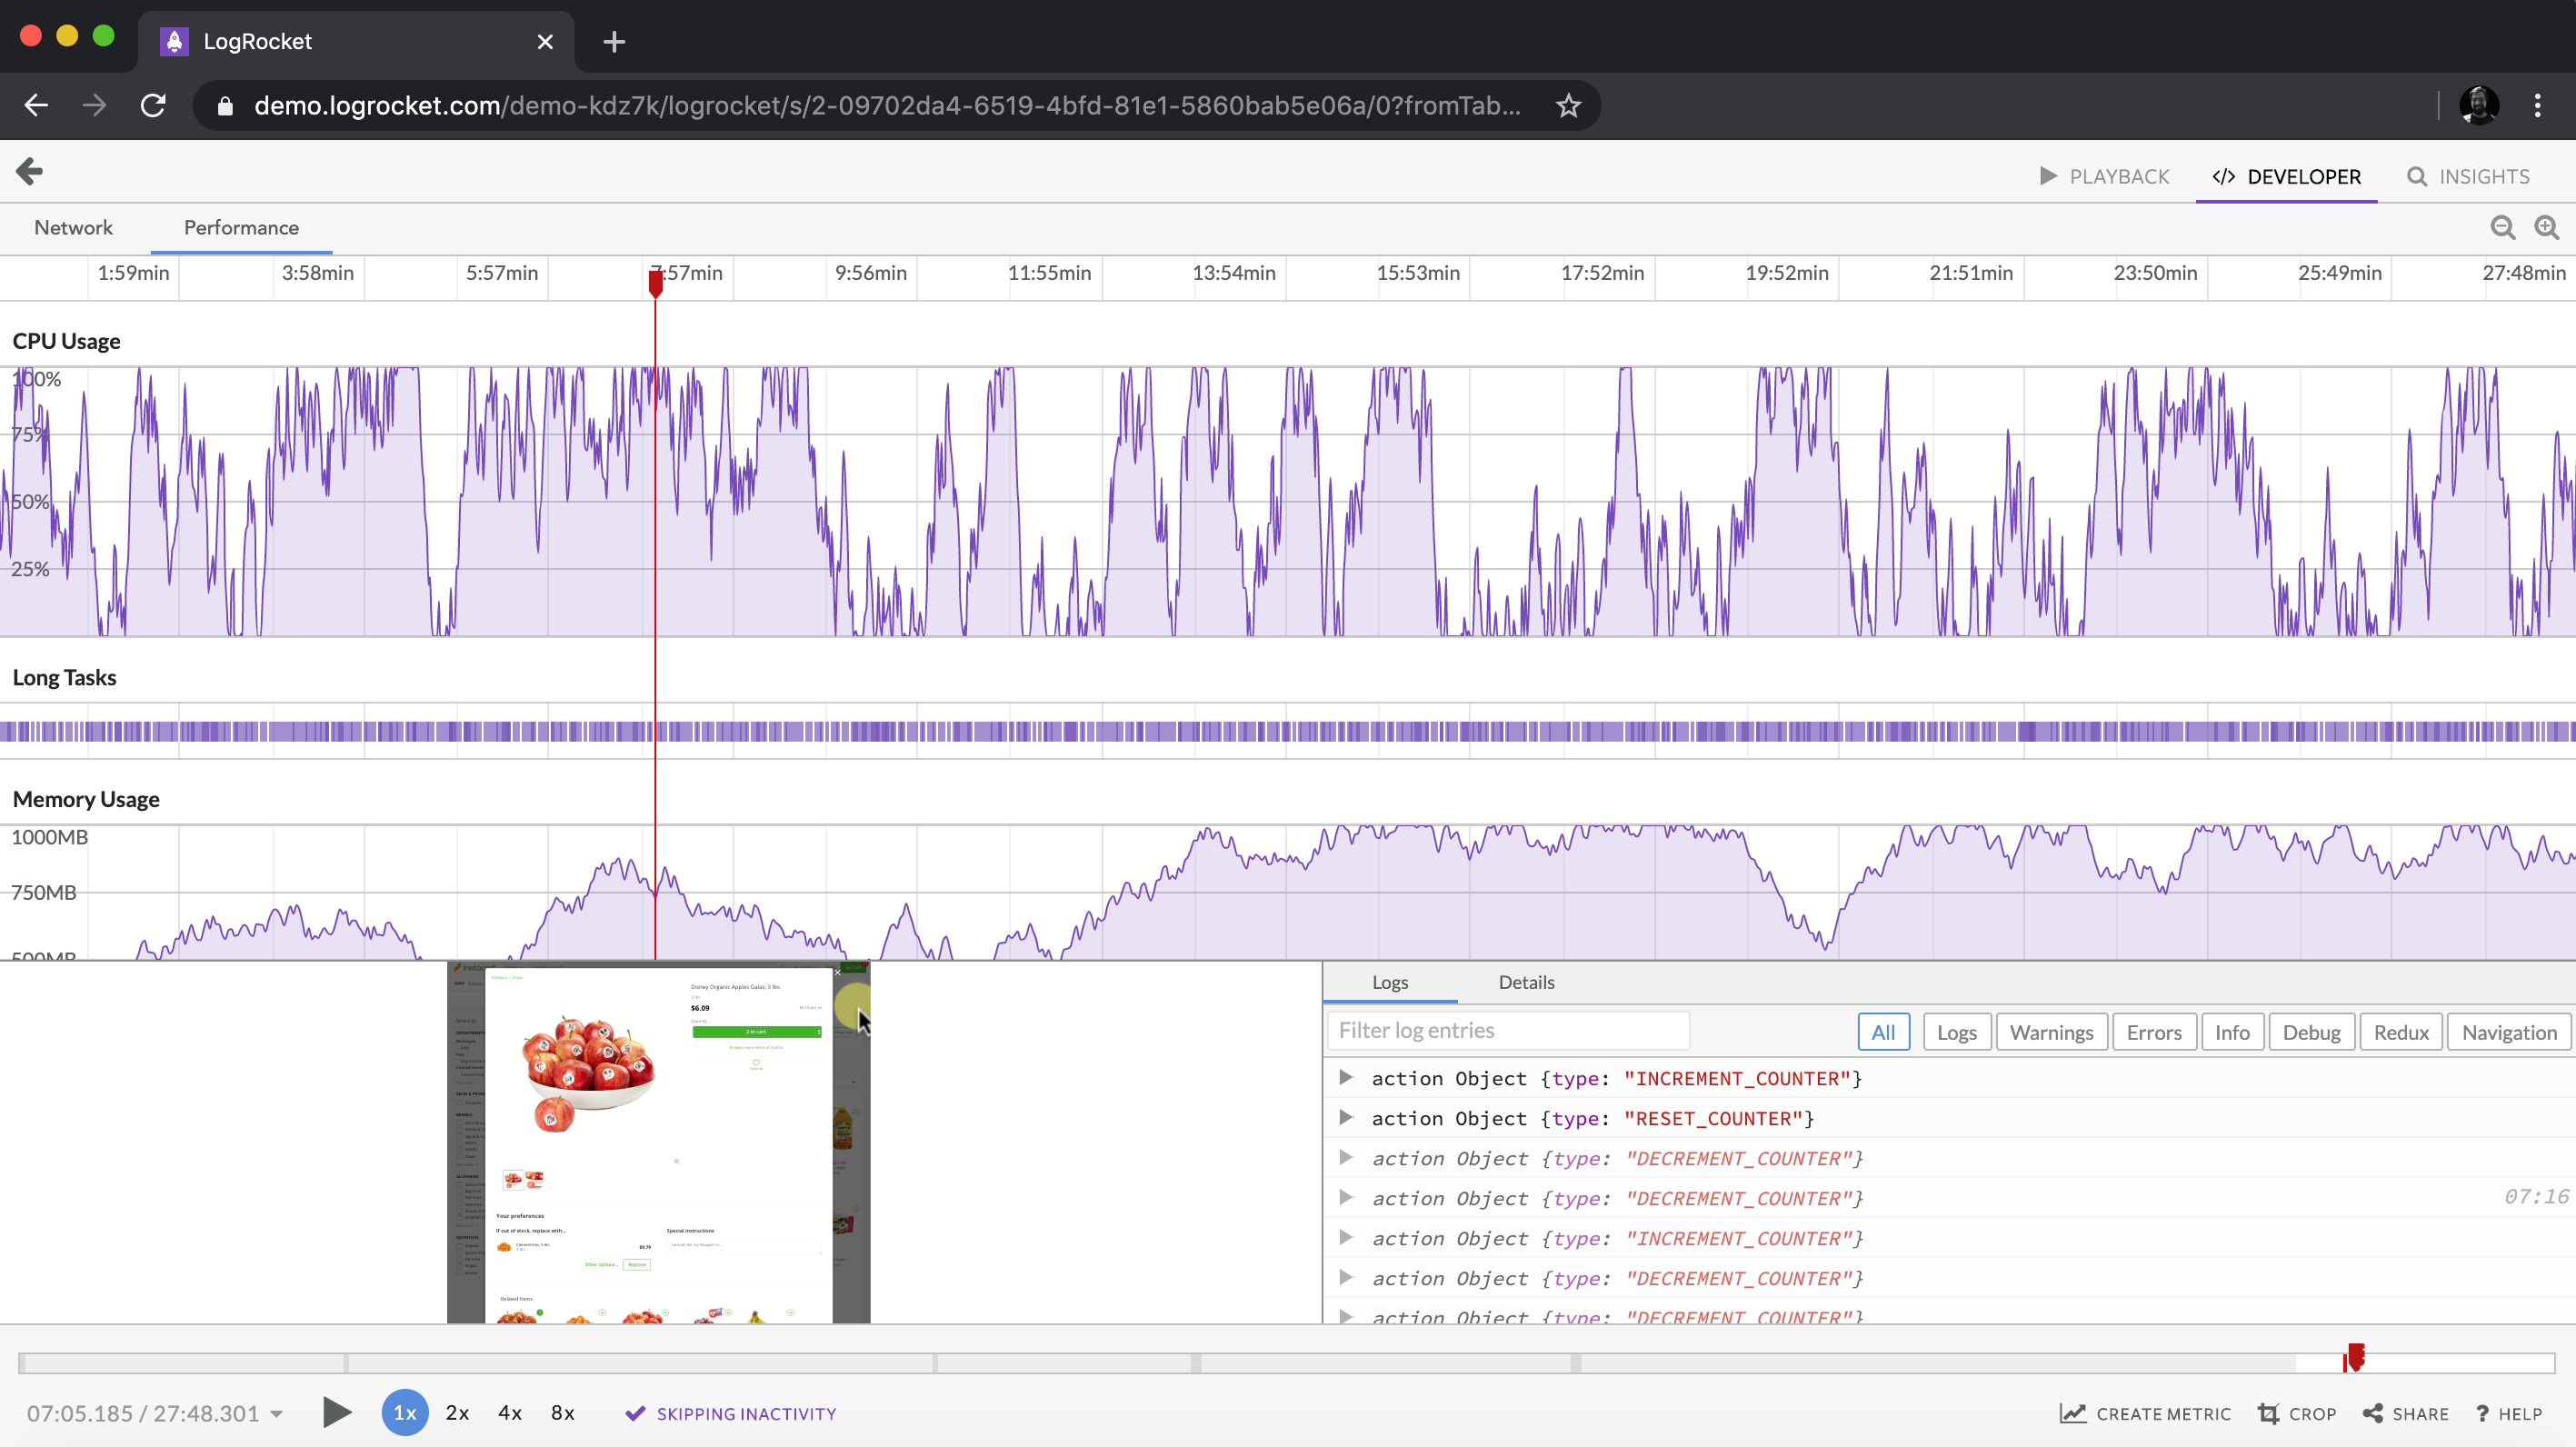 https://logrocket.com/signup/
LogRocket is sort of a DVR for net and cell apps, recording all the pieces that occurs in your net app or website. As a substitute of guessing why issues occur, you may combination and report on key frontend efficiency metrics, replay consumer periods together with software state, log community requests, and mechanically floor all errors.
Modernize the way you debug net and cell apps — Begin monitoring free of charge.
