
With its clear syntax and expressiveness, together with many different qualities, Laravel is among the hottest PHP frameworks utilized by builders.
Earlier than Laravel UI was launched, certainly one of its key options was default assist for Vue.js from Laravel v5.3 to v6. Vue is a contemporary JavaScript frontend framework used to create person interfaces.
On this article, we are going to display how one can construct a single-page utility utilizing Laravel and Vue.
Why are Laravel and Vue good collectively?
Listed below are a few of the key benefits of utilizing each Laravel with Vue to create a full-stack workflow in your tasks:
- The supply code is mixed into one undertaking, relatively than having separate tasks for the backend and frontend
- Setup and configuration are easy
- A single deployment can deal with each frameworks collectively
What’s an SPA? (single-page utility)
A single-page utility (SPA for brief) dynamically hundreds new knowledge from an online server to a webpage with no need to refresh the whole web page.
Examples of widespread web sites that use SPA embody gmail.com and youtube.com — in different phrases, SPAs are ubiquitous to a big extent. Nearly all of admin dashboards that you simply would possibly work with each day are created utilizing SPAs.
Advantages of SPAs:
- Consumer expertise is extra versatile
- Caches knowledge within the browser
- Fast load time
Disadvantages of SPAs:
- Can compromise website positioning (SEO)
- Potential safety points
- Consumes quite a lot of browser sources
Undertaking setup
This put up will display easy methods to develop a to-do app that enables customers to register for an account and add duties.
For this tutorial, Laravel 9 is getting used, which requires PHP 8.1 and Vue 3; we additionally have to have PHP and NGINX put in.
Let’s get began with the next command:
composer create-project --prefer-dist laravel/laravel laravel-vue-demo
Subsequent, we are going to set up the JavaScript dependencies.
npm set up
We should set up just a few packages earlier than we are able to add Vue to our undertaking.
As well as, plugin-vue should be put in, as Laravel 9 ships with Vite, relatively than webpack-mix, which was the earlier Laravel bundler for JavaScript. Let’s try this now:
npm set up [email protected] [email protected] @vitejs/plugin-vue
Open the file known as vite.config.js and add vue() to the config:
import { defineConfig } from 'vite';
import laravel from 'laravel-vite-plugin';
import vue from '@vitejs/plugin-vue'

export default defineConfig({
    plugins: [
        vue(),
        laravel([
            'resources/css/app.css',
            'resources/js/app.js',
        ]),
    ],
});
Edit the app.js file and the snippet for the Vue 3 app bootstrap:
require('./bootstrap');

import {createApp} from 'vue'

import App from './App.vue'

createApp(App).mount("#app")
Create a file known as App.vue and add the next:
<template>
  <h1> Whats up, Vuejs with Laravel </h1>
</template>
<script>
export default {
  setup() {

   }
}
</script>
Lastly, open the welcome.blade.php file positioned within the sources/views folder and add the next:
<!DOCTYPE html>
<html>
<head>
 ....
        @vite('sources/css/app.css')
</head>
<physique>
  <div id="app"></div>
  @vite('sources/js/app.js')
</physique>
</html>
To preview our app, we have to begin our Vue app and Laravel server on two totally different terminals/command strains:
npm run dev


php artisan serve

To construct our to-do app, we have to create some extra information. Vue can be creating a number of pages, principally:
- A login web page
- A registration web page
- A house web page
To speak with the Laravel endpoints, we have to set up Axios:
npm set up axios
Vue routing
Utilizing the vue-router package deal, there are numerous routing methods that could be utilized in Vue; these methods are often known as historical past modes.
When a person requests routes like http://localhost:8000/residence — which can return a 404 error when the web page is refreshed — we are able to depend on Laravel to detect any fallback routes after which serve the Blade file that accommodates our app.
For that reason, we can be utilizing HTML5 mode:
Route::get('/{vue_capture?}', perform() {
    return view('welcome');
})->the place('vue_capture', '[/w.-]*');
import {createRouter, createWebHistory} from 'vue-router';

const router = createRouter({
    historical past: createWebHistory(),
    routes: [
        {
            path: "https://blog.logrocket.com/",
            component: () => import('./pages/Login.vue')
        },
        {
            path: '/register',
            component: () => import('./pages/Register.vue')
        },
        {
            path: '/home',
            component: () => import('./pages/Home.vue')
        }
    ],
})
As a result of simplicity of the undertaking, we’re basically dealing with authentication for the login web page utilizing Laravel Sanctum, after which we save our token within the native storage.
For different requests to achieve success, the token is joined to the header, which can enable the person making the request to be recognized by Laravel.
Here’s what our login web page will appear to be:

And here’s what our registration web page will appear to be:
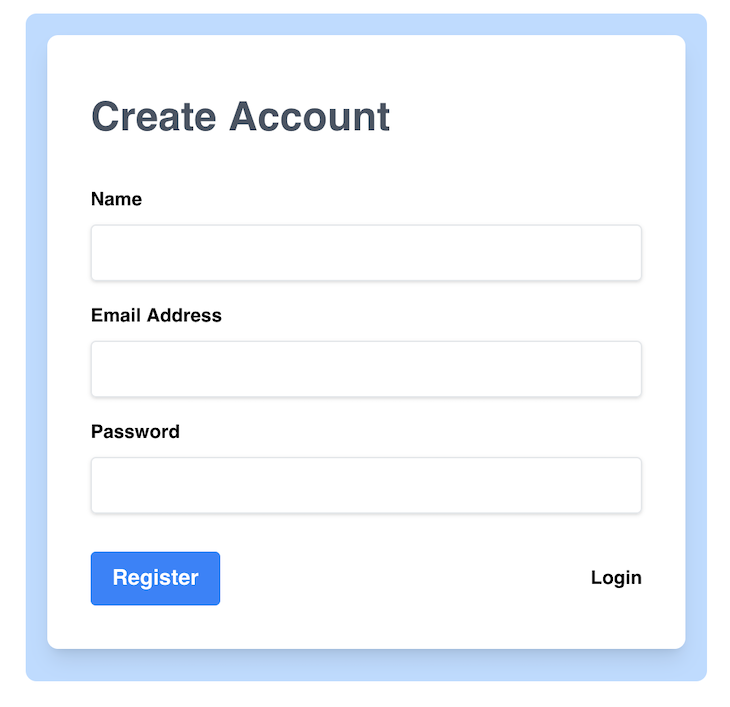
And listed below are the related code blocks for each:
<!--Login.vue-->
<template>
    <div class="mx-auto w-4/12 mt-10 bg-blue-200 p-4 rounded-lg">
        <div
            class="bg-white shadow-lg rounded-lg px-8 pt-6 pb-8 mb-2 flex flex-col"
        >
            <h1 class="text-gray-600 py-5 font-bold text-3xl"> Login </h1>
            <ul class="list-disc text-red-400" v-for="(worth, index) in errors" :key="index" v-if="typeof errors === 'object'">
                <li>{{worth[0]}}</li>
            </ul>
            <p class="list-disc text-red-400" v-if="typeof errors === 'string'">{{errors}}</p>
            <kind technique="put up" @submit.stop="handleLogin">
            <div class="mb-4">
                <label
                    class="block text-grey-darker text-sm font-bold mb-2"
                    for="username"
                >
                    E mail Deal with
                </label>
                <enter
                    class="shadow appearance-none border rounded w-full py-2 px-3 text-grey-darker"
                    id="username"
                    kind="textual content"
                    v-model="kind.e-mail"
                    required
                />
            </div>
            <div class="mb-4">
                <label
                    class="block text-grey-darker text-sm font-bold mb-2"
                    for="password"
                >
                    Password
                </label>
                <enter
                    class="shadow appearance-none border border-red rounded w-full py-2 px-3 text-grey-darker mb-3"
                    id="password"
                    kind="password"
                    v-model="kind.password"
                    required
                />
            </div>
            <div class="flex items-center justify-between">
                <button
                    class="bg-blue-500 hover:bg-blue-900 text-white font-bold py-2 px-4 rounded"
                    kind="submit"
                >
                    Signal In
                </button>
                <router-link
                    class="inline-block align-baseline font-bold text-sm text-blue hover:text-blue-darker"
                    to="register"
                >
                    Signal Up
                </router-link>
            </div>
            </kind>
        </div>
    </div>
</template>
export default {
    setup() {
        const errors = ref()
        const router = useRouter();
        const kind = reactive({
            e-mail: '',
            password: '',
        })
        const handleLogin = async () => {
            strive {
                const consequence = await axios.put up('/api/auth/login', kind)
                if (consequence.standing === 200 && consequence.knowledge && consequence.knowledge.token) {
                    localStorage.setItem('APP_DEMO_USER_TOKEN', consequence.knowledge.token)
                    await router.push('residence')
                }
            } catch (e) {
                if(e && e.response.knowledge && e.response.knowledge.errors) {
                    errors.worth = Object.values(e.response.knowledge.errors)
                } else
            }
        }

        return {
            kind,
            errors,
            handleLogin,
        }
    }
}
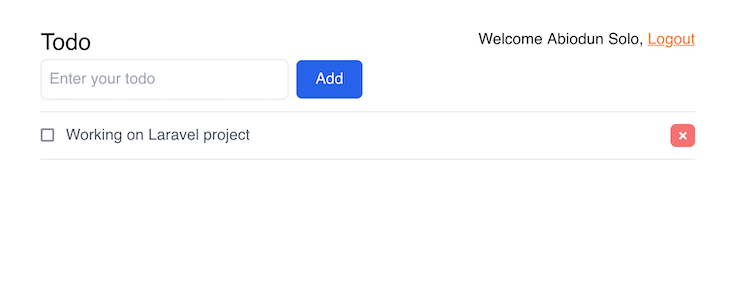
The Vue House view/web page handles all to-do actions comparable to creating, deleting, updating, and itemizing to-dos. All of the actions make requests to the endpoints with the person token for authorization through Axios.
Let’s check out what they are going to appear to be, adopted by the related snippets:
<!-- House -->
<template>
    <div class="w-6/12 p-10 mx-auto">
        <div class="flex justify-between">
            <h1 class="text-2xl"> Todo </h1>
            <span class="capitalize">Welcome {{ person && person.title }}, <button
                class="text-orange-500 underline hover:no-underline rounded-md"
                @click on="handleLogout">Logout</button></span>
        </div>
        <enter kind="textual content" class="p-2 w-64 border rounded-md" v-model="todo" placeholder="Enter your todo"/>
        <button class="bg-blue-600 text-white px-5 py-2 rounded-md ml-2 hover:bg-blue-400" @click on="addTodo">Add</button>
        <Loader v-if="isLoading"/>
        <ul class="border-t mt-3 cursor-pointer">
            <li :class="`py-3 border-b text-gray-600 ${val.has_completed ? 'line-through' : ''}`"
                v-for="(val, idx) in todos" :key="idx">
                <enter kind="checkbox" :checked="val.has_completed" @click on="checked(idx)"/>
                <span @click on="checked(val, idx)" class="pl-3">{{ val.title }} </span>
                <button class="float-right bg-red-400 px-2 text-white font-bold rounded-md hover:bg-red-600"
                        @click on="deleteTodo(val, idx)">&occasions;
                </button>
            </li>
        </ul>
    </div>
</template>
setup() {
    const todo = ref('')
    const todos = ref([])
    const person = ref()
    const isLoading = ref()

    let router = useRouter();
    onMounted(() => {
        authentication()
        handleTodos()
    });

    const authentication = async () => {
        isLoading.worth = true
        strive {
            const req = await request('get', '/api/person')
            person.worth = req.knowledge
        } catch (e) {
            await router.push("https://weblog.logrocket.com/")
        }
    }

    const handleTodos = async () => {
        strive {
            const req = await request('get', '/api/todos')
            todos.worth = req.knowledge.knowledge
        } catch (e) {
            await router.push("https://weblog.logrocket.com/")
        }
        isLoading.worth = false
    }

    const handleNewTodo = async (title) => {
        strive {
            const knowledge = {title: title}
            const req = await request('put up', '/api/todos', knowledge)
            if (req.knowledge.message) {
                isLoading.worth = false
                return alert(req.knowledge.message)
            }
            todos.worth.push(req.knowledge.knowledge)
        } catch (e) {
            await router.push("https://weblog.logrocket.com/")
        }
        isLoading.worth = false
    }

    const handleLogout = () => {
        localStorage.removeItem('APP_DEMO_USER_TOKEN')
        router.push("https://weblog.logrocket.com/")
    }

    const addTodo = () => {
        if (todo.worth === "") {
            return alert("Todo can't be empty");
        }
        isLoading.worth = true
        handleNewTodo(todo.worth)
        todo.worth = ""
    }

    const checked = async (val, index) => {
        strive {
            const knowledge = {has_completed: !val.has_completed}
            const req = await request('put', `/api/todos/${val.id}`, knowledge)
            if (req.knowledge.message) {
                isLoading.worth = false
                return alert(req.knowledge.message)
            }
            todos.worth[index].has_completed = !val.has_completed
        } catch (e) {
            await router.push("https://weblog.logrocket.com/")
        }
        isLoading.worth = false
    }

    const deleteTodo = async (val, index) => {
        if (window.verify("Are you positive")) {
            strive {
                const req = await request('delete', `/api/todos/${val.id}`)
                if (req.knowledge.message) {
                    isLoading.worth = false
                    todos.worth.splice(index, 1)
                }
            } catch (e) {
                await router.push("https://weblog.logrocket.com/")
            }
            isLoading.worth = false
        }
    }
For Laravel, we can be creating the next:
- Controllers (
AuthController,TodoController) - Fashions (
Todo,Consumer) - Routes (
api) - Middleware (
auth:sanctum).
Our routes are in api.php, which handles all of the endpoints consumed by Vue.
Route::put up('/auth/register', [AuthController::class, 'register']);
Route::put up('/auth/login', [AuthController::class, 'login']);

Route::apiResource('todos', TodoController::class)->middleware('auth:sanctum');

Route::middleware('auth:sanctum')->get('/person', perform (Request $request) {
    return $request->person();
});
The register logic in AuthController registers the person and creates a token.
public perform register(Request $request): IlluminateHttpJsonResponse
{
    strive {
        //Validated
        $validateUser = Validator::make($request->all(),
        [
            'name' => 'required',
            'email' => 'required|email|unique:users,email',
            'password' => 'required'
        ]);

        if($validateUser->fails()){
            return response()->json([
                'status' => false,
                'message' => 'validation error',
                'errors' => $validateUser->errors()
            ], 401);
        }

        $person = Consumer::create([
            'name' => $request->name,
            'email' => $request->email,
            'password' => Hash::make($request->password)
        ], 201);

        return response()->json([
            'status' => true,
            'message' => 'User Created Successfully',
            'token' => $user->createToken("API_TOKEN")->plainTextToken
        ], 200);

    } catch (Throwable $e) {
        return response()->json([
            'status' => false,
            'message' => $e->getMessage()
        ], 500);
    }
}
The login validates the request, checks if the person exists, after which creates a token:
public perform login(Request $request): IlluminateHttpJsonResponse
{
    strive {
        //Validated
        $validateUser = Validator::make($request->all(),
            [
                'email' => 'required',
                'password' => 'required'
            ]);

        if($validateUser->fails()){
            return response()->json([
                'status' => false,
                'message' => 'validation error',
                'errors' => $validateUser->errors()
            ], 401);
        }

        if(!Auth::try($request->solely(['email', 'password']))){
            return response()->json([
                'status' => false,
                'message' => 'Email & Password does not exist.',
            ], 401);
        }

        $person = Consumer::the place('e-mail', $request->e-mail)->first();

        return response()->json([
            'status' => true,
            'message' => 'Logged In Successfully',
            'token' => $user->createToken("API_TOKEN")->plainTextToken
        ], 200);

    } catch (Throwable $e) {
        return response()->json([
            'status' => false,
            'message' => $e->getMessage()
        ], 500);
    }
}
The POST endpoints for including new to-dos are managed by the retailer technique within the to-do controller — /api/todos.
public perform retailer(Request $request): IlluminateHttpJsonResponse
{
    $knowledge = Todo::the place('user_id', $request->person()->id)->the place('title', $request->title);
    if ($data->first()) {
        return response()->json(['status' => false, 'message' => 'Already exist']);
    }
    $req = $request->all();
    $req['user_id'] = $request->person()->id;
    $knowledge = Todo::create($req);
    return response()->json(['status' => true, 'data' => $data], 201);
}
This manages the Todo replace endpoint, which is known as after a person completes a to-do and is positioned at /api/todos/id.
public perform replace(Request $request, $id): IlluminateHttpJsonResponse
{
    $validateUser = Validator::make($request->all(),
        [
            'has_completed' => 'required',
        ]);

    if ($validateUser->fails()) {
        return response()->json([
            'status' => false,
            'message' => 'validation error',
            'errors' => $validateUser->errors()
        ], 401);
    }

    $knowledge = Todo::discover($id);
    $data->has_completed = $request->has_completed;
    $data->replace();
    return response()->json(['status' => true, 'data' => $data], 202);
}
When a person deletes a Todo, the endpoint /api/todos/id is known as, and this takes care of it:
public perform destroy(int $id): IlluminateHttpJsonResponse
{
    throw_if(!$id, 'todo Id is lacking');
    Todo::findOrFail($id)->delete();
    return response()->json(['status' => true, 'message' => 'todo deleted']);
}
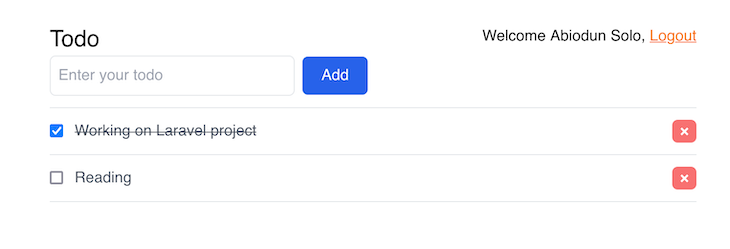
Effectively accomplished, we’ve created a single-page app utilizing Laravel and Vue! 🎉 Right here’s the ultimate results of our to-do app, and right here’s a hyperlink to the supply code:
Conclusion
We have been in a position to set up how a lot less complicated it’s to create a simple person authentication and to-do utility utilizing Vue and Laravel when in comparison with the standard PHP/Vue combo — which might require much more setup work.
The mix of Vue with Laravel, in my opinion, makes it simple to develop single-page functions as a result of there isn’t a want to fret about routing, middleware, or dealing with CORS. Let me learn about your experiences growing SPAs within the feedback part beneath.
Thanks for studying! ✌️
Expertise your Vue apps precisely how a person does
Debugging Vue.js functions could be tough, particularly when there are dozens, if not tons of of mutations throughout a person session. In case you’re occupied with monitoring and monitoring Vue mutations for your whole customers in manufacturing, strive LogRocket. 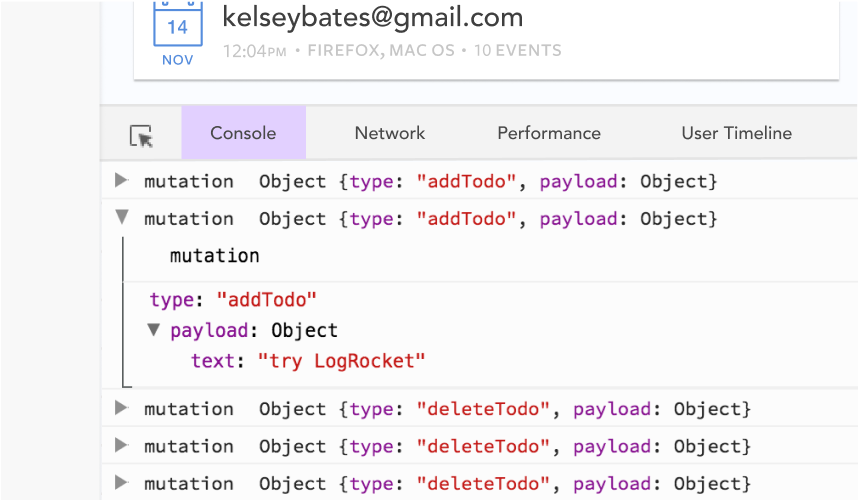 https://logrocket.com/signup/
LogRocket is sort of a DVR for net and cellular apps, recording actually the whole lot that occurs in your Vue apps together with community requests, JavaScript errors, efficiency issues, and way more. As an alternative of guessing why issues occur, you’ll be able to mixture and report on what state your utility was in when a problem occurred.
The LogRocket Vuex plugin logs Vuex mutations to the LogRocket console, providing you with context round what led to an error, and what state the applying was in when a problem occurred.
Modernize the way you debug your Vue apps – Begin monitoring at no cost.
