
Pterodactyl is a free, open supply server administration instrument constructed with PHP, React, and Go. It’s primarily used for recreation server administration due to its interactive and easy UI for finish customers, and it at present has greater than 150 contributors.
Pterodactyl runs its recreation servers in Docker containers. Together with all of its options, it additionally supplies top-notch safety, and as a person, you might be free to dig deeper into the code and discover any vulnerabilities.
Video games which might be supported by Pterodactyl embrace Minecraft, Rust, Terraria, Teamspeak, Mumble, Crew Fortress 2, Counter Strike: International Offensive, Garry’s Mod, and ARK: Survival Developed. To at the present time, the Pterodactyl group continues so as to add an increasing number of to that record. Pterodactyl supplies the proper platform to handle recreation servers with considerably much less effort.
On this article, we’re going get our fingers soiled with Pterodactyl. We’ll begin with the set up course of and transfer ahead with the setup required to easily host supported video games. We’ll additionally introduce and stroll by way of terminologies of Pterodactyl.
Set up information
One enormous plus for customers is that Pterodactyl helps many widespread working methods. Pterodactyl has some vital dependencies, nonetheless. The complete record may be discovered right here.
Earlier than shifting forward, affirm that you’ve put in the dependencies.
It’s higher to have one listing for Pterodactyl the place you’ll be able to set up all needed recordsdata and function from that path solely. For downloading Panel-related recordsdata, that you must fireplace the curl request as written under:
curl -Lo panel.tar.gz https://github.com/pterodactyl/panel/releases/newest/obtain/panel.tar.gz
tar -xzvf panel.tar.gz
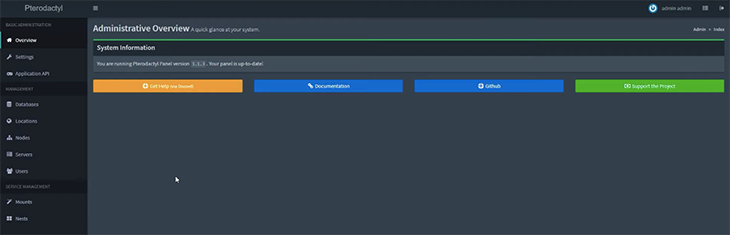
Earlier than set up begins, a immediate will ask for just a few particulars like admin person configuration, database identify, SSL, and so forth. It’ll set up after you enter the small print. After that, you’ll be able to navigate to your area and open a panel. Log in together with your credentials and it’ll appear like this:
All required recordsdata for the set up are right here. The subsequent step is to arrange a server, however that you must have Wings (beforehand referred to as Daemon) earlier than that may occur.
Pterodactyl Wings
Wings is used for Pterodactyl server management. It’s constructed utilizing Go and Node.js daemon. Like Pterodactyl Panel, Wings additionally helps a number of working methods like CentOS and Ubuntu, nonetheless it doesn’t help Home windows.
There are additionally some primary system dependencies like curl and Docker. If you happen to don’t have these in your machine, you must set up them earlier than putting in Wings.
Let’s check out easy methods to set up Wings:
mkdir -p /and so forth/pterodactyl
curl -L -o /usr/native/bin/wings "https://github.com/pterodactyl/wings/releases/newest/obtain/wings_linux_$([[ "$(uname -m)" == "x86_64" ]] && echo "amd64" || echo "arm64")"
chmod u+x /usr/native/bin/wings
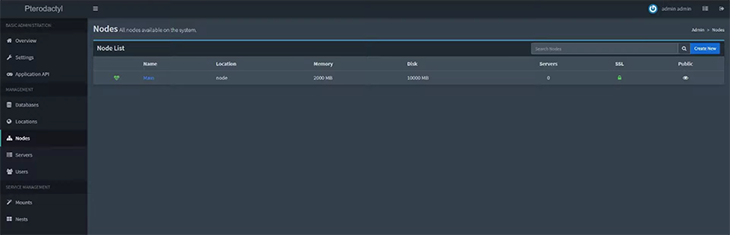
Now you’ll be able to create a node in your put in Panel from the administrator view by clicking on Nodes from the sidebar. The display seems like this:
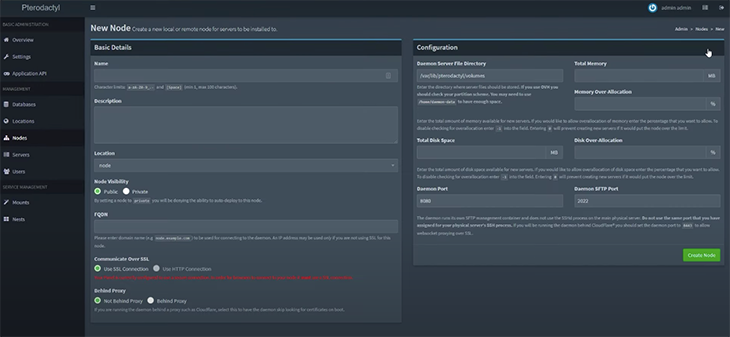
Two sections are displayed on the display: one for primary particulars and the opposite for configuration. Primary Particulars will ask on your identify, description, location, area identify, and some different issues, whereas within the Configuration tab, you’ll specify RAM, disk house, port, and so forth. After that, click on on the Create Node button.
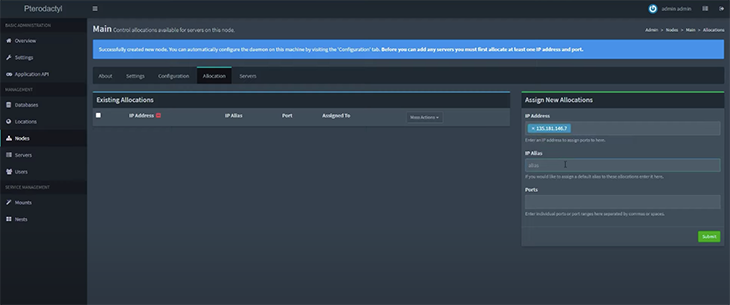
Subsequent, refill particulars within the Assign New Allocation field and click on Submit.
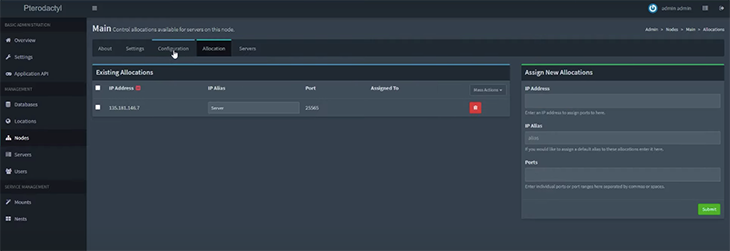
You may see all your allotted nodes within the Allocation tab from the highest menu.
There’s an alternative choice obtainable to autoconfigure a node. For that, go to the Configuration menu from the sidebar and click on on the Generate Token button. This can generate a token for you as proven under:
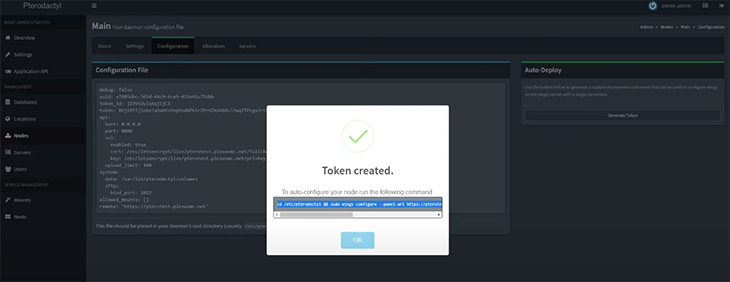
Now, copy and paste the Bash command into your terminal and restart Wings. Then, go to Nodes and refresh the web page. You may see a inexperienced coronary heart earlier than the node record.
To begin Wings, execute sudo wings. Node allocation can also be executed based mostly on IP and port quantity and may be assigned to your server. Node settings may be discovered below the Nodes tab within the sidebar.
Server setup
An online server is nothing however the {hardware} chargeable for managing HTTP/HTTPS requests. There are two internet servers for Pterodactyl: Nginx and Apache. You should utilize whichever one you’re extra comfy with, they usually can each be configured with or with out SSL. My suggestion is to go along with SSL to make your server safer.
Pterodactyl doesn’t work on default configuration so that you’ll need to take away it beforehand. For extra particulars on this step, you’ll be able to test the official setup information.
After the online server is created, you now must create a server for the Panel that may act as a degree of contact on your video games. To do this, click on Servers within the sidebar. As you’ll be able to see, you’ll need to fill out lots of fields on this part.
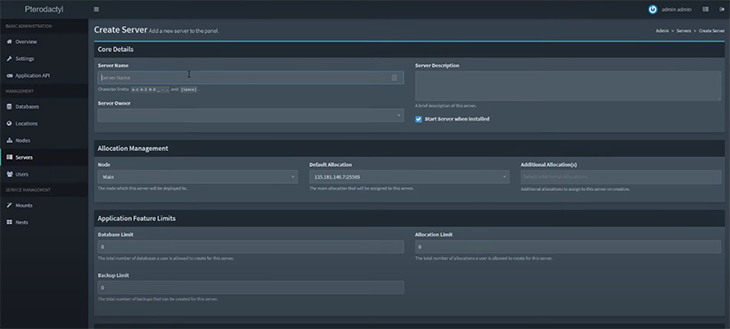

After filling in all the small print and clicking on Create Server, the server will now be listed on the homepage.

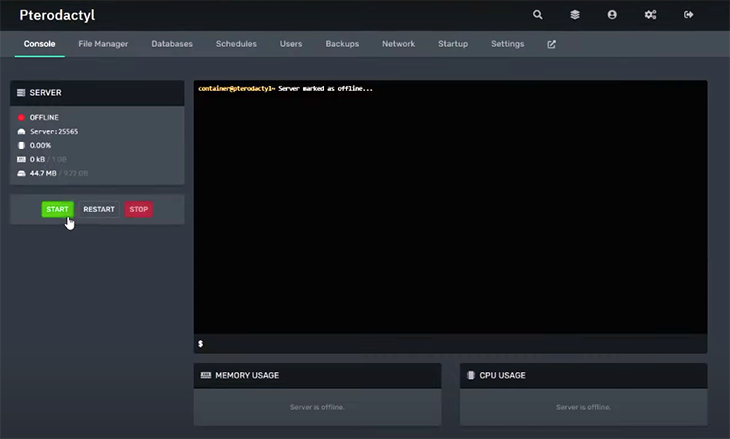
After a while, the set up course of will end and you may click on on that server to handle it. The display will appear like this:
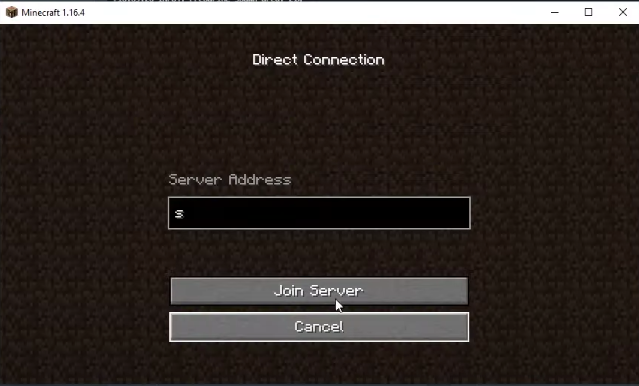
As soon as it’s up, you’ll be able to navigate to your recreation and select this server as a connection. I related my Minecraft recreation with the Pterodactyl server by offering the server deal with, as demonstrated under:
Now your brand-new server might be mapped with the sport and you may take pleasure in enjoying!
When you full the setup, another issues have to be configured. The primary is backup storage.
A backup is required in case one thing horrible occurs to your important information and supplies you with a fast restoration. Pterodactyl permits us to again up each regionally and on the S3 bucket and supplies an easy configuration for switching storage. You may set that within the .env file.
Native backup
This selection was configured within the .env file as a backup choice by default.
# Setting backup driver to decide on native backup through Wings
APP_BACKUP_DRIVER=wings
Now, you may marvel the place your backup might be saved. For this, that you must write down the trail inside Wings’ config.yml:
system:
  backup_directory: /path/to/backup/storage
S3 backup
AWS S3 may also be used to create a backup. For implementing a backup on S3, change the given configuration within the .env file:
APP_BACKUP_DRIVER=s3

# Information to truly use s3
AWS_DEFAULT_REGION=
AWS_ACCESS_KEY_ID=
AWS_SECRET_ACCESS_KEY=
AWS_BACKUPS_BUCKET=
AWS_ENDPOINT=
Pterodactyl supplies setup choices for the reverse proxy, reCAPTCHA, and 2FA.
Database setup
A database is an integral a part of the system and is used to retailer information appropriately. In our case, it’s greatest to have a database and one admin person with all permissions.
Pterodactyl is utilizing MySQL for administration, which you’ll want to put in as a prerequisite. You will get set up steps on their official web site. After that, observe the given steps to arrange the database:
mysql -u root -p

# Bear in mind to vary 'yourPassword' under to be a novel password
CREATE USER 'pterodactyl'@'127.0.0.1' IDENTIFIED BY 'yourPassword';
CREATE DATABASE panel;
GRANT ALL PRIVILEGES ON panel.* TO 'pterodactyl'@'127.0.0.1' WITH GRANT OPTION;
exit
As soon as that executes, that you must generate an encryption key file by executing the given command:
cp .env.instance .env
composer set up --no-dev --optimize-autoloader

# This might be executed for the preliminary setup solely. If you happen to had arrange Pterodactyl beforehand, then skip it.
php artisan key:generate --force
After the preliminary setup, atmosphere setup is important. You have to run two instructions as described, which can arrange a session, caching, and DB credentials.
php artisan p:atmosphere:setup
php artisan p:atmosphere:database
At present, the database is ready up with construction solely. You have to insert base information that might be used within the panel. Simply run the under command and wait till it executes:
php artisan migrate --seed --force
After the bottom information, you want one admin person. To set an admin person and its permissions, let’s run just a few extra instructions:
php artisan p:person:make

# If utilizing NGINX or Apache (not on CentOS):
chown -R www-data:www-data /var/www/pterodactyl/*

# If utilizing NGINX on CentOS:
chown -R nginx:nginx /var/www/pterodactyl/*

# If utilizing Apache on CentOS
chown -R apache:apache /var/www/pterodactyl/*
Now you will have one admin person and a completely arrange database!
SSL certificates setup
SSL, or Safe Socket Layer, helps system safety.
Usually, SSL will encrypt information and authenticate a person. If there’s an SSL certificates configured on the server stage, then the communication of a browser to the server might be safe. Pterodactyl additionally provides an choice for this, and you may arrange SSL for each Panel and daemon.
There are two strategies by which an SSL certificates may be created.
The primary technique is utilizing Certbot. For this selection, that you must set up Certbot through the given command:
sudo apt replace
sudo apt set up -y certbot
# Run this in the event you use Nginx
sudo apt set up -y python3-certbot-nginx
# Run this in the event you use Apache
sudo apt set up -y python3-certbot-apache
After the set up, you’ll be able to generate a certificates utilizing the webserver-specific plugin. Within the given command, point out your area identify accordingly:
# Nginx
certbot certonly --nginx -d instance.com
# Apache
certbot certonly --apache -d instance.com
# Standalone - Use this if neither works. Be certain that to cease your webserver first when utilizing this technique.
certbot certonly --standalone -d instance.com
The SSL certificates has been added to your server. As it’s possible you’ll know, each SSL certificates has some expiry date and can have to be regenerated. Right here, you’ll be able to truly arrange autorenewal and free you from any regeneration troubles.
Let’s discover the second technique, designed for single-use circumstances solely. Let’s use an instance the place the person doesn’t have entry to Port 80. For that case, that you must use the Cloudflare API. Full set up directions may be discovered at acme.sh.
curl https://get.acme.sh | sh
After set up, get your Cloudflare API key from the tab below My Profile. Now, execute the under command to create a certificates:
sudo mkdir /and so forth/letsencrypt/reside/instance.com

export CF_Key="Your_CloudFlare_API_Key"
export CF_Email="[email protected]"

acme.sh --issue --dns dns_cf -d "instance.com"
--key-file /and so forth/letsencrypt/reside/instance.com/privkey.pem
--fullchain-file /and so forth/letsencrypt/reside/instance.com/fullchain.pem
That is how the SSL certificates is generated! It’s an integral a part of a safe system.
Benefits of utilizing Pterodactyl
Pterodactyl supplies some out of certain benefits which might be very enticing to customers. There are a selection of useful options and we’ll spotlight just a few vital ones under.
Safety
We reside in a time that’s all about higher safety. Data is essential and shouldn’t fall within the incorrect fingers, and Pterodactyl retains that in thoughts. Pterodactyl supplies AES-256-CBC encryption mechanism, bcrypt hashing, and HTTPS help.
Internet hosting recreation servers with Docker
Pterodacyl permits us to make use of Docker containers to host recreation servers. Docker supplies an a variety of benefits, together with a setup restrict on useful resource utilization and an atmosphere setup for every recreation.
Scalability
You’ll most likely begin with fewer sources, and as your viewers begins rising, it’s possible you’ll take into consideration including extra. With Pterodactyl, it’s very simple to scale on the fly. Ultimately, this could present a seamless expertise for all customers.
Straightforward troubleshooting and mounting
Pterodactyl has a pleasant troubleshooting mechanism. By working a command, you may get an error log file and determine points that may be mounted in much less time.
Pterodactyl additionally supplies a mount characteristic for directors, permitting mounting different directories from the host file storage to the server’s storage. That configuration is out there for each Panel and Wings.
Basically, Pterodactyl is constructed on fashionable tooling with, for my part, the perfect design. It helps customized modification and has a user-friendly interface that anybody can use with minimal steering — to not point out the truth that Pterodactyl is free, and the code is open supply.
Conclusion
With Pterodactyl, anyone can obtain sturdy efficiency for gaming servers with high-level safety. It supplies a scalable internet hosting facility and stands out amongst different free and open supply gaming servers. Pterodactyl additionally has a very good help system that may clear up queries for any particular person or internet hosting supplier.
I’ve been utilizing Pterodactyl for some time and advocate it to anybody concerned with organising a recreation server. Not solely will you get a seamless expertise with this improved configuration, however you’ll be able to invite customers to your server and generate income on prime of it.
LogRocket: Full visibility into your internet apps

LogRocket is a frontend utility monitoring answer that permits you to replay issues as in the event that they occurred in your personal browser. As a substitute of guessing why errors occur, or asking customers for screenshots and log dumps, LogRocket allows you to replay the session to shortly perceive what went incorrect. It really works completely with any app, no matter framework, and has plugins to log further context from Redux, Vuex, and @ngrx/retailer.
Along with logging Redux actions and state, LogRocket data console logs, JavaScript errors, stacktraces, community requests/responses with headers + our bodies, browser metadata, and customized logs. It additionally devices the DOM to file the HTML and CSS on the web page, recreating pixel-perfect movies of even essentially the most advanced single-page apps.
