
Utilizing the suitable colour scheme in your React Native app will go a good distance towards not simply attracting customers, but additionally compelling them to interact with sure components of your utility. Nevertheless, developing with appropriate colours might be fairly difficult.
Many builders discover themselves in a quandary when selecting a colour scheme. This ends in them spending hours flipping between colours when they need to be specializing in designing the final structure of the app.
For those who’re a kind of builders, you’re in the suitable place. On this article, we’ll display how one can shortly give you a colour scheme on your app and likewise contact on some greatest practices to information you within the course of.
Leap forward:
Stipulations
To observe together with this information, seize the starter app from this Expo Snack venture. We’ll make adjustments to the app as we progress via this tutorial.
Beginning merely with a black-and-white structure
For those who’re not but positive what colour scheme to make use of on your app, it’s greatest to begin with a easy black-and-white structure.
Black and white go properly with almost any colour. Most significantly, utilizing a easy black-and-white theme means that you can focus first on organizing the final structure and ensuring the weather look nearly as good as potential.
Usually talking, your structure must work earlier than colour is introduced in. Coloring can solely make issues look good; it may well’t repair main points.
A black-and-white structure ought to use both:
- Black textual content positioned on a white background
- White textual content positioned on a black background
Right here’s how our starter to-do listing app seems to be in black and white:

If you’re happy with the structure, you possibly can then take into consideration bringing in a “punch” colour to make the theme look extra vigorous.
Including yet one more colour to your theme
Many cellular apps use a mixture of black, white, and a 3rd colour so as to add some variation to the theme.
The simplest option to get a 3rd colour is by choosing one from the photographs inside your app. With this technique, you’re extra more likely to find yourself with a coherent colour scheme. For those who’re uncertain of which colours to mix, you possibly can use a colour era software like Adobe Colour to resolve that drawback:
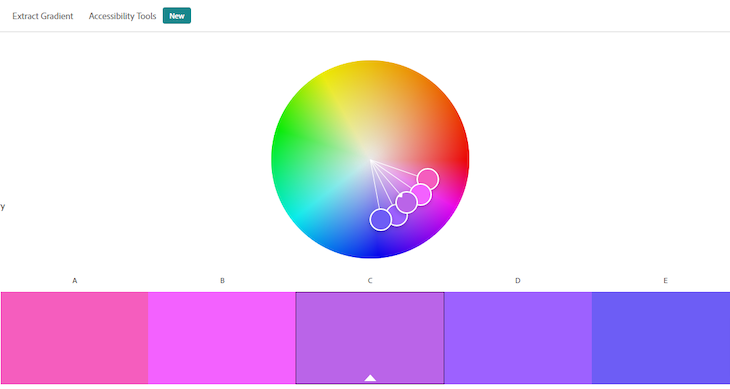
Adobe Colour exhibits you colours that work harmoniously with a base colour you choose. It helps to have no less than some fundamental data of colour idea. Whereas that may be a deep subject to cowl, let’s simply contact on its elementary ideas.
In response to the colour idea, there are three main colours — crimson, yellow, and blue. By mixing these three main colours, we are able to derive three secondary colours — inexperienced, orange, and purple. If we then combine the three main and secondary colours, we are able to get six tertiary colours.
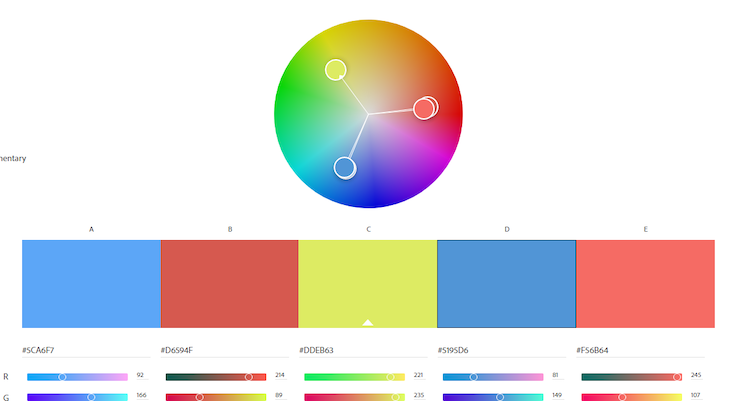
Let’s have a look at this fundamental idea because it pertains to the colour wheel for our goals. To start, the wheel shows all main, secondary, and tertiary colours, with complementary hues positioned throughout from each other:
Now that we perceive the logic behind selecting colours for our functions, let’s add a 3rd colour to our to-do listing React Native app.
Making use of a triadic colour scheme to our React Native app
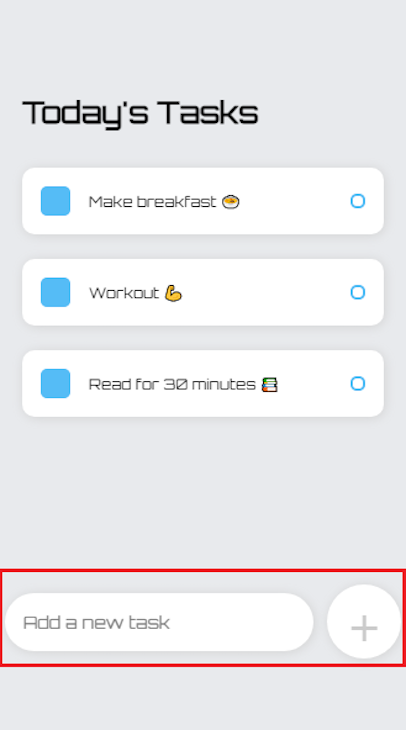
For this instance, I’ll apply a shade of blue with a hex worth of #55BCF6 to each the sq. and circle within the process field. Moreover, I’ll use a lighter model of the colour with a hex worth of #E8EAED to the primary background.
Open your App.js file and scroll right down to the stylesheet. First, change the background colour of the primary container from its present hex worth of #fff to #E8EAED — our lighter blue colour:
 container: {
    // different CSS
    backgroundColor: '#E8EAED',
  },
Subsequent, change the background colour of the + button from #000 to #fff:
addWrapper: {
    // different CSS
    backgroundColor: '#fff'
  },
Subsequent, go into the elements/Job.js file. Change each the background colour of the squares and the border colour of the circles to #55BCF6 — our darker blue colour:
sq.: {
    // different CSS
    backgroundColor: '#55BCF6'
  },

  round: {
    // different CSS
    borderColor: '#55BCF6'
  }
Lastly, change the textual content in every process field to black:
  itemText: {
    // different CSS
    colour: '#000'
  },
Your app ought to now appear like the next picture:
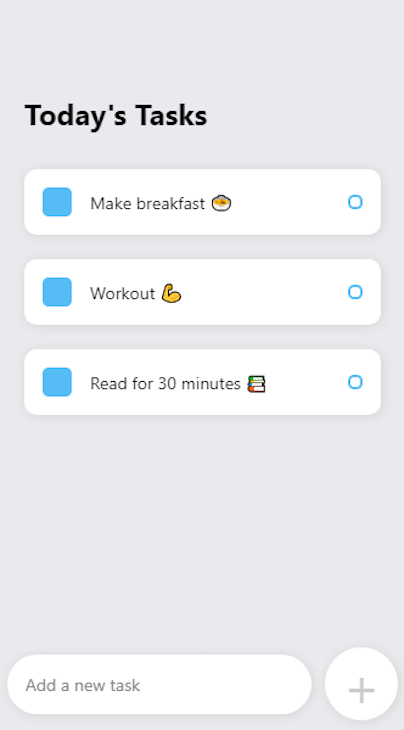
Our instance app makes use of three colours — white, black, and blue. The extra colours we add, the extra sophisticated issues get.
Usually talking, it’s greatest to maintain the colour scheme of your app so simple as potential. You need to use totally different shades of a specific colour, as we did with the blue in our instance app. However on the whole, the less colours you employ in your app, the higher your person expertise will likely be.
Add new colours solely if in case you have cause to take action, and ensure any new colours you add mix properly with the present colours in your React Native app.
Including customized fonts with expo-font
You may use customized fonts in your React Native app with expo-font. For our app, let’s use the Orbitron font household from Google Fonts.
- Obtain the Orbitron font household to your native machine
- Create a folder named
fontscontained in thebelongingsfolder of your Snack venture - Import the fonts out of your laptop into your venture
- Transfer the imported fonts into the
belongings/fontsfolder
Now that you’ve got uploaded the font to your venture, add the next subject contained in the dependencies object in your bundle.json file:
"expo-font": "10.2.1",
Expo Snack will robotically add the library to your venture.
Subsequent, in App.js, import the useFonts hook from expo-font on the high of the file:
import { useFonts } from 'expo-font';
Load the font within your App operate:
export default operate App() {

  const [fontsLoaded] = useFonts({
    'Orbitron-Common': require('./belongings/fonts/Orbitron-Common.ttf'),
  });

  // return (...)
}
Scroll right down to the model sheet and apply the font household to the primary sectionTitle:
sectionTitle: {
   // Different CSS
   fontFamily: 'Orbitron-Common'
 },
Open the elements/Job.js file and undergo the identical steps above. This time, apply the font to the .itemText factor:
  itemText: {
    // different css
    fontSize: '12px',
    fontFamily: 'Orbitron-Common'
  },
Your app ought to now appear like so:
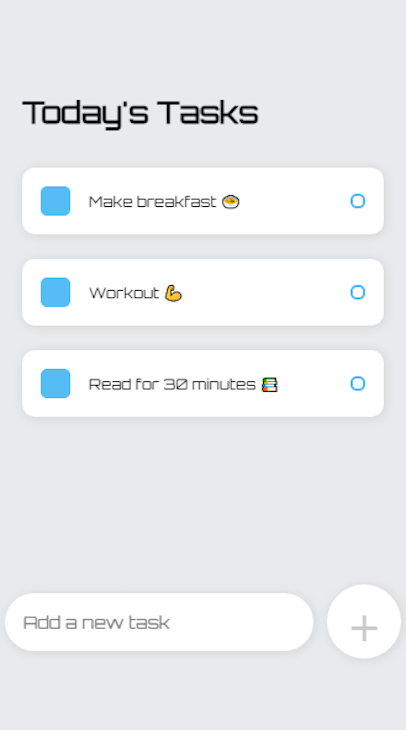
Right here we’re utilizing totally different sizes of the identical font.
Issues begin to get extra sophisticated once you usher in one other font. You must contemplate how these fonts will work collectively. It will get much more sophisticated once you usher in a 3rd font, and a fourth, and so forth.
Typically, simply as with colours, the extra fonts you could have, the tougher it’s to work with them.
Extra nice articles from LogRocket:
Customizing React Native textual content colour, weight, and transparency
When customizing the textual content in your React Native app, the very first thing you’ll have to contemplate is colour.
It’s vital that you just select a colour that contrasts properly with the background colour. If the distinction of your textual content is simply too delicate — as in, it blends with the background — individuals might need a tough time studying the textual content in your app, which negatively impacts person expertise.
Earlier, in our instance React Native utility, we set the textual content colour inside every process field to black. This alternative contrasts properly with the white process containers. Study extra about why it’s vital to decide on colours with good distinction from the W3C Internet Accessibility Initiative.
Different vital UX components associated to textual content embrace transparency and kind kinds like daring and italics. By utilizing totally different font variations, you make it straightforward for individuals to skim via the textual content in your app.
Daring textual content is usually used to emphasise phrases and phrases you need the person to see. This might be a profit, a particular supply, a headline, or another type of pressing info.
Italic types might be used to characterize delicate info corresponding to sidenotes, prompts, and different kinds of non-urgent info.
Fonts often come in several weights — regular, daring, and light-weight, to call a number of examples. You may management the boldness of your textual content in React Native with the fontWeight property:
  itemText: {
    fontSize: '12px',
    fontWeight: 'daring' // different values embrace skinny, gentle, regular, and so forth.
  },
It’s additionally frequent to characterize delicate info by making the textual content extra clear. We will see this in our instance app. Check out how the textual content prompting the person so as to add a brand new process is grayed out to have much less distinction than the opposite textual content:
  addText: {
    colour: '#000',
    opacity: 0.2,
  }
When adjusting the opacity of a textual content, it’s vital to verify the distinction ratio between the textual content and its background is excessive sufficient that each one individuals — together with these with low imaginative and prescient — can learn the content material with out battle.
Conclusion
A great React Native colour scheme may also help you stand out, convey who you’re and what you’re about, and ultimately assist individuals join with you thru your app. It’s vital that you’ve got the structure prepared earlier than testing out totally different colours.
Keep in mind that with all Attain Native theme components — together with textual content colour, font, total colour scheme, and extra — much less is healthier. Don’t transcend 4 colours to keep away from complicating the design. Attempt to stick to two or three colours.
Thanks for studying and have a fantastic week.
LogRocket: Immediately recreate points in your React Native apps.

LogRocket is a React Native monitoring answer that helps you reproduce points immediately, prioritize bugs, and perceive efficiency in your React Native apps.
LogRocket additionally helps you improve conversion charges and product utilization by displaying you precisely how customers are interacting along with your app. LogRocket’s product analytics options floor the explanation why customers do not full a specific movement or do not undertake a brand new function.
Begin proactively monitoring your React Native apps — attempt LogRocket at no cost.
