Badges are efficient instruments for alerting customers about necessary developments regarding functions. They’ll show the variety of pending notifications for an app, present the times till a sure deadline, alert a person of a remark, and extra.
On this article, we are going to discover ways to combine notification badge elements right into a React Native undertaking and discover how badges enhance UX and drive engagement. We will even study Notifee, varied methods to set a badge rely, and find out how to clear the badge rely dynamically. We’ll additionally briefly take a look at how push notifications allow the badge counter to be triggered dynamically. To be taught extra about React Native, take a look at the React Native archives.
Soar forward:
Stipulations
To comply with together with this tutorial, you’ll want:
- Node.js: an asynchronous event-driven JavaScript runtime, designed for constructing scalable apps
- Watchman: a service that watches information and triggers actions when there’s a change
- Xcode: this IDE comprises every part wanted to develop, take a look at, and distribute apps throughout Apple platforms
- CocoaPods: a dependency supervisor for Swift and Goal-C Cocoa initiatives
- Notifee: this library brings native notification assist to each Android and iOS apps however doesn’t combine with third-party messaging providers
Managing badges in React Native
Let’s discover the completely different strategies for setting and manipulating notification badges in iOS utilizing the notification library Notifee. First, seek advice from React Native docs to create the React Native app by organising the event setting.
Now, with the React Native CLI, let’s create our undertaking with the next command:
$ npx react-native init reactBadge --template react-native-template-typescript
As soon as the undertaking is created, cd into the undertaking listing within the terminal window.
$ cd
$ yarn begin
Run the command beneath so as to add the Notifee bundle:
$ yarn add @notifee/react-native
As soon as that’s achieved, cd into iOS.
$ cd ios
$ pod set up
For this tutorial, I used a machine with Mac M1 structure. Nevertheless, CocoaPods isn’t appropriate with that structure, so take into account that the next instructions would range on different Macs. If you’re not utilizing M1 structure, you may run pod set up after cd in iOS.
If utilizing a machine with Mac M1, run the next command:
$ cd ios
$ sudo arch -x86_64 gem set up ffi
$ arch -x86-64 pod set up
These instructions set up ffi, which hundreds dynamically linked libraries and allows Mac M1 to run pod set up hassle-free.
Now open Xcode and click on on Open a undertaking or file.
Navigate to the folder listing that holds reactBadge and open the iOS folder. Then, double-click reactBadge.xcworkspace to open our iOS undertaking in Xcode.
![]()
As soon as that’s achieved, our folder construction ought to appear to be the picture above. Click on Play on the prime to construct our iOS app within the simulator.
Utilizing Notifee with React Native
To arrange a badge rely, import notifee into App.tsx.
import notifee from '@notifee/react-native';
Notifications are the important thing to constructing a badge notification system in cellular gadgets as a result of the badge rely will depend on the variety of obtained and cleared notifications. Let’s take a look at find out how to set off a notification in React Native utilizing Notifee.
Making a notification set off operate
For iOS gadgets, we should request person permission earlier than triggering a notification, and for Android gadgets, we’ve got to create a channel. Fortunately, Notifee comes with two helpful capabilities for overcoming these challenges:
notifee.requestPermission()requests permission for iOS gadgets earlier than displaying notifications or badge counts on their appsnotifee.createChannel({})creates achannelIdfor Android machine apps
Let’s dive into the code. First, in App.tsx, we’ll create an asynchronous operate used for displaying notifications. When clicked, this serves two functions: to request permission to show notifications or create a channel, and to show our created app.
To do that, paste the code block into App.tsx.
const App = () => {
 const isDarkMode = useColorScheme() === 'darkish';

 const backgroundStyle = {
   backgroundColor: isDarkMode ? Colours.darker : Colours.lighter,
 };

 async operate onDisplayNotification() {
   // Request permissions (required for iOS)
   await notifee.requestPermission();

   // Create a channel (required for Android)
   const channelId = await notifee.createChannel({
     id: 'default',
     identify: 'Default Channel',
   });

   // Show a notification
   await notifee.displayNotification({
     title: 'Notification Title',
     physique: 'Show a notification utilizing notifee',
     android: {
       channelId,
       smallIcon: 'name-of-a-small-icon', // non-obligatory, defaults to 'ic_launcher'.
       // pressAction is required if you need the notification to open the app when pressed
       pressAction: {
         id: 'default',
       },
     },
   });
 }
Now we have to set off the notification utilizing Button from React Native.
import {Button} from 'react-native';
As soon as the button is imported, we are going to cross onDisplayNotification into the onPress handler of the Button part.
Extra nice articles from LogRocket:
return (
   <SafeAreaView model={backgroundStyle}>
     <StatusBar barStyle={isDarkMode ? 'light-content' : 'dark-content'} />
     <ScrollView
       contentInsetAdjustmentBehavior="automated"
       model={backgroundStyle}>
       <Header />
       <View
         model={{
           backgroundColor: isDarkMode ? Colours.black : Colours.white,
         }}>
         <Part title="Step One">
           <Textual content model={types.spotlight}>Set badge rely</Textual content>
         </Part>
         <Button
           title="Show Notification"
           onPress={() => onDisplayNotification()}
         />
       </View>
     </ScrollView>
   </SafeAreaView>
 );
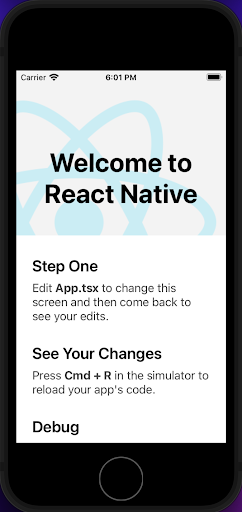
After we click on Show Notification, it would set off and show our created notification.
Setting a badge rely in React Native
In iOS gadgets, the app icon on the machine dwelling display screen shows a badge rely as a pink circle with a quantity on the highest proper nook of the icon. This quantity represents what number of unread notifications the person has.
![]()
To create a operate to set the badge rely, we’ll use setBadgeCount. In App.tsx, create setBadgeCount, as proven beneath:
 async operate setBadgeCount() {
   // Set badge rely
   notifee.setBadgeCount(53).then(() => console.log('Badge rely set'));
 }
From there, cross setBadgeCount into the onPress handler to set off setting the badge rely.
     <View
         model={{
           backgroundColor: isDarkMode ? Colours.black : Colours.white,
         }}>
         <Part title="Step One">
           <Textual content model={types.spotlight}>Show a notification</Textual content>
         </Part>
         <Button
           title="Show Notification"
           onPress={() => onDisplayNotification()}
         />
         <Part title="Step Two">
           <Textual content model={types.spotlight}>Set badge rely</Textual content>
         </Part>
         <Button title="Set badge rely" onPress={() => setBadgeCount()} />
       </View>
![]()
Upon clicking setBadgeCount, whichever integer handed by means of the strategy might be displayed because the badgeCount.
![]()
Clearing badge part notifications in React Native
UX is necessary to contemplate when creating our notifications. To create a greater UX, we wish badgeCount to clear when the app is opened. To do that, we’ll use useEffect by pasting the code block into App.tsx.
React.useEffect(() => {
   // App launched, take away the badge rely
   notifee.setBadgeCount(0).then(() => console.log('Badge rely eliminated'));
 }, []);
![]()
Enabling distant push notifications
Enabling distant push notifications in iOS apps is one other method to dynamically set off the badge counter and removes the necessity for a person motion. Distant push notifications are finest at triggering our badge counts, thus, providing a greater UX. In addition they comprise small quantities of information and push that information to our apps, even when the machine isn’t working.
On iOS gadgets, there are 4 key elements wanted to ship notifications:
- The corporate’s server
- APNs
- The person’s machine
- The app working on the person’s machine
The corporate’s server creates distant notifications to find out what notifications to ship and the time to ship them, then creates the notification request. This comprises the notification information and a novel identifier for the person’s machine that’s then forwarded to the APNs, which deal with the supply to the person.
Nevertheless, different actions, corresponding to organising a supplier server and configuring the app to deal with notifications, are the developer’s duty.
To study organising a distant push notification service in iOS, take a look at this article on implementing push notifications in React Native with OneSignal. For builders seeking to arrange push notifications for Android, seek advice from this sensible information on push notifications with React and Firebase.
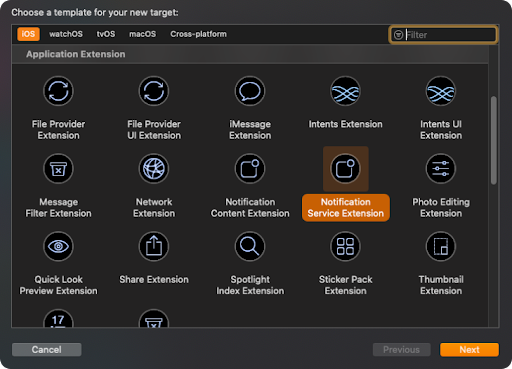
For this text, we’ll discover using the Notification Service Extension, which allows the modification of the unique notification.
Utilizing the UNNotificationServiceExtension
The UNNotificationServiceExtension object supplies an entry level for the notification service app extension. This extension is launched when the system delivers a notification to the person’s machine. Xcode supplies a template for the notification service extension goal and supplies the subclass that we are going to modify. When our app receives a distant notification, the system hundreds out the extension and calls the didReceive(_:withContentHandler:) methodology underneath the next circumstances.
- The app have to be configured to obtain distant notifications to show an alert
- The distant notifications
apsdictionary containsmutable-contentwith a price set to 1.
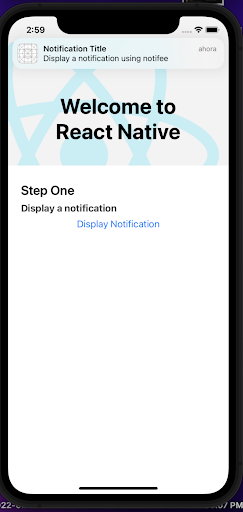
On this part, we are going to modify the content material of the obtained push notification and increment the badge rely when a brand new push notification is obtained.
Let’s get into it.
First, add UNNotificationServiceExtension within the iOS app in our React Native undertaking inside Xcode.
Then, add a product identify appropriate to your undertaking.

To arrange app teams, we have to navigate to Xcode and choose Mission -> Targets -> Your app Goal -> Signing & Capabilities -> [+] -> App Teams.
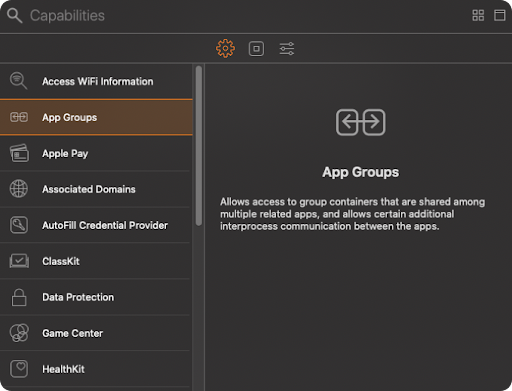
Now, within the App Teams part, choose [+] -> Add a brand new container -> Enter group identify -> OK.
![]()
Be sure that the chosen app group created earlier is chosen.

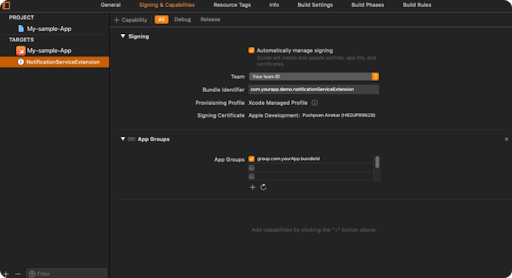
Lastly, it’s time to create the App Group for our NotificationServiceExtension.
Within the Mission listing of our Xcode, click on Targets -> Notification Service Extension Goal -> Signing and Capabilities -> [+] -> App Teams.

Choose the identical App Group that was created earlier within the App Goal.
Establishing usersuite to retailer badge rely
We might want to create a usersuite to cross information between our app goal and the notification service goal. To do that, comply with beneath:
Paste the code block into the AppDelegate.swift folder.
func applicationWillEnterForeground(_ utility: UIApplication) {

 UserDefaults(suiteName: "group.com.yourApp.bundleId")?.set(1, forKey: "rely")      UIApplication.shared.applicationIconBadgeNumber = 0

}
Subsequent, we’ll create the logic for incrementing our badge rely on obtained notifications.
import UserNotifications

class NotificationService: UNNotificationServiceExtension {

    var contentHandler: ((UNNotificationContent) -> Void)?
    var bestAttemptContent: UNMutableNotificationContent?
    let defaults = UserDefaults(suiteName: "group.com.yourApp.bundleId")

    override func didReceive(_ request: UNNotificationRequest, withContentHandler contentHandler: @escaping (UNNotificationContent) -> Void) {
        self.contentHandler = contentHandler
        bestAttemptContent = (request.content material.mutableCopy() as? UNMutableNotificationContent)
        var rely: Int = defaults?.worth(forKey: "rely") as! Int
        if let bestAttemptContent = bestAttemptContent {
            bestAttemptContent.title = "(bestAttemptContent.title) "
            bestAttemptContent.physique = "(bestAttemptContent.physique) "
            bestAttemptContent.badge = rely as? NSNumber
            rely = rely + 1
            defaults?.set(rely, forKey: "rely")
            contentHandler(bestAttemptContent)
        }
    }

    override func serviceExtensionTimeWillExpire() {

        if let contentHandler = contentHandler, let bestAttemptContent =  bestAttemptContent {
            contentHandler(bestAttemptContent)
        }
    }
}
Now, we are able to run the applying and see the badge rely increment after receiving every notification.
![]()
Conclusion
On this article, we built-in notification badges right into a React Native undertaking and realized find out how to allow badges to enhance UX and information the person to the app to drive engagement. We additionally checked out how Notifee and different strategies can set and dynamically clear a badge rely.
LogRocket: Immediately recreate points in your React Native apps.

LogRocket is a React Native monitoring answer that helps you reproduce points immediately, prioritize bugs, and perceive efficiency in your React Native apps.
LogRocket additionally helps you enhance conversion charges and product utilization by exhibiting you precisely how customers are interacting along with your app. LogRocket’s product analytics options floor the the reason why customers do not full a selected move or do not undertake a brand new function.
Begin proactively monitoring your React Native apps — strive LogRocket at no cost.
