
Are you on the lookout for a enjoyable undertaking to scale up your studying in Flutter? Then that is the one for you! This text will information you on tips on how to construct a photograph gallery app utilizing the image_editor bundle in Flutter. The steps will embody getting pictures from native storage, creating a kind performance, and making an edit performance.
To leap forward:
Conditions
This tutorial requires the reader to have:
- Flutter
- Dependencies (image_size_getter, image_editor, photo_view)
- And a few espresso (not required, however really useful :))
Constructing our photograph gallery utility
To kick off this tutorial, let’s work on 4 main parts spanning three Dart recordsdata which might be important to constructing our photograph gallery utility. The parts embody:
- Constructing the homepage
- Creating the organized characteristic
- Routing to picture index
- Making a navigation bar inside the routes
Let’s start!
Constructing the homepage
Earlier than we begin, we have to create a brand new Flutter undertaking.
First, create a brand new listing utilizing the command mkdir <foldername> in your terminal. To alter the prevailing listing to the brand new listing you created, use the command cd <foldername>. Then, create a brand new Flutter undertaking utilizing the command Flutter create <projectname> and depart the remaining for the Flutter SDK to deal with.
(Be aware: Change the key phrases <foldername> and <pojectname> to the names of your selection)
Subsequent, paste the codes beneath into the foremost.dart file.
import 'bundle:flutter/materials.dart';
import 'homepage.dart';

void foremost() {
  runApp(const MyApp());
}
class MyApp extends StatelessWidget {
  const MyApp({Key? key}) : tremendous(key: key);
  static const String _title="Gallery App";
  // This widget is the foundation of your utility.
  @override
  Widget construct(BuildContext context) => const MaterialApp(
        title: _title,
        debugShowCheckedModeBanner: false,
        residence: MyHomePage(title: 'Gallery'),
      );
}
The code above merely instantiates the MyHomePage class. So we might want to create a brand new class, and we’ll do this in a brand new Dart file referred to as homepage.dart, as imported within the code above.
Subsequent, we’ll paste the code beneath into the homepage.dart file:
import 'bundle:flutter/materials.dart';
import 'bundle:flutter/companies.dart';

import 'gallerywidget.dart';

const whitecolor = Colours.white;
const blackcolor = Colours.black;
class MyHomePage extends StatefulWidget {
  const MyHomePage({Key? key, required this.title}) : tremendous(key: key);
  ultimate String title;
  @override
  State<MyHomePage> createState() => _MyHomePageState();
}
class _MyHomePageState extends State<MyHomePage> {
  ultimate urlImages = [
    'assets/images/a.jpg',
    'assets/images/b.jpg',
    'assets/images/c.jpg',
    'assets/images/d.jpg',
  ];
  var transformedImages = [];

  Future<dynamic> getSizeOfImages() async {
    transformedImages = [];
    for (int i = 0; i < urlImages.size; i++) {
      ultimate imageObject = {};
      await rootBundle.load(urlImages[i]).then((worth) => {
            imageObject['path'] = urlImages[i],
            imageObject['size'] = worth.lengthInBytes,
          });
      transformedImages.add(imageObject);
    }
  }
  @override
  void initState() {
    getSizeOfImages();
    tremendous.initState();
  }
  @override
  Widget construct(BuildContext context) {
    return Scaffold(
      appBar: AppBar(
        elevation: 0,
        backgroundColor: whitecolor,
        centerTitle: true,
        title: Textual content(
          widget.title,
          type: const TextStyle(coloration: blackcolor),
        ),
        iconTheme: const IconThemeData(coloration: blackcolor),
      ),
      // Physique space
      physique: SafeArea(
          baby: Column(
        crossAxisAlignment: CrossAxisAlignment.stretch,
        youngsters: <Widget>[
          Expanded(
              child: Container(
                  padding:
                      const EdgeInsets.symmetric(horizontal: 10, vertical: 20),
                  decoration: const BoxDecoration(
                    color: whitecolor,
                  ),
                  child: GridView.builder(
                    gridDelegate:
                        const SliverGridDelegateWithFixedCrossAxisCount(
                      crossAxisCount: 3,
                      crossAxisSpacing: 5,
                      mainAxisSpacing: 5,
                    ),
                    itemBuilder: (context, index) {
                      return RawMaterialButton(
                        child: InkWell(
                          child: Ink.image(
                            image: AssetImage(transformedImages[index]['path']),
                            peak: 300,
                            match: BoxFit.cowl,
                          ),
                        ),
                        onPressed: () {
                            Navigator.push(
                              context,
                              MaterialPageRoute(
                                  builder: (context) => GalleryWidget(
                                        urlImages: urlImages,
                                        index: index,
                                      )));
                        },
                      );
                    },
                    itemCount: transformedImages.size,
                  )))
        ],
      )),
    );
  }
}
Within the code above, we created an array checklist comprising 4 picture paths retrieved from the property folder within the undertaking app construction.
Then, we created a Future <dynamic> occasion referred to as getSizeOfImages to get the dimensions of every file. Lastly, we referred to as initState, a lifecycle methodology, to name our getSizeOfImages perform.
We returned our scaffold with a easy appBar and grid for our widgets. appBar comprises our title, and it’ll home the motion property that we’ll focus on later.
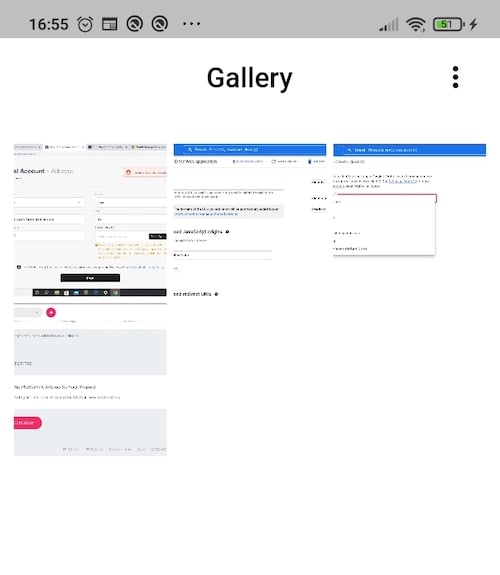
The GridView.builder will show the pictures in a grid format as designated by their index within the array. In our itemBuilder, we wrapped an Inkwell widget round our picture with an onPressed property, which is able to direct us to a brand new web page once we click on a picture.
Right here is the results of the code above:
Creating the organized characteristic
We’d like the organized characteristic to kind the association of our pictures based mostly on measurement and title. So, inside our homepage.dart file, let’s create 4 callback Future <dynamic> features above the initState perform (sortImagesByIncreseSize, sortImagesByDecreaseSize, sortImagesByNamesIncrease, sortImagesByNamesDecrease).
We’ll name the features above as soon as we click on on the corresponding button to which we linked it.
Right here is the code:
Future<dynamic> sortImagesByIncreseSize() async {
  transformedImages.kind((a, b) => a['size'].compareTo(b['size']));
}
Future<dynamic> sortImagesByDecreseSize() async {
  transformedImages.kind((b, a) => a['size'].compareTo(b['size']));
}
Future<dynamic> sortImagesByNamesIncrease() async {
  transformedImages.kind((a, b) => a['path'].compareTo(b['path']));
}
Future<dynamic> sortImagesByNamesDecrease() async {
  transformedImages.kind((b, a) => a['path'].compareTo(b['path']));
}
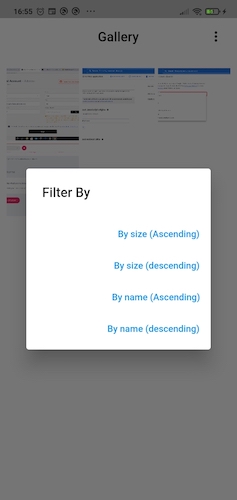
Now, we need to use the callback features we created. So, we’ll create an motion property inside our appBar with 4 TextButtons: ascending title, descending title, ascending measurement, and descending measurement.
Here’s what the code appears like:
actions: <Widget>[
  GestureDetector(
    onTap: () {
      // show the dialog
      showDialog(
        context: context,
        builder: (BuildContext context) {
          return AlertDialog(
            title: const Text("Filter By"),
            // content: const Text("This is my message."),
            actions: [
              TextButton(
                child: Column(
                  children: const [
                    Text('By size (Ascending)'),
                  ],
                ),
                onPressed: () {
                  sortImagesByIncreseSize()
                      .then((worth) => setState(() {}));
                  Navigator.pop(context);
                },
              ),
              TextButton(
                baby: Column(
                  youngsters: const [
                    Text('By size (descending)'),
                  ],
                ),
                onPressed: () {
                  sortImagesByDecreseSize()
                      .then((worth) => setState(() {}));
                  Navigator.pop(context);
                },
              ),
              TextButton(
                baby: Column(
                  youngsters: const [
                    Text('By name (Ascending)'),
                  ],
                ),
                onPressed: () {
                  sortImagesByNamesIncrease()
                      .then((worth) => setState(() {}));
                  Navigator.pop(context);
                },
              ),
              TextButton(
                baby: Column(
                  youngsters: const [
                    Text('By name (descending)'),
                  ],
                ),
                onPressed: () {
                  sortImagesByNamesDecrease()
                      .then((worth) => setState(() {}));
                  Navigator.pop(context);
                },
              ),
            ],
          );
        },
      );
    },
    baby: Container(
      margin: const EdgeInsets.solely(proper: 20),
      baby: const Icon(Icons.more_vert),
    ),
  )
],
Let’s break down what’s happening right here.
Extra nice articles from LogRocket:
We used the strategies described above to implement the sorting performance. Thus, to kind pictures by measurement, our app will use the getSizeOfImages perform initially created to loop by the array of pictures and procure their sizes.
Then, it’ll kind the pictures based mostly on the dimensions, each rising and reducing, utilizing the sortImagesByIncreasingSize, sortImagesByDecreasingSize, sortImagesByNameIncrease, and sortImagesByNameDecrease features respectively.
Here’s what it appears like in the intervening time:
Routing to picture index
The purpose of this part is to learn to show every picture as soon as we click on it. To do that, we’ll refer again to the onPressed property in our GridView.builder.
As we talked about earlier than, as soon as we click on a picture, it’ll navigate us to a brand new web page with the GalleryWidget class.
We have to create the GalleryWidget class, and we’ll do this inside a brand new file referred to as gallerywidget.dart.
Inside our GalleryWidget class, we would like to have the ability to scroll by our pictures, and to get our pictures through the use of their index as soon as we click on them. So, we have to create a pageController, which we’ll use to regulate the pages’ index.
Subsequent, we have to create a construct methodology, and inside it, we’ll create a PhotoViewGallery, which comes from the photo_view bundle we put in earlier.
To appropriately name our picture index, we’ll put the pageController contained in the PhotoViewGallery. Subsequent, we’ll use a builder property to construct every picture with the assistance of the index.
Then, we’ll return the PhotoViewGalleryPageOptions, which we received from the photo_view bundle, and inside it, we’ll put the picture (urlImage) with the AssetImage class.
Right here is an implementation of the reason above:
import 'bundle:flutter/materials.dart';
import 'bundle:photo_view/photo_view_gallery.dart';

import 'homepage.dart';

class GalleryWidget extends StatefulWidget {

  ultimate Listing<String> urlImages;
  ultimate int index;
  ultimate PageController pageController;
  // ignore: use_key_in_widget_constructors
  GalleryWidget({
    required this.urlImages,
    this.index = 0,
  }) : pageController = PageController(initialPage: index);
  @override
  State<GalleryWidget> createState() => _GalleryWidgetState();
}
class _GalleryWidgetState extends State<GalleryWidget> {
  var urlImage;
  @override
  void initState() {
    supplier = AssetImage(widget.urlImages[widget.index]);
    tremendous.initState();
  }
  @override
  Widget construct(BuildContext context) {
    return Scaffold(
      appBar: AppBar(
        elevation: 0,
        backgroundColor: whitecolor,
        centerTitle: true,
        title: const Textual content(
          'Gallery',
          type: TextStyle(coloration: blackcolor),
        ),
        iconTheme: const IconThemeData(coloration: blackcolor),
        main: IconButton(
            onPressed: () => Navigator.of(context).pop(),
            icon: const Icon(Icons.arrow_back)),
      ),
      physique: Column(
        youngsters: <Widget>[
          Expanded(
            child: PhotoViewGallery.builder(
              pageController: widget.pageController,
              itemCount: widget.urlImages.length,
              builder: (context, index) {
                urlImage = widget.urlImages[index];
                return PhotoViewGalleryPageOptions(
                  imageProvider: AssetImage(urlImage),
                );
              },
            ),
          ),
        ],
      ),
    );
  }
}
Making a backside navigation bar
Now, we need to create a backside navigation bar. To do this, we’ll begin by calling the bottomNavigationBar widget beneath our physique. Inside this widget, create an onTap perform that we are going to use to navigate to a brand new web page (edit web page). We need to create a BottomNavigationBarItem with the Edit label.
Again to the onTap property, we might want to get the chosen navigation bar merchandise. We will do this by setting an index within the _GalleryWidgetState class. We’ll use the code beneath to implement the performance:
int bottomIndex = 0;
Now, we’ll use the setState perform to maintain monitor of the indexes, and after that, we’ll create an if assertion inside the setState to test if the index is the same as one. Whether it is true, it’ll take us to the edit part.
Here’s what the navigation widget appears like:
bottomNavigationBar: BottomNavigationBar(
  onTap: (e) {
    setState(() {
      bottomIndex = e;
      if (e == 1) {
        Navigator.push(
            context,
            MaterialPageRoute(
                builder: (context) => EditScreen(picture: urlImage)));
      }
    });
  },
  currentIndex: bottomIndex,
  backgroundColor: Colours.white,
  iconSize: 30,
  selectedItemColor: Colours.black,
  unselectedIconTheme: const IconThemeData(
    coloration: Colours.black38,
  ),
  elevation: 0,
  gadgets: const <BottomNavigationBarItem>[
    BottomNavigationBarItem(icon: Icon(Icons.share), label: 'Share'),
    BottomNavigationBarItem(
      icon: Icon(Icons.edit),
      label: 'Edit',
    ),
  ],
),
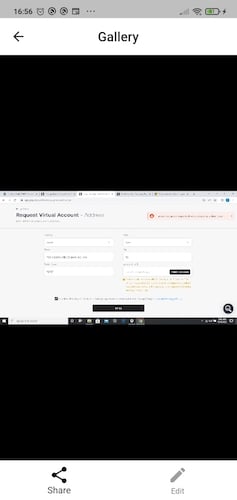
And right here is the results of the code above:
Creating an edit characteristic
What’s a gallery utility with out an edit characteristic? The next part is a necessary a part of this information as it’ll present you tips on how to create an edit characteristic utilizing the image_editor bundle in Flutter.
Let’s start!
edit_screen.dart
We’ll begin by creating a brand new Dart file referred to as edit_screen.dart. Inside this file, we’ll name the EditScreen class we’re routing to in our navigation bar. We’ll create two modifying options on this part: rotation and flipping.
Here’s a breakdown of the processes concerned:
- As soon as we click on the edit button, it’ll route us to the edit web page, the place we could have the picture on a full display screen with a backside modal to pick an choice to edit the picture
- Subsequent, we’ll create a
restoreperform and set the worth to the at present chosen picture - Then, we’ll create two features,
_flipHorizonand_flipVert, to flip our pictures horizontally and vertically - Lastly, we’ll create a
rotateperform and set the worth to a perform referred to ashandleOption
Right here is an implementation of the earlier clarification:
import 'dart:convert';
import 'dart:typedinformation';
import 'bundle:flutter/materials.dart';
import 'bundle:flutter/companies.dart';
import 'bundle:pictureeditor/pictureeditor.dart';
import 'bundle:picturemeasurementgetter/picturesize_getter.dart';
import 'homepage.dart';

class EditScreen extends StatefulWidget {
  String picture;
  EditScreen({required this.picture, Key? key}) : tremendous(key: key);
  @override
  State<EditScreen> createState() => _EditScreenState();
}
class _EditScreenState extends State<EditScreen> {
  ImageProvider? supplier;
  bool horizon = true;
  bool vertic = false;
  int angle = 1;
  int angleConstant = 90;
  @override
  void initState() {
    supplier = AssetImage(widget.picture);
    tremendous.initState();
  }
  @override
  Widget construct(BuildContext context) {
    return Scaffold(
      appBar: AppBar(
        elevation: 0,
        backgroundColor: whitecolor,
        centerTitle: true,
        title: const Textual content(
          'Gallery',
          type: TextStyle(coloration: blackcolor),
        ),
        iconTheme: const IconThemeData(coloration: blackcolor),
        actions: <Widget>[
          IconButton(
            icon: const Icon(Icons.settings_backup_restore),
            onPressed: restore,
            tooltip: 'Restore image to default.',
          ),
        ],
      ),
      physique: Column(
        youngsters: <Widget>[
          if (provider != null)
            AspectRatio(
              aspectRatio: 1,
              child: Image(
                image: provider!,
              ),
            ),
          Expanded(
            child: Scrollbar(
              child: SingleChildScrollView(
                child: Column(
                  children: [
                    Row(
                      mainAxisAlignment: MainAxisAlignment.spaceAround,
                      children: <Widget>[
                        ElevatedButton(
                          child: const Text('Flip Horizontal'),
                          onPressed: () {
                            _flipHorizon(FlipOption(
                                horizontal: horizon, vertical: vertic));
                          },
                        ),
                        ElevatedButton(
                          child: const Text('Flip Vertical'),
                          onPressed: () {
                            _flipVert(FlipOption(
                                horizontal: vertic, vertical: horizon));
                          },
                        ),
                      ],
                    ),
                    Row(
                      mainAxisAlignment: MainAxisAlignment.spaceAround,
                      youngsters: [
                        ElevatedButton(
                          child: const Text('Rotate R 90'),
                          onPressed: () {
                            _rotate(RotateOption(angleConstant * angle!));
                            setState(() {
                              angle = angle + 1;
                              if ((angleConstant * angle) > 360) angle = 1;
                            });
                          },
                        ),
                        ElevatedButton(
                          child: const Text('Rotate L 90'),
                          onPressed: () {
                            _rotate(
                                RotateOption(360 - (angleConstant * angle!)));
                            setState(() {
                              angle = angle + 1;
                              if ((angleConstant * angle) > 360) angle = 1;
                            });
                          },
                        )
                      ],
                    )
                  ],
                ),
              ),
            ),
          ),
        ],
      ),
    );
  }
  void setProvider(ImageProvider? supplier) {
    this.supplier = supplier;
    setState(() {});
  }
  void restore() {
    setProvider(AssetImage(widget.picture));
  }
  Future<Uint8List> getAssetImage() async {
    ultimate ByteData byteData = await rootBundle.load(widget.picture!);
    return byteData.buffer.asUint8List();
  }
  Future<void> _flipHorizon(FlipOption flipOption) async {
    handleOption(<Choice>[flipOption]);
    setState(() {
      horizon = !horizon;
    });
  }
  Future<void> _flipVert(FlipOption flipOption) async {
    handleOption(<Choice>[flipOption]);
    setState(() {
      horizon = !horizon;
    });
  }
  Future<void> _rotate(RotateOption rotateOpt) async {
    handleOption(<Choice>[rotateOpt]);
  }
  Future<void> handleOption(Listing<Choice> choices) async {
    ultimate ImageEditorOption choice = ImageEditorOption();
    for (int i = 0; i < choices.size; i++) {
      ultimate Choice o = choices[i];
      choice.addOption(o);
    }
    choice.outputFormat = const OutputFormat.png();
    ultimate Uint8List assetImage = await getAssetImage();
    ultimate srcSize = ImageSizeGetter.getSize(MemoryInput(assetImage));
    print(const JsonEncoder.withIndent('  ').convert(choice.toJson()));
    ultimate Uint8List? outcome = await ImageEditor.editImage(
      picture: assetImage,
      imageEditorOption: choice,
    );
    if (outcome == null) {
      setProvider(null);
      return;
    }
    ultimate resultSize = ImageSizeGetter.getSize(MemoryInput(outcome));
    print('srcSize: $srcSize, resultSize: $resultSize');
    ultimate MemoryImage img = MemoryImage(outcome);
    setProvider(img);
  }
}
Right here is the results of the code above:
Conclusion
Now we have come to the tip of the tutorial, and I hope it has been useful. Let’s summarize the notable elements of this undertaking. Within the Creating the organized characteristic part, we detailed altering the association of the pictures (ascending and descending order) with respect to the dimensions or title of the picture file.
Then, within the Routing to picture index part, we spoke about navigating to every picture with respect to its place (index). The edit_screen.dart part talked about remodeling the picture placement (flip and rotate) and reverting it again to its unique placement utilizing the image_editor bundle in Flutter.
Listed here are another articles you may discover to get a greater concept of the parts we constructed on this tutorial:
Thanks for studying! Joyful coding 💻.
LogRocket proactively surfaces and diagnoses an important points in your apps and web sites

Hundreds of engineering and product groups use LogRocket to cut back the time it takes to know the foundation explanation for technical and value points. With LogRocket, you’ll spend much less time on back-and-forth conversations with clients and take away the countless troubleshooting course of. LogRocket means that you can spend extra time constructing new issues and fewer time fixing bugs.
Be proactive – strive LogRocket right now.
