
These days, it’s frequent for builders to work on each frontend and backend tasks. In line with a latest developer survey, React Native is likely one of the hottest frameworks worldwide for constructing cross-platform cell apps. Laravel is a PHP internet framework with a sublime code construction that builders can use to create REST APIs. Laravel at the moment has 71k GitHub stars, demonstrating its reputation within the developer neighborhood.
This text will cowl the main points of importing photographs from React Native app to a Laravel API.
Contents
Getting began
Importing photographs from a React Native app appears easy. Nonetheless, React Native doesn’t present a direct solution to join the app with Laravel’s endpoint.
Subsequently, you’ll must take a number of steps and use an HTTP library like Axios to add the pictures out of your app. You’ll additionally must retailer the general public URL of every picture within the database.
Let’s begin by creating the Laravel venture utilizing composer.
> composer create-project laravel/laravel image-upload
Run the next command to create an Picture mannequin class together with migration.
> php artisan make:mannequin Picture -m
Then, specify the required columns within the up() operate of the generated migration class, like so:
public operate up()
{
    Schema::create('photographs', operate (Blueprint $desk) {
        $table->id();
        $table->string('url');
        $table->timestamps();
    });
}
Subsequent, run the next command to carry out the database modifications.
> php artisan migrate
Now that the database is prepared, let’s arrange the API code.
Establishing the Laravel picture add API
Let’s create a POST API to deal with the picture add request from the React Native app.
Run the next command to create a controller to deal with the incoming requests.
php artisan make:controller ImageUploadController
Subsequent, within the ImageUploadController class, create a handler class methodology, uploadImage, as proven under.
use AppModelsImage;
use IlluminateHttpRequest;
use IlluminateSupportFacadesURL;
use IlluminateSupportFacadesValidator;
use IlluminateValidationRulesFile;

class ImageUploadController extends Controller
{
    public operate uploadImage(Request $request)
    {
        $validator = Validator::make($request->all(), ['image' => ['required', File::image()->max(2 * 1024)]]);
        if ($validator->fails()) return response()->json($validator->messages());
        $picture = new Picture();
        $file = $request->file('picture');
        $filename = uniqid() . "_" . $file->getClientOriginalName();
        $file->transfer(public_path('public/photographs'), $filename);
        $url = URL::to("https://weblog.logrocket.com/") . '/public/photographs/' . $filename;
        $picture['url'] = $url;
        $image->save();
        return response()->json(['isSuccess' => true, 'url' => $url]);
    }
}
Within the uploadImage methodology, we use the Validator utility class to validate that there’s a picture within the request and that the file measurement is lower than 2MB. If the validation fails, we return the validation error message because the response.
Within the above code, we retailer the picture within the public path in order that it’s accessible by the URL. To make the filenames distinctive, you possibly can prepend the unique filename with a novel ID utilizing the uniqid() operate.
Creating an endpoint for picture uploads
Subsequent, connect the controller methodology to an API endpoint by including the next code snippet to the routes/api.php file:
use AppHttpControllersImageUploadController;

Route::publish('/add', [ImageUploadController::class, 'uploadImage'])
    ->identify('photographs.add');
Now, run the API server in your system utilizing the next command:
> php artisan serve --host 0.0.0.0
To allow API entry from an area IP deal with, use the --host 0.0.0.0 choice. You’ll want this because the React Native app will make the HTTP request to the native IP deal with.
Extra nice articles from LogRocket:
To seek out the native IP deal with on Home windows, run the next command:
> ipconfig
To seek out the native IP deal with on macOS, test the community settings. Alternatively, you need to use ngrok to make your localhost publicly accessible utilizing a URL.
Configuring the React Native app with Expo
On this information, we’ll use Expo to create the React Native venture. Expo is a improvement software that allows you to run your React Native app on any system with out utilizing an emulator.
> npx create-expo-app ImageUploaderApp
Subsequent, let’s set up some dependencies that we’ll use within the venture. We’ll use the expo-image-picker library to pick photographs from the system’s gallery and the axios library to add the pictures to our Laravel API.
To put in these libraries, open up a terminal and navigate to your venture’s listing. Then, run the next instructions:
> npm i expo-image-picker axios
Now that these dependencies are put in, we are able to get to work on our code!
Constructing the React Native UI for previewing and importing photographs
Let’s work on creating the UI for the React Native app.
Begin by making a customized Button part, like so:
import React from "react";
import { TouchableOpacity, Textual content, StyleSheet } from "react-native";

interface ButtonProps {
  onPress: () => void;
  textual content: string;
}

export const Button = ({ onPress, textual content }: ButtonProps) => (
  <TouchableOpacity onPress={onPress} fashion={types.button}>
    <Textual content fashion={types.buttonText}>{textual content}</Textual content>
  </TouchableOpacity>
);

const types = StyleSheet.create({
  button: {
    backgroundColor: "blue",
    padding: 20,
    borderRadius: 5,
  },
  buttonText: {
    fontSize: 20,
    colour: "#fff",
  },
});
Subsequent, create a Thumbnail part that can preview the picture chosen from the gallery.
import React from "react";
import { View, Picture, StyleSheet } from "react-native";

interface ThumbnailProps {
  uri: string;
}

export const Thumbnail = ({ uri }: ThumbnailProps) => (
  <View>
    <Picture supply={{ uri }} fashion={types.thumbnail} />
  </View>
);

const types = StyleSheet.create({
  thumbnail: {
    width: 300,
    peak: 300,
    resizeMode: "include",
    marginBottom: 50,
  },
});
We will use these parts collectively in the principle App.js file to create the app’s person interface.
Subsequent, create a operate openImagePickerAsync() within the App.js file that can test and ask for gallery permission. When the person grants permission, set the chosen picture within the state and show the picture utilizing the Thumbnail part.
import * as ImagePicker from "expo-image-picker";
import React, { useState } from "react";
import { Button } from "./parts/Button";
import { Thumbnail } from "./parts/Thumbnail";
import { StatusBar } from "expo-status-bar";
import { StyleSheet, View, Platform } from "react-native";

...

export default operate App() {

  const [selectedImage, setSelectedImage] = useState<ImagePicker.ImageInfo>();

  const openImagePickerAsync = async () => {
    let permissionResult =
      await ImagePicker.requestMediaLibraryPermissionsAsync();
    if (permissionResult.granted === false) {
      alert("Permission to entry digital camera roll is required!");
      return;
    }
    let pickerResult = await ImagePicker.launchImageLibraryAsync({
      high quality: 1,
      mediaTypes: ImagePicker.MediaTypeOptions.Pictures,
    });
    if (pickerResult.cancelled === true) return;
    setSelectedImage(pickerResult);
  };

  const uploadImage = async () => {
    // add logic will go right here
  }

  return (
    <View fashion={types.container}>
      {selectedImage ? (
        <>
          <Thumbnail uri={selectedImage.uri} />
          <Button onPress={uploadImage} textual content="Add" />
        </>
      ) : (
        <Button onPress={openImagePickerAsync} textual content="Choose a photograph" />
      )}
      <StatusBar fashion="auto" />
    </View>
  );
}
At this level, the app’s UI ought to look one thing like this:

As soon as the picture is chosen from the gallery, we wish to show an add button that can make an API request to the Laravel server.
Within the uploadImage() operate, create a FormData object and append the picture information. Name the axios.publish() methodology to make the POST request to the add endpoint. Within the headers, add Content material-Sort: multipart/form-data to allow file add to the server.
const API_BASE = 'YOUR LOCAL IP ADDRESS' // 192.168.1.1;

const uploadImage = async () => {
    if (!selectedImage) return;
    const canUpload = await checkFileSize(selectedImage.uri);
    if (!canUpload) {
      alert("Can not add recordsdata bigger than 2MB");
      setSelectedImage(undefined);
      return;
    }
    const uri =
      Platform.OS === "android"
        ? selectedImage.uri
        : selectedImage.uri.substitute("file://", "");
    const filename = selectedImage.uri.cut up("https://weblog.logrocket.com/").pop();
    const match = /.(w+)$/.exec(filename as string);
    const ext = match?.[1];
    const sort = match ? `picture/${match[1]}` : `picture`;
    const formData = new FormData();
    formData.append("picture", {
      uri,
      identify: `picture.${ext}`,
      sort,
    } as any);
    strive {
      const { information } = await axios.publish(`${API_BASE}/api/add`, formData, {
        headers: { "Content material-Sort": "multipart/form-data" },
      });
      if (!information.isSuccess) {
        alert("Picture add failed!");
        return;
      }
      alert("Picture Uploaded");
    } catch (err) {
      console.log(err);
      alert("One thing went improper");
    } lastly {
      setSelectedImage(undefined);
    }
};
Right here’s the pattern app with the add button:

Checking for picture file measurement
It’s a good observe to test for recordsdata for measurement earlier than importing them to the server. Let’s do that by putting in the expo-file-system library.
> npm i expo-file-system
import * as FileSystem from "expo-file-system";
...

const checkFileSize = async (
  fileURI: string,
  maxSize = 2
): Promise<boolean> => {
  const fileInfo = await FileSystem.getInfoAsync(fileURI);
  if (!fileInfo.measurement) return false;
  const sizeInMb = fileInfo.measurement / 1024 / 1024;
  return sizeInMb < maxSize;
};
Within the above code, the FileSystem.getInfoAsync() methodology accepts the file URI because the parameter and returns the file measurement in bytes.
Now, run the npm run begin command to construct the React Native app.
> npm run begin
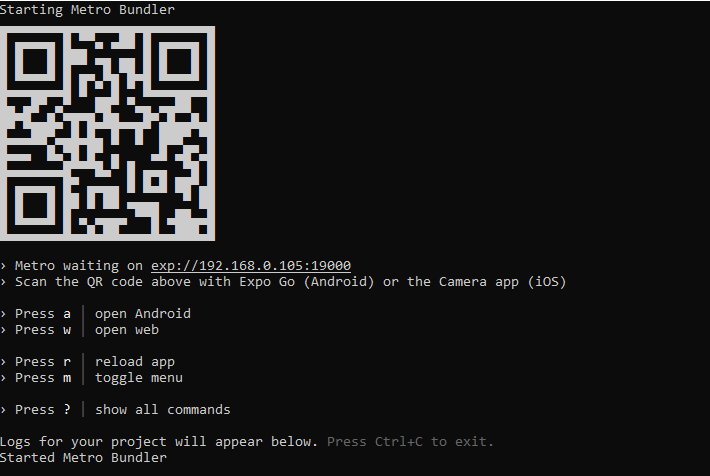
Youll want the Expo App in your system to put in and run your React Native app. As soon as it’s put in, scan the QR code displayed in your terminal. You may study extra about Expo from the official documentation.
As soon as your app is working on the system, attempt to add a picture that’s higher than 2MB. It’s best to see an error message like that proven under:

Now, strive importing a smaller picture; you must see a message indicating the picture was efficiently uploaded.


Conclusion
On this article, we demonstrated add photographs from a React Native app to a Laravel API.
We began by establishing our Laravel API and creating an endpoint for picture uploads. Then, we configured the React Native venture utilizing Expo and created UI parts for previewing and importing the picture. Lastly, we used Axios to add the picture to the Laravel API.
Importing photographs from React Native to a Laravel API is a reasonably easy course of. Simply comply with the steps outlined on this article, and you must be capable to full it very quickly. In case you have any questions or run into any points, be happy to go away a remark under.
Cheers and glad coding!
LogRocket: Immediately recreate points in your React Native apps.

LogRocket is a React Native monitoring resolution that helps you reproduce points immediately, prioritize bugs, and perceive efficiency in your React Native apps.
LogRocket additionally helps you improve conversion charges and product utilization by displaying you precisely how customers are interacting along with your app. LogRocket’s product analytics options floor the explanation why customers do not full a selected movement or do not undertake a brand new characteristic.
Begin proactively monitoring your React Native apps — strive LogRocket totally free.
