
Ranging from iOS 12, builders can use the back-facing digital camera to detect and monitor identified photographs through the use of an API known as ARImageTrackingConfiguration. What does it imply to you? In case you’ve watched the Harry Potter film earlier than, you in all probability keep in mind the wizarding newspaper with animated photographs in print. With the picture monitoring configuration, we will flip this right into a actuality via an ARKit app.
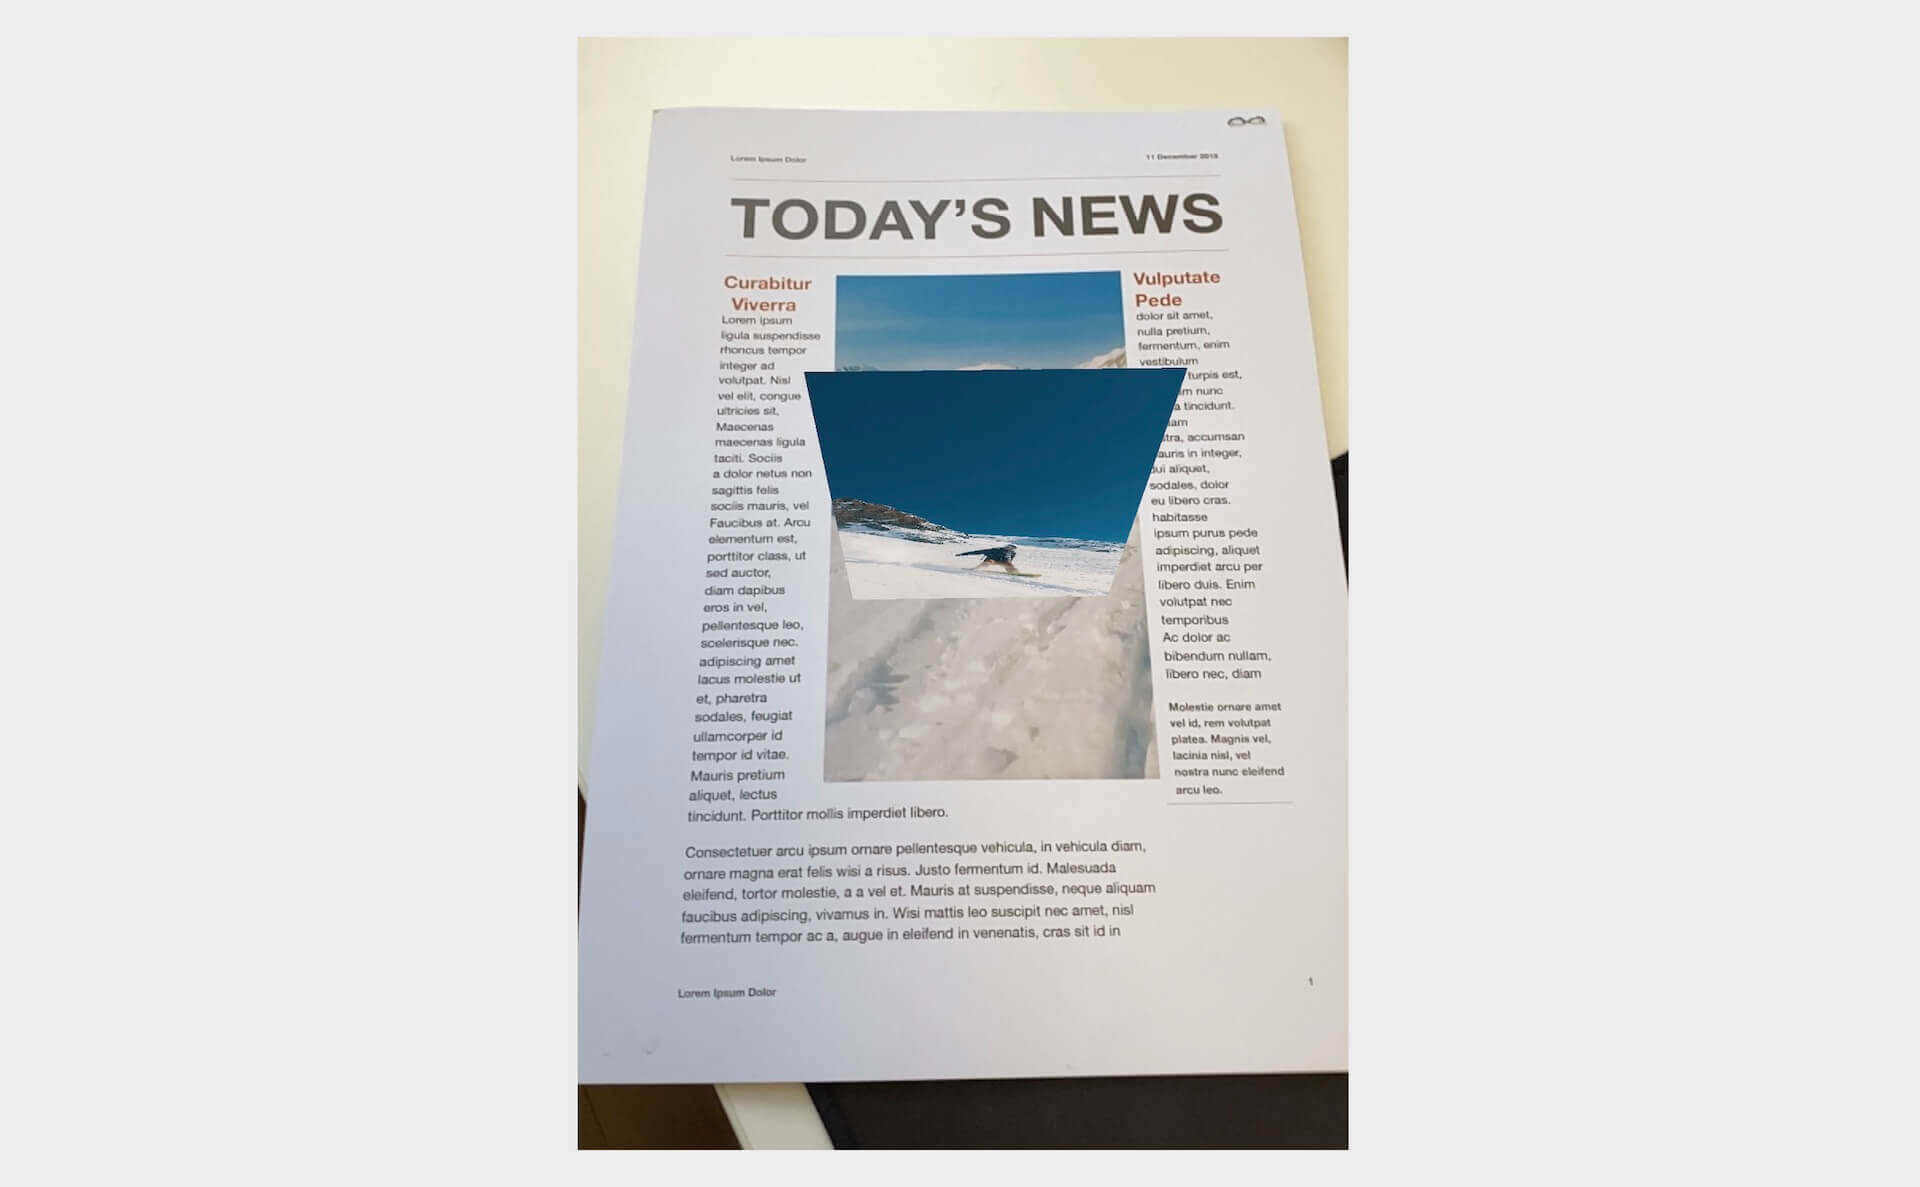
On this chapter, you’ll learn to use ARImageTrackingConfiguration to carry out picture monitoring and construct an AR newspaper app much like that appeared within the Harry Potter film. It’s not straightforward to explain how the app works in phrases. So, please head over to this hyperlink and see the demo app in motion. When the app acknowledges a selected picture, it overlays the picture with a video. As you possibly can see within the video, what’s wonderful is that ARKit tracks the place change of the picture and hold anchoring the video content material.
Wanting attention-grabbing, proper? Let’s get began.
Making a New Undertaking Utilizing ARKit template
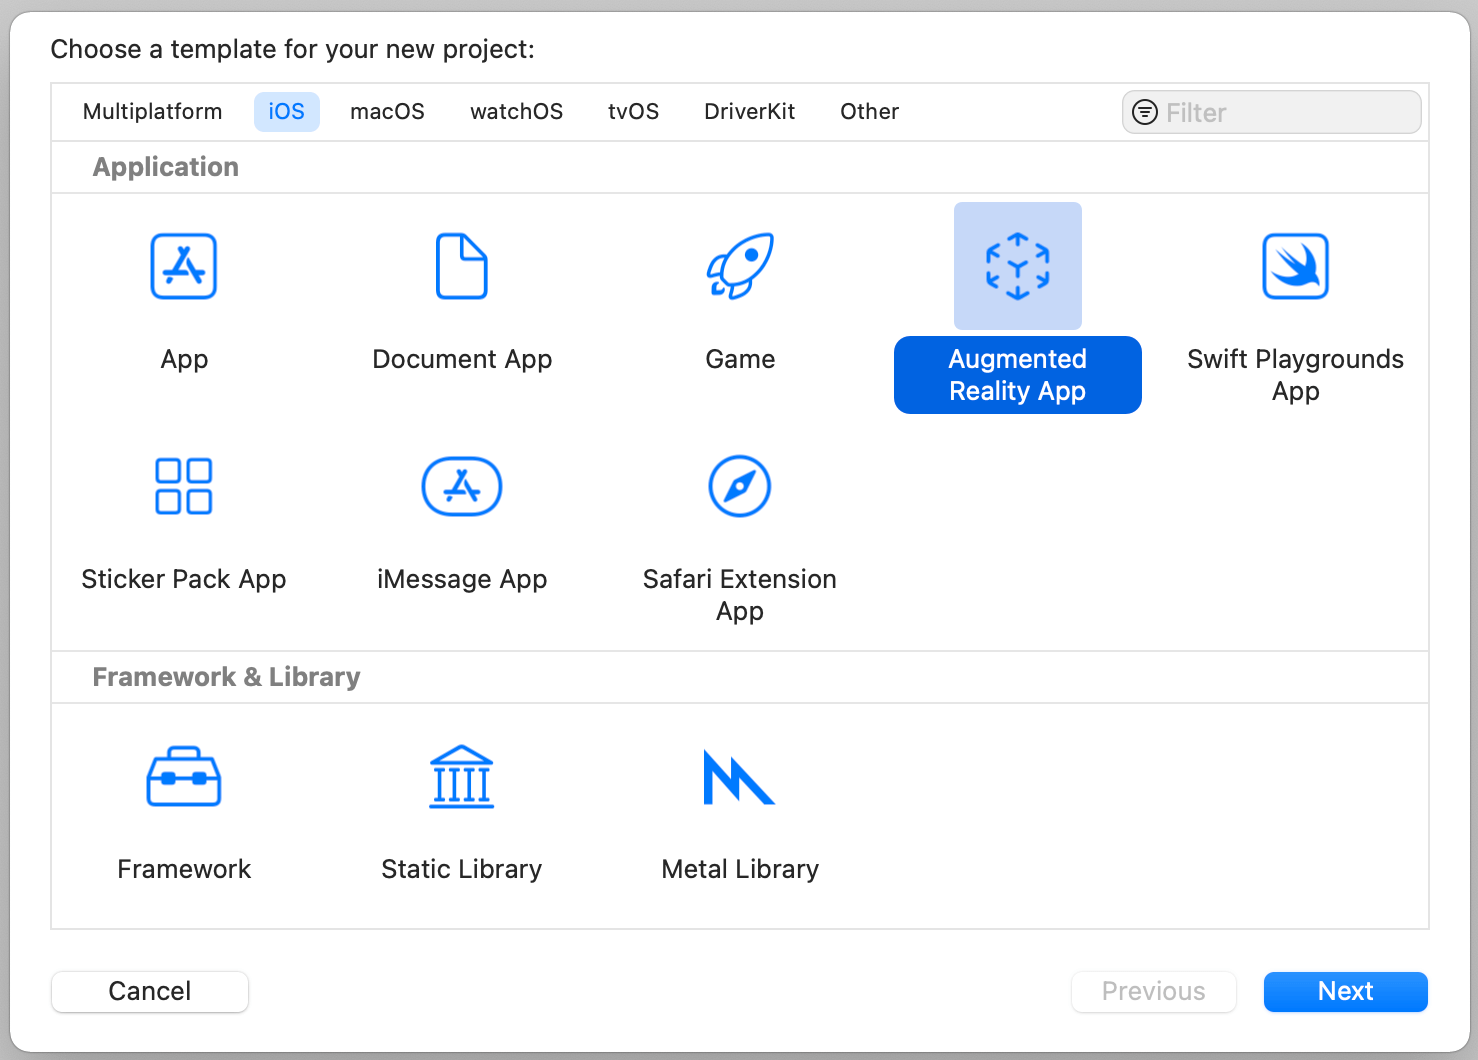
We’ll construct this challenge from scratch. Assuming you’ve opened Xcode, you can begin by creating a brand new challenge. Select the Augmented Actuality template and click on Subsequent. For the challenge info, identify the challenge ARNewspaper and be sure you set the Content material Expertise to SceneKit.
When you saved the challenge, Xcode will generate the ARKit challenge for you. There are a few issues we don’t want within the generated code. By default, the template generates a 3D spaceship, which is loaded when the app launches. Clearly, we don’t want this mannequin. Within the ViewController.swift file, change the next line of code in viewDidLoad() from:
|
let scene = SCNScene(named: “artwork.scnassets/ship.scn”)! |
To:
For the viewWillAppear technique, it’s loaded with ARWorldTrackingConfiguration():
|
override func viewWillAppear(_ animated: Bool) { tremendous.viewWillAppear(animated)
// Create a session configuration let configuration = ARWorldTrackingConfiguration()
// Run the view’s session sceneView.session.run(configuration) } |
We don’t want it too as a result of we’ll use one other monitoring configuration to deal with the picture monitoring. In the meantime, empty the tactic like this:
|
override func viewWillAppear(_ animated: Bool) { tremendous.viewWillAppear(animated) } |
Getting ready the Sources
Now that we now have created the challenge skeleton, let’s transfer onto the subsequent step and import the required sources. First, obtain the useful resource pack from https://www.appcoda.com/sources/swift5/ARNewspaperResources.zip. Since this app goes to play a video when a specific picture is acknowledged, you need to put together the next sources:
- A picture to be acknowledged. It may be any picture (JPG/PNG) in your picture library. Or you should utilize the one (i.e.
snowboarding.jpg) which comes with our useful resource pack. - A video to be performed after the picture is detected. Once more, it may be any video in mp4 format. Within the useful resource pack, you need to discover a video file named
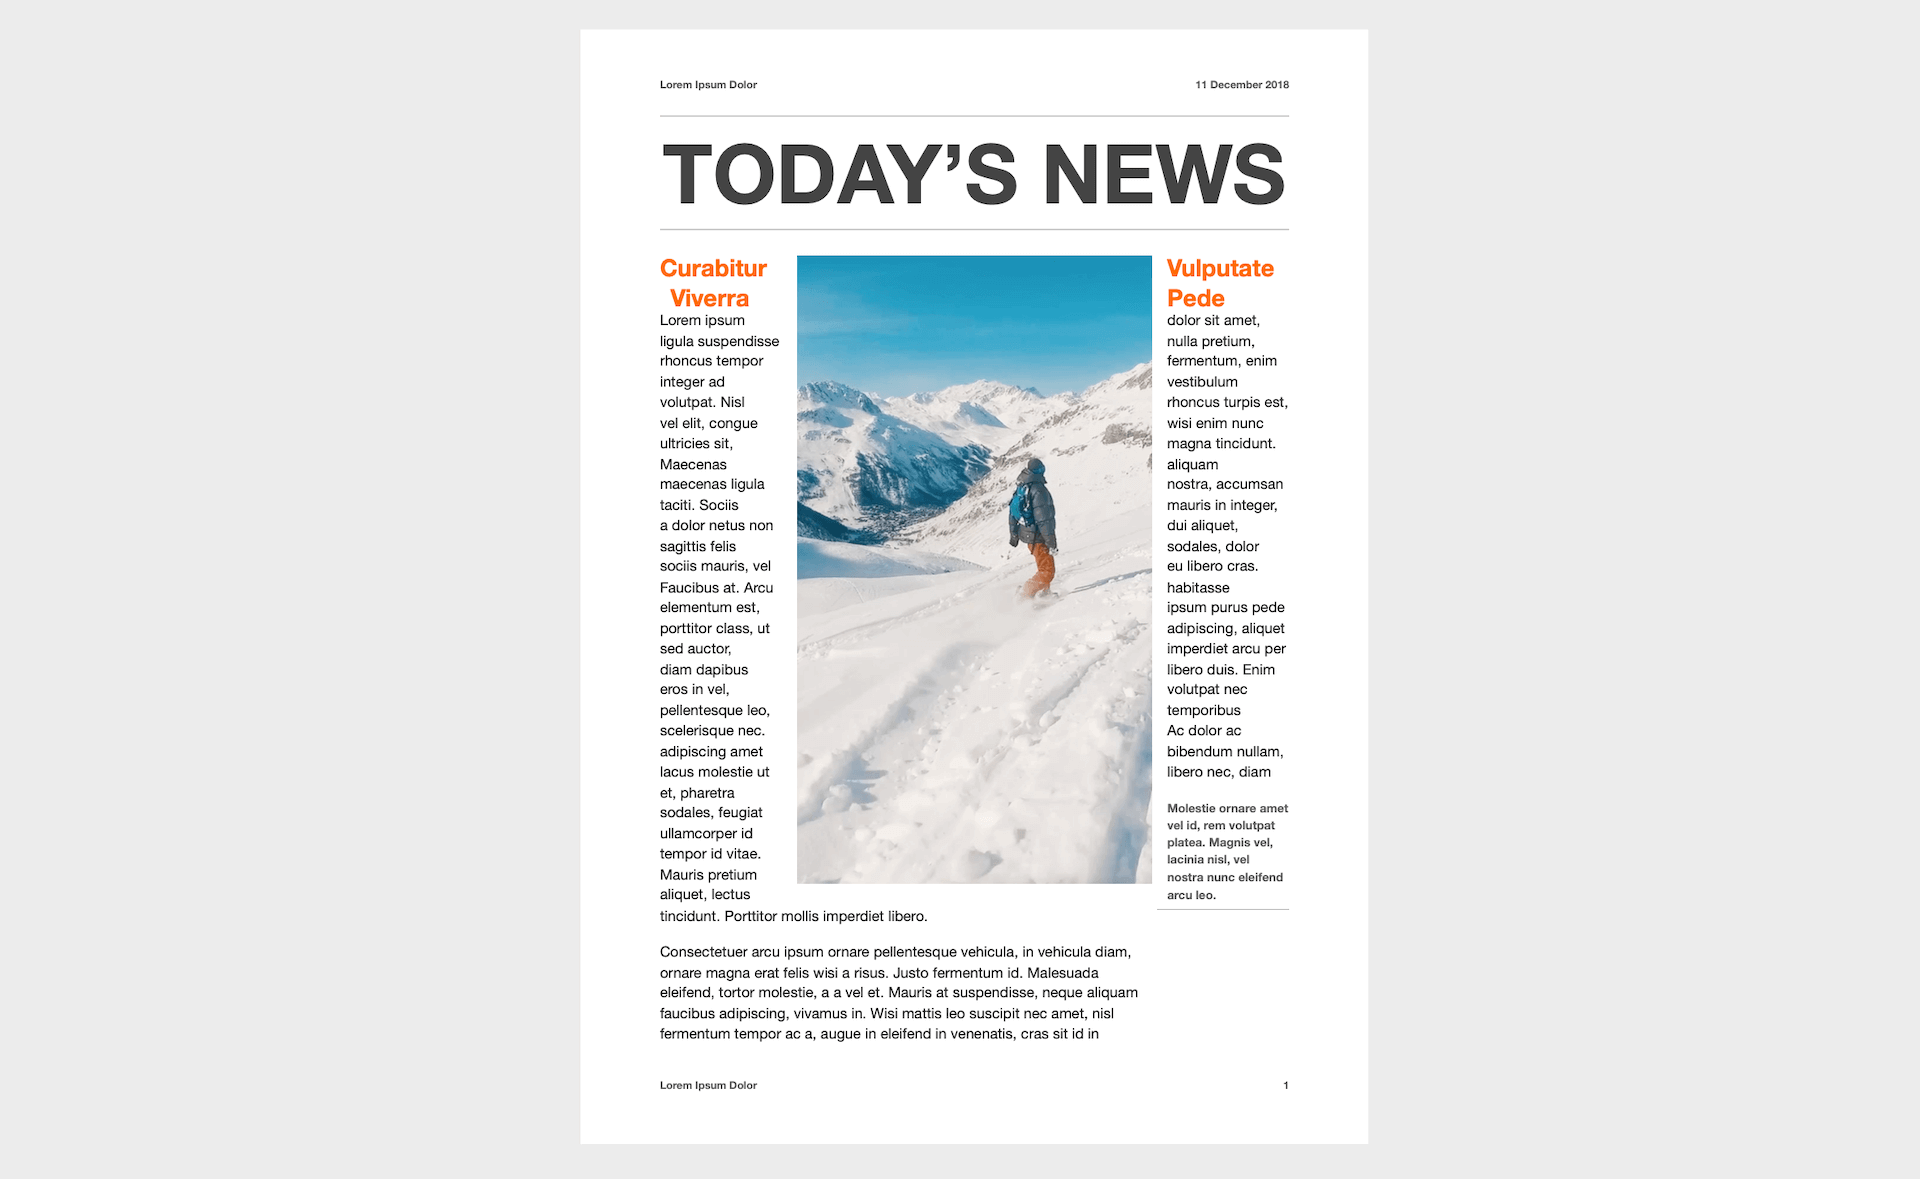
snowboarding.mp4. - A doc containing the picture. That is fully optionally available. However to imitate the Harry Potter newspaper, the useful resource pack features a PDF file named
arkit-newspaper.pdf, as proven in determine 45.2. You may print it out in A4 dimension paper for later testing. In case you don’t have a printer, that is okay. You may open the file on an iPad or a Mac. We’ll focus on extra about how one can run the check within the later part.
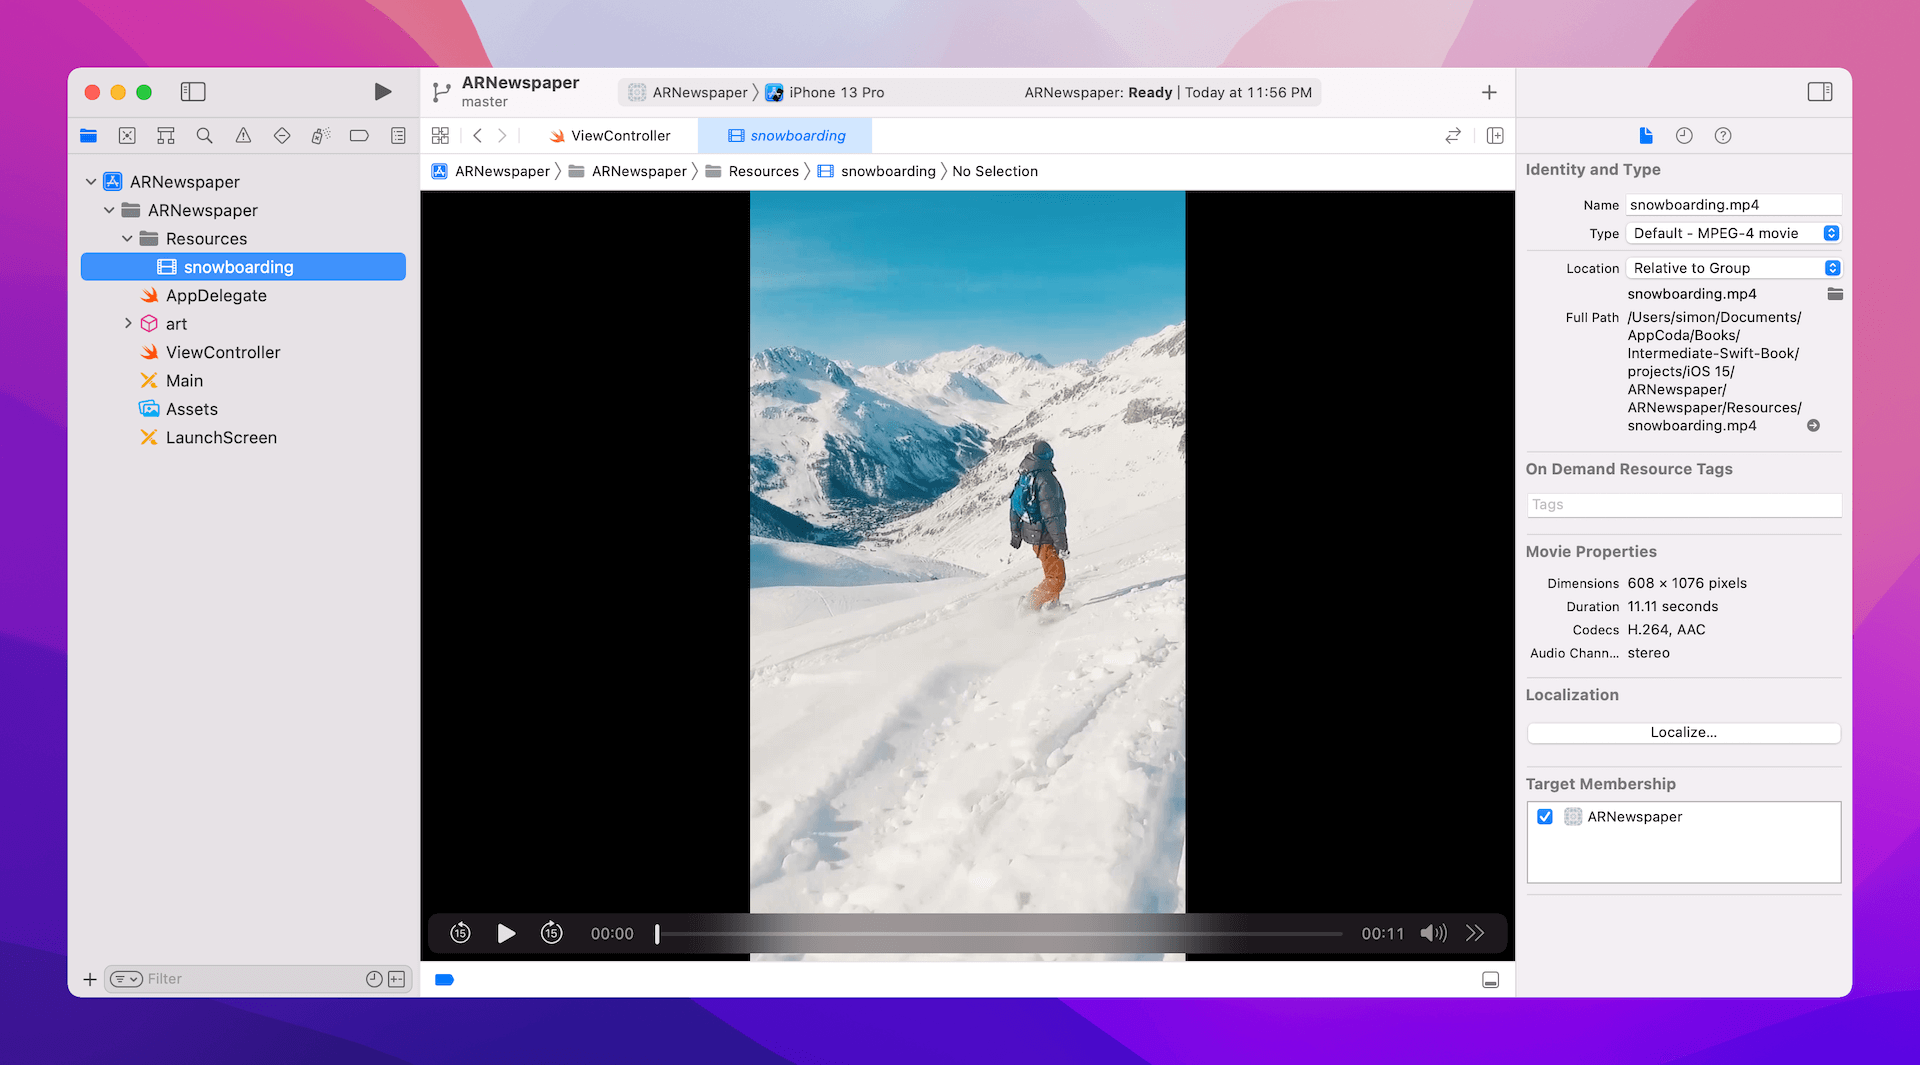
Subsequent, we’ll import the video file (i.e. snowboarding.mp4) into Xcode. Within the challenge navigator of Xcode, proper click on ARNewspaper and create a brand new group named Sources. Drag the video file from Finder into Xcode and place it within the Sources folder. When Xcode prompts you to decide on choices for including the file, please be sure you tick the checkbox of ARNewspaper within the Add to targets choice. In case you’ve efficiently imported the video file, you need to be capable to preview it in Xcode.
Setting the Reference Picture for Picture Monitoring
We haven’t imported the picture but. As you already know, we used so as to add the pictures to the asset catalog. However this time, it wants a bit of additional work for picture monitoring. Open Belongings and right-click to decide on AR and Textures > New AR Useful resource Group. This creates a brand new useful resource group to specify the reference photographs for picture monitoring. You may drag the snowboarding.jpg file (or your personal picture) to the useful resource group.
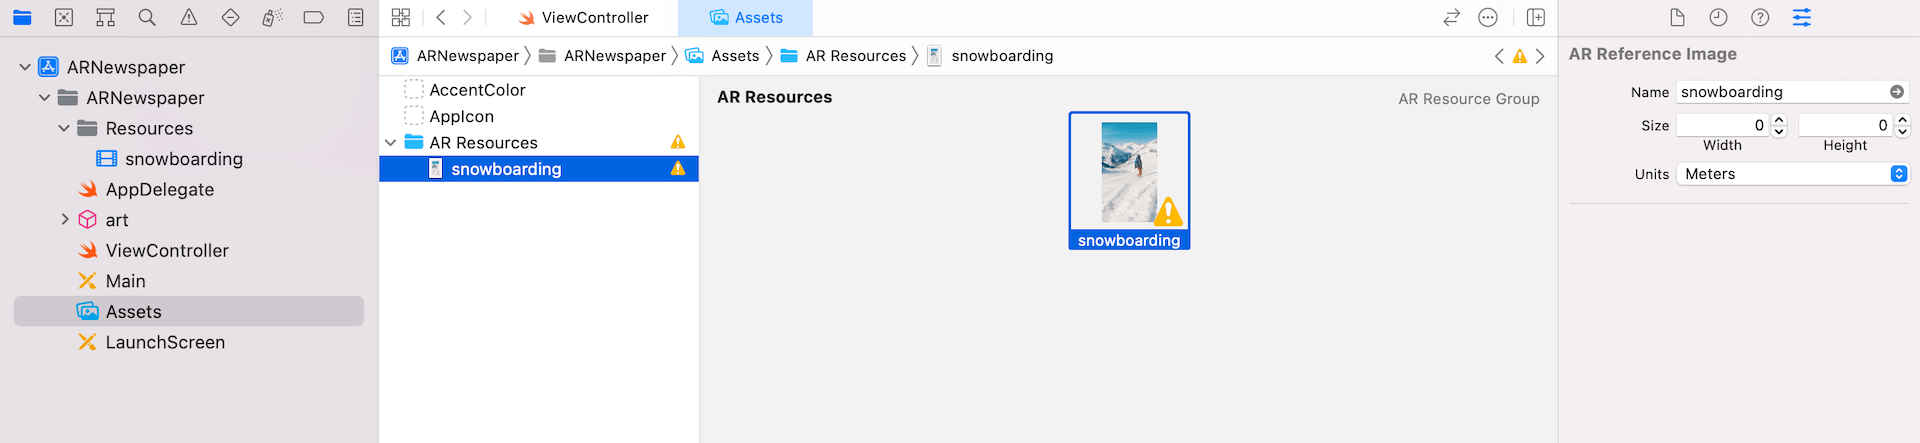
Whereas we solely have one picture for this demo, you possibly can really put a number of photographs for picture monitoring on this group. As you possibly can see, there’s a large exclamation mark on the picture, which suggests there’s something lacking. Now choose the picture within the group and open the Attributes inspector.
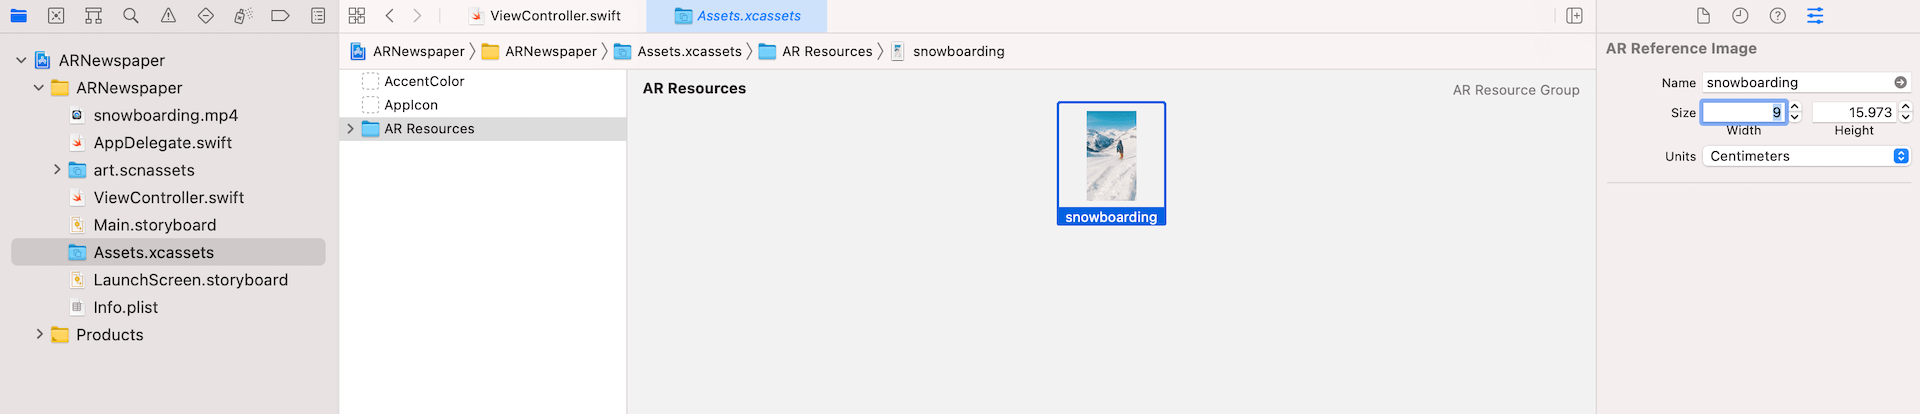
To detect the precise picture, ARKit requires you to specify the real-world dimension of the picture. Assuming you print the newspaper file on a A4-size paper, the picture ought to have a width of 9cm and a top of 16cm. So, change the Items to Centimeters and set the width to 9. When you set the width, Xcode mechanically calculates the top worth.
Please notice that the real-world dimension of the picture varies. In case you print it on a A3-size paper or show the PDF file on a 42-inch display, the bodily dimension of the picture turns into bigger. You’ll then want to regulate these values accordingly.
Organising the AR Picture Monitoring Configuration
Within the earlier chapters, we used ARWorldTrackingConfiguration to trace the system’s place and blend the digital content material with the true world. Aside from the world monitoring configuration, ARKit gives different forms of configuration. To carry out picture monitoring, we use a configuration known as ARImageTrackingConfiguration. You employ this configuration to detect and monitor the movement of identified 2D photographs.
To arrange this picture monitoring configuration, replace the viewWillAppear technique like this:
|
1 2 3 4 5 6 7 8 9 10 11 12 13 14 15 16 17 |
override func viewWillAppear(_ animated: Bool) { tremendous.viewWillAppear(animated)
// Create a session configuration let configuration = ARImageTrackingConfiguration()
// Outline reference photographs guard let referenceImages = ARReferenceImage.referenceImages(inGroupNamed: “AR Sources”, bundle: Bundle.principal) else { fatalError(“Did not load the reference photographs”) }
// Specify the pictures to trace configuration.trackingImages = referenceImages
// Run the view’s session sceneView.session.run(configuration) } |
To precisely detect the place and orientation of a 2D picture in the true world, ARKit requires preprocessed picture knowledge and data of the picture’s real-world dimensions. The ARReferenceImage class encapsulates this info.
– https://developer.apple.com/documentation/arkit/arreferenceimage
Within the code, we specify to make use of ARImageTrackingConfiguration and inform ARKit what photographs to trace. We name the referenceImages technique of ARReferenceImage to load all referenced photographs from the asset catalog. The inGroupNamed parameter takes within the group identify of the AR useful resource group. Recalled that we named it AR Sources, this is the reason we cross it to the tactic.
As soon as we loaded the reference photographs, we assigned them to the trackingImages property of the configuration. Lastly, we name the run technique to start the picture monitoring operation utilizing the again digital camera.
Overlaying a Video Participant to the Detected Picture
Now that we now have created the picture monitoring configuration, the query is how can we overlay a video on prime of the detected picture?
When ARKit begins the picture monitoring, it mechanically provides an ARImageAnchor object when the reference picture is acknowledged. In a Scened-based ARKit app, the renderer(_:didAdd:for:) technique of ARSCNViewDelegate shall be known as when the anchor is added to the scene. Thus, we will implement the tactic to overlay the video on prime of the detected picture.
First, let’s declare the video play for the video playback in ViewController like this:
|
let videoPlayer: AVPlayer = { // Load the video guard let url = Bundle.principal.url(forResource: “snowboarding”, withExtension: “mp4”) else { return AVPlayer() }
return AVPlayer(url: url) }() |
We load the snowboarding.mp4 file and assign it to AVPlayer for playback. We simply put together the participant for the video playback. The video gained’t begin enjoying till we name its play technique.
Now implement the tactic within the ViewController class like this:
|
1 2 3 4 5 6 7 8 9 10 11 12 13 14 15 16 17 18 19 |
func renderer(_ renderer: SCNSceneRenderer, didAdd node: SCNNode, for anchor: ARAnchor) {
guard let imageAnchor = anchor as? ARImageAnchor else { return }
// Detected aircraft let aircraft = SCNPlane(width: imageAnchor.referenceImage.physicalSize.width, top: imageAnchor.referenceImage.physicalSize.top)
aircraft.firstMaterial?.diffuse.contents = self.videoPlayer
let planeNode = SCNNode(geometry: aircraft) planeNode.eulerAngles.x = –.pi / 2
node.addChildNode(planeNode)
self.videoPlayer.play() } |
As mentioned, each time a brand new anchor is added to the AR session. The strategy above shall be known as. Due to this fact, we first must test if the newly added anchor is an ARImageAnchor. If it’s a picture anchor, we create a aircraft through the use of SCNPlane for holding the video participant. The dimensions of the oblong aircraft is ready to its real-world dimension that you just supplied earlier when configuring the reference picture.
Subsequent, we instantiate a SCNNode with the aircraft we simply created and add the aircraft to the scene by calling addChildNode. Lastly, we name the play() technique of the participant to begin the video playback.
It’s possible you’ll surprise why we have to modify the eulerAngles to rotate the aircraft. By default, SCNPlane is vertically oriented. Nevertheless, the detected picture is meant to be horizontal. To match the detected picture’s orientation, we now have to rotate the aircraft. The determine beneath exhibits you the default orientation of the aircraft.
In case you can’t wait to check out the picture monitoring, you possibly can deploy the app to your iPhone. Assuming you’ve printed out the PDF doc, you possibly can level the system digital camera on the newspaper. When the app detects the “Snowboarding” picture, it mechanically overlay the video participant on prime of the picture and begins the video playback.
In case that you just would not have a printer, chances are you’ll load the PDF doc on iPad, which has an identical dimension of the A4 paper. Alternatively, you possibly can open the file in your Mac for testing. However please attempt to resize it to A4 dimension.
Replaying the Video
The picture monitoring ought to work now. Nevertheless, the video playback solely happens as soon as. When the video finishes enjoying, it is not going to play once more. To repair this subject, insert the next code within the viewDidLoad technique:
|
NotificationCenter.default.addObserver(forName: .AVPlayerItemDidPlayToEndTime, object: self.videoPlayer.currentItem, queue: .principal) { [weak self] (notification) in
self?.videoPlayer.search(to: CMTime.zero) } |
We added an observer to take heed to the AVPlayerItemDidPlayToEndTime notification, which is posted when the video playback ends. On this case, we set the playback time again to zero.
To play the video once more, insert the next technique in ViewController:
|
func renderer(_ renderer: SCNSceneRenderer, didUpdate node: SCNNode, for anchor: ARAnchor) {
if let pointOfView = sceneView.pointOfView { let isVisible = sceneView.isNode(node, insideFrustumOf: pointOfView)
if isVisible { if videoPlayer.charge == 0.0 { videoPlayer.play() } } } } |
This technique is mechanically known as by ARKit when the anchor is up to date. We first test the reference picture is seen on display after which begin the replay if the result’s true.
Disabling Statistics
You must discover a statistics bar appeared on the backside of the display. If you do not want it, you possibly can disable it by altering the next line of code in viewDidLoad and set its worth to false:
|
sceneView.showsStatistics = false |
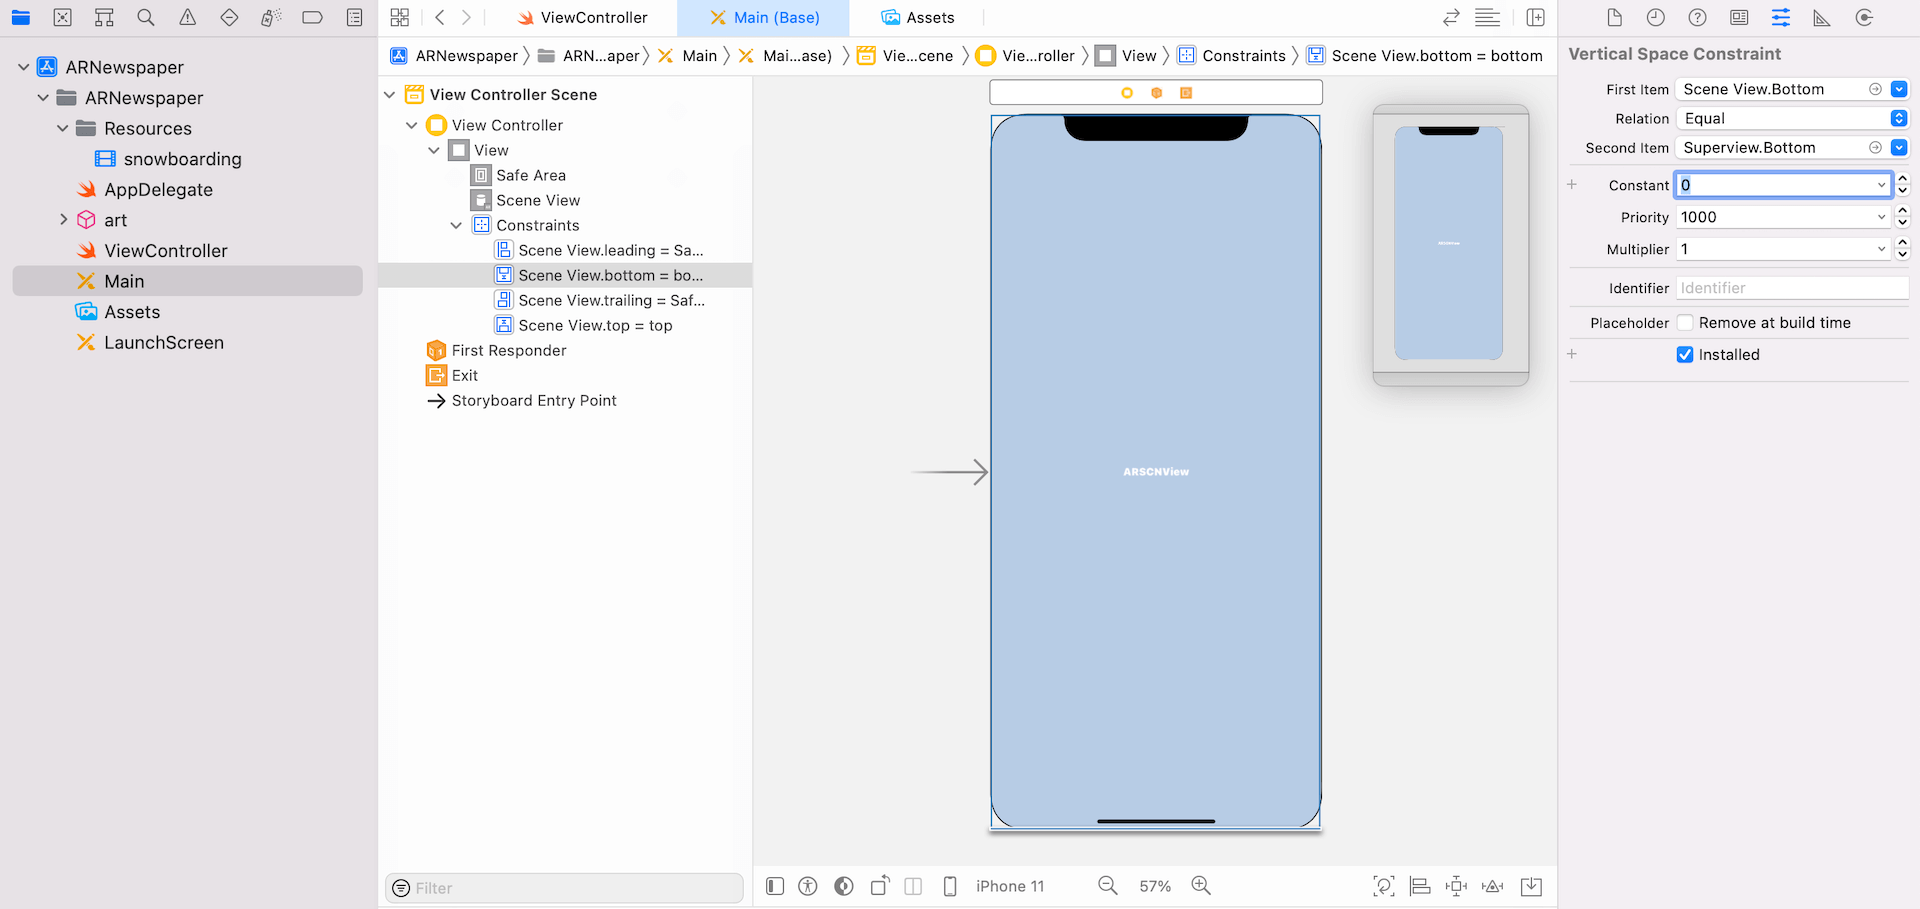
Increase the View to Full Display screen
By default, the Scene View generated by Xcode has constraints that have been configured respect to the secure space. For this reason you see an empty white bar on the backside of the display. If you wish to make the scene view full display, you turn over to Predominant.storyboard and alter the scene view’s backside constraint. Within the Attributes inspector, change the Second Merchandise to Superview.Backside and set its fixed worth to 0.
Abstract
On this chapter, we discover one other configuration supplied by ARKit that permits you to carry out picture monitoring. With ARImageTrackingConfiguration, it empowers builders to construct some attention-grabbing apps that merges digital content material with the true world setting. The Harry Potter newspaper is simply one of many many examples. It’s possible you’ll apply the approach to counterpoint the person expertise and engagement of some real-world objects like postcard and restaurant menus.
This can be a pattern chapter of our Intermediate iOS Programming with Swift e-book. To obtain the total supply code and entry all its content material, you possibly can test it out right here.
