
If in case you have labored with any sort of type in a cell utility, then you know the way sophisticated it’s to deal with dates in kinds. On this article, we’ll learn to implement a calendar for dealing with and manipulating dates in a SwiftUI utility.
SwiftUI offers a DatePicker management for selecting an absolute date from customers, nonetheless, as a full-fledged calendar UI, it has some limitations. On this tutorial, we’ll additionally use a well-liked calendar library referred to as FSCalendar, a totally customizable calendar library for iOS. Our last app will appear like the pictures under:
You will discover the entire code for this tutorial on this GitHub repository. Let’s get began!
Desk of contents
We’ll cowl the next:
Create a SwiftUI undertaking
Earlier than writing any code, we’ll want a working SwiftUI utility. Let’s create it now; open Xcode, and also you’ll see a display studying Welcome to Xcode, as proven under:
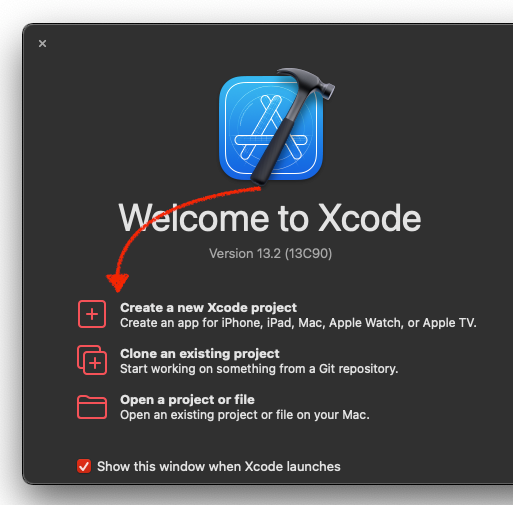
Choose Create a brand new Xcode undertaking, then Xcode shall be launched with the select undertaking template popup:
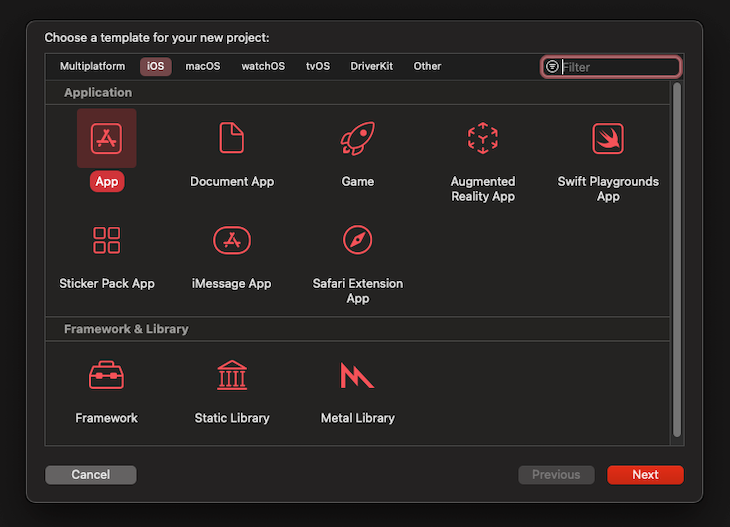
We’ll go away the chosen choice because the default one, App, then click on Subsequent. Enter a reputation to your undertaking and click on Subsequent. Now that we’ve efficiently created a SwiftUI undertaking, let’s run it on our gadget or simulator.
To construct the app on a tool, choose it from the highest bar of Xcode, after which click on the Play button on the left to start out the construct:
![]()
If all the pieces labored appropriately, you’ll see a clean display in your gadget with a “Hey, World!” textual content within the middle.
Present a calendar view with DatePicker in SwiftUI
To create a calendar UI in our Swift utility, we’ll begin with DatePicker from SwiftUI. This construction is principally used to pick dates from a consumer interface, and it’s very simple to make use of and management.
Let’s add DatePicker into our view physique. Add the code under to the ContentView.swift file:
import SwiftUI

struct ContentView: View {
    @State var selectedDate: Date = Date()
    var physique: some View {
        // Added DatePicker with choice equal to State variable selectedDate
        DatePicker("Choose Date", choice: $selectedDate)
                  .padding(.horizontal)
    }
}
....
As you will have seen, we added DatePicker with two parameters, Choose Date and choice.
The primary String param is the title of date picker, which is proven beside the picker controls on the UI. The second param, choice, is a vital parameter that takes a Binding variable of sort Date. The Date variable modifications as the chosen date or time is modified from the DatePicker management.
To cross the Binding into the choice param, we’ve created a State variable named selectedDate of sort Date, and its preliminary worth is the present date. We additionally added somewhat horizontal padding to the part.
The UI output from the code above shall be just like the picture under:
Now, we will open a calendar view to pick a date and time from a wheel picker, which are saved within the selectedDate variable. Now, let’s show it on the UI.
Change the code within the ContentView physique with the code under:
VStack(alignment: .middle, spacing: 0) {
    Textual content(selectedDate.formatted(date: .abbreviated, time: .normal))
        .font(.system(dimension: 28))
        .daring()
        .foregroundColor(Coloration.accentColor)
        .padding()
        .animation(.spring(), worth: selectedDate)
    Divider()
    Spacer()
    DatePicker("Choose Date", choice: $selectedDate)
        .padding(.horizontal)
}
.padding(.vertical, 200)
The code above will produce the next UI:
We’ve applied a date picker into our utility, however we aren’t completed but. We wish to present a calendar view in our UI that can at all times be displayed. For this, we’ll use the datePickerStyle modifier of the DatePicker part. We will use this modifier to show DatePicker in any predefined kinds we would like.
We’ll use graphical type, which exhibits the DatePicker as a CalendarView that’s at all times opened. We gained’t want the time part now, so we’ll cross displayedComponents in our DatePicker initializer. We’ve additionally omitted the time half from selectedDate when displaying it on the UI.
With the modifications above, the up to date code within the physique of our ContentView will appear like the next:
VStack() {
    Textual content(selectedDate.formatted(date: .abbreviated, time: .omitted))
        .font(.system(dimension: 28))
        .daring()
        .foregroundColor(Coloration.accentColor)
        .padding()
        .animation(.spring(), worth: selectedDate)
        .body(width: 500)
    Divider().body(peak: 1)
    DatePicker("Choose Date", choice: $selectedDate, displayedComponents: [.date])
        .padding(.horizontal)
        .datePickerStyle(.graphical)
    Divider()
}
.padding(.vertical, 100)
The code above will consequence within the UI under:

Including TabView into utility
To date, we’ve built-in a calendar-like view utilizing DatePicker. However we will enhance on this through the use of a well-liked iOS library referred to as FSCalendar.
However first, we have to separate these two screens in our app UI. For this, we’ll use TabView, which can create two tabs in our app, one for CalendarView with DatePicker, and one other for FSCalendar.
Let’s begin by shifting the UI that we created within the part above into one other SwiftUI file. Create a brand new SwiftUI file in Xcode and name it DatePickerCalendar. Paste the code from the physique of ContentView into the physique of DatePickerCalendar:
import SwiftUI

struct DatePickerCalendar: View {
    @State var selectedDate = Date()
    var physique: some View {
        VStack {
            FormattedDate(selectedDate: selectedDate, omitTime: true)
            Divider().body(peak: 1)
            DatePicker("Choose Date", choice: $selectedDate,
                       in: ...Date(), displayedComponents: .date)
                .datePickerStyle(.graphical)
            Divider()
        }
    }
}

struct DatePickerCalendar_Previews: PreviewProvider {
    static var previews: some View {
        DatePickerCalendar()
    }
}
Within the code above, you’ll discover that we’ve applied two modifications. For one, we’ve added the in parameter within the DatePicker initializer, which permits the consumer to select dates in a given vary. On this case, I’ve supplied all dates from the earlier to the present date.
FormattedDate is a helper view that I created to make the code look clear. It’s principally the identical Textual content part that we used beforehand to show selectedDate on the UI with some type modifiers.
To create the FormattedDate view, create a brand new SwiftUI file, identify it FormattedDate, and add the next code inside it:
import SwiftUI

struct FormattedDate: View {
    var selectedDate: Date
    var omitTime: Bool = false
    var physique: some View {
        Textual content(selectedDate.formatted(date: .abbreviated, time:
              omitTime ? .omitted : .normal))
            .font(.system(dimension: 28))
            .daring()
            .foregroundColor(Coloration.accentColor)
            .padding()
            .animation(.spring(), worth: selectedDate)
            .body(width: 500)
    }
}

struct FormattedDate_Previews: PreviewProvider {
    static var previews: some View {
        FormattedDate(selectedDate: Date())
    }
}
We additionally have to create a brand new file for our calendar view that can implement the FSCalendar library. Create a brand new SwiftUI file named CalendarView and add the next code inside physique:
Textual content("That is Calendar View")
Now, let’s add the TabView in our ContentView file:
TabView {
    DatePickerCalendar()
      .tabItem {
        Label("DatePicker Calendar", systemImage: "calendar.badge.plus")
            .padding()
      }
    CalendarView()
      .tabItem {
        Label("Fullscreen Calendar", systemImage: "calendar")
            .padding()
      }
}
.onAppear {
    let look = UITabBarAppearance()
    look.backgroundColor = UIColor(Coloration.purple.opacity(0.2))
    look.shadowColor = UIColor(.purple)
    look.backgroundEffect = UIBlurEffect(type: .extraLight)
    UITabBar.look().standardAppearance = look
    UITabBar.look().scrollEdgeAppearance = look
}
Within the code above, we now have added two views in our TabView. First is the DatePickerCalendar, which we created earlier, and the second is the empty CalendarView. Every view has a tabItem modifier that defines what to show contained in the tab bar. We’ve additionally added an onAppear occasion methodology on TabView to alter the looks of TabView.
Now, we’ll have the UI under:
Putting in FSCalendar into our undertaking
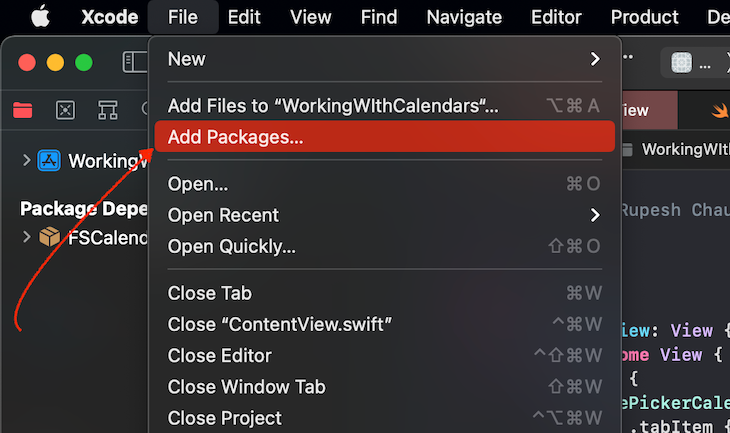
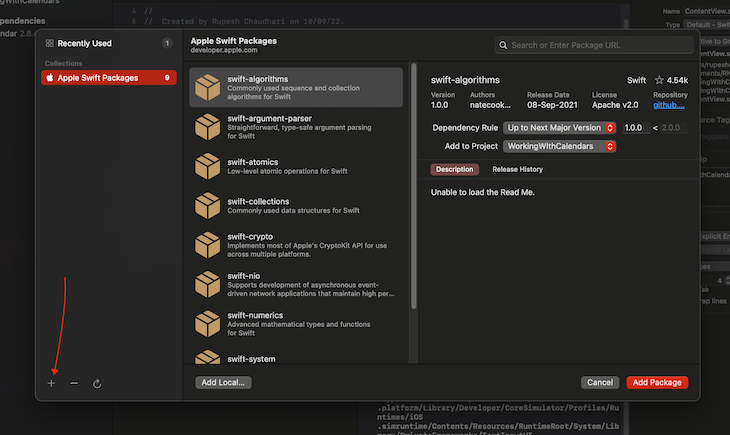
Now, let’s set up the FSCalendar library. So as to add a brand new library, in Xcode, go to File → Add Packages, as seen within the picture under:
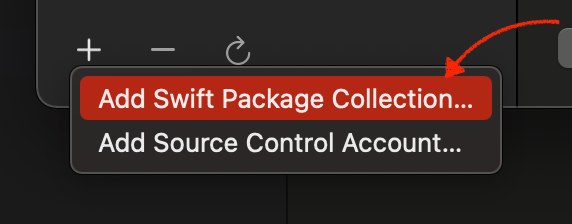
Click on on the Add (+) button, then click on on Add swift package deal assortment:
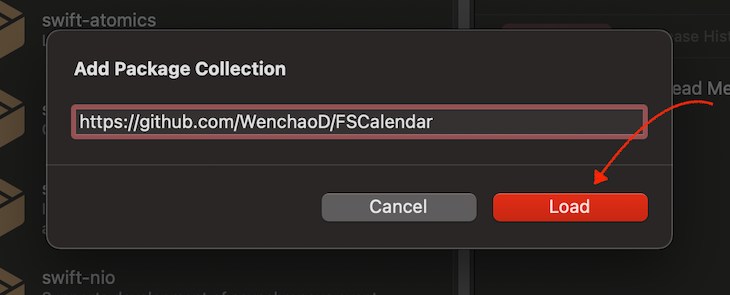
Then, paste the next hyperlink into the enter and proceed:
https://github.com/WenchaoD/FSCalendar
That is the repository URL of the package deal we’ll use:
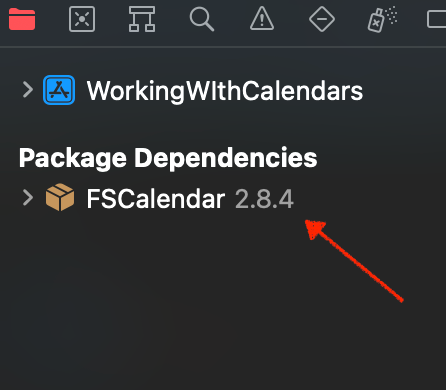
That’s it! You’ve now added FSCalendar into you undertaking. If all the pieces went proper, you’ll now see FSCalendar in Package deal Dependencies on the left aspect of Xcode in undertaking navigator menu:
Combine UIKit view from FSCalendar with UIViewRepresentable
Now, we’ve put in FSCalendar, however we can’t straight make the most of the library as it’s because it doesn’t help SwiftUI out of the field. Subsequently, we’ll have to make the most of the UIKit view offered by this library.
For this, we’ll use UIViewRepresentable as a wrapper across the UIKit view to show it in our SwiftUI view hierarchy. For extra details about this, you can even seek advice from the official documentation.
First, we’ll create a view in the identical file, which returns UIViewRepresentable. Then, we’ll implement some methodology inside it, which can create a UIView and can permit us to speak with it:
import UIKit
import FSCalendar
....

struct CalendarView: View {
    var physique: some View {
      CalendarViewRepresentable(selectedDate: $selectedDate)
    }
}

struct CalendarViewRepresentable: UIViewRepresentable {
    typealias UIViewType = FSCalendar

    func makeUIView(context: Context) -> FSCalendar {
      return FSCalendar()
    }

    func updateUIView(_ uiView: FSCalendar, context: Context) {}

    func makeCoordinator() -> Coordinator {
        Coordinator(self)
    }

    class Coordinator: NSObject,
          FSCalendarDelegate, FSCalendarDataSource {
            var mother or father: CalendarViewRepresentable

            init(_ mother or father: CalendarViewRepresentable) {
                self.mother or father = mother or father
            }
    }
}
Within the code above, we’ve applied three strategies and one class:
makeUIView: Creates the UIView that shall be rendered on the UI. For now, we straight return an occasion ofFSCalendar, which we’ll change as we transfer ahead to present us extra management over the calendarupdateUIView: Used to replace state of the view. We gained’t want this for this tutorial.makeCoordinator: Used to create a customized occasion that we will use to speak between SwiftUI and UIKit viewsCoordinator: The customized occasion that’s returned frommakeCoordinator
Utilizing the code above, we now have an FSCalendar view in our utility, which can appear like the picture under by default:
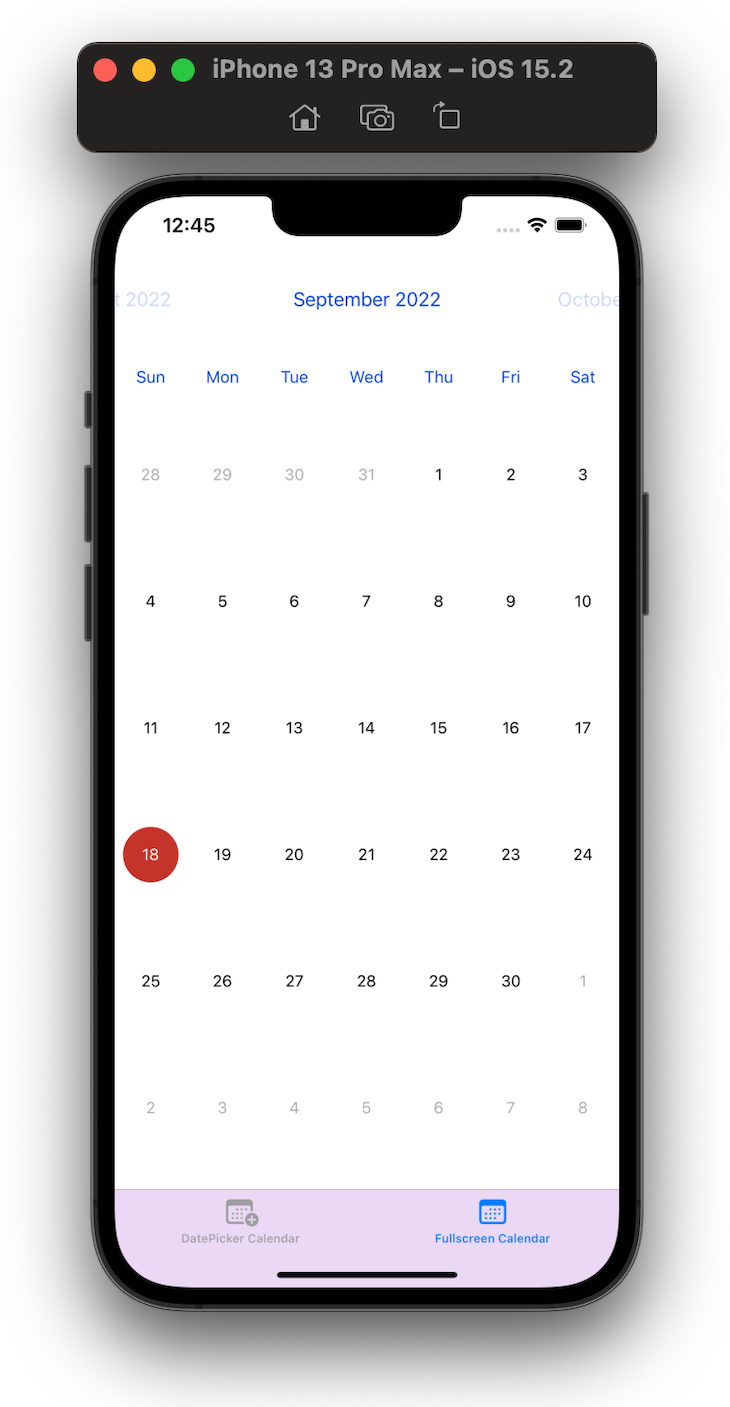
Displaying a calendar view with FSCalendar
We’ve efficiently rendered a calendar view in our app UI. Now, let’s set the date worth chosen by the consumer on the calendar. To take action, we’ll create a calendar variable inside our CalendarViewRepresentable and customise it because the consumer performs interactions on the UI:
struct CalendarView: View {
  // Added a @State var to trace the chosen date by consumer
  @State var selectedDate: Date = Date()

  var physique: some View {
        VStack {
            // Displaying the chosen date
            FormattedDate(selectedDate: selectedDate, omitTime: true)
            // Passing the selectedDate as Binding
            CalendarViewRepresentable(selectedDate: $selectedDate)
        }
  }
}

struct CalendarViewRepresentable: UIViewRepresentable {
  ...
  // Making a object of FSCalendar to trace throughout the view
  fileprivate var calendar = FSCalendar()

  // Getting selectedDate as a Binding in order that we will replace it as
  // consumer modifications their choice
  @Binding var selectedDate: Date

  func makeUIView(context: Context) -> FSCalendar {
          // Setting delegate and dateSource of calendar to the
          // values we get from Coordinator
          calendar.delegate = context.coordinator
          calendar.dataSource = context.coordinator
          // returning the intialized calendar
          return calendar
  }

  ....


    class Coordinator: NSObject,
                        FSCalendarDelegate, FSCalendarDataSource {
        ....
        // Implementing the didSelect methodology of FSCalendar
        // that is fired with the brand new date when consumer selects a brand new date
        // within the Calendar UI, we're setting our selectedDate Binding
        // var to this new date when that is triggered
        func calendar(_ calendar: FSCalendar,
                        didSelect date: Date,
                        at monthPosition: FSCalendarMonthPosition) {
            mother or father.selectedDate = date
        }
    }

  ....
}
Now, our calendar UI will appear like the picture under:
Customizing the calendar UI
Now that we’ve applied a working calendar in our SwiftUI utility, let’s customise the calendar. FSCalendar comes with loads of customizability options. You’ll be able to have a full have a look at them on the GitHub repo.
After including some customized options and kinds to our calendar, the ultimate code in our CalendarView file shall be as follows:
import SwiftUI
import UIKit
import FSCalendar

struct CalendarView: View {

    @State var selectedDate: Date = Date()

    var physique: some View {
              CalendarViewRepresentable(selectedDate: $selectedDate)
                .padding(.backside)
                .padding(EdgeInsets(prime: 40,
                          main: 0, backside: 0, trailing: 0))
                .background{
                    AsyncImage(url: URL(
                                string: "https://photographs.pexels.com/pictures/1939485/pexels-photo-1939485.jpeg")){ img in
                        img.resizable(resizingMode: .stretch)
                            .blur(radius: 4, opaque: true)
                    } placeholder: {
                        LinearGradient(colours: [.red.opacity(0.4),
                                      .green.opacity(0.4)],
                                      startPoint: .prime,
                                      endPoint: .backside)
                    }
                }
                .ignoresSafeArea(.all, edges: .prime)
    }
}

struct CalendarViewRepresentable: UIViewRepresentable {
    typealias UIViewType = FSCalendar

    fileprivate var calendar = FSCalendar()
    @Binding var selectedDate: Date

    func makeUIView(context: Context) -> FSCalendar {
        calendar.delegate = context.coordinator
        calendar.dataSource = context.coordinator

        // Added the under code to alter calendar look
        calendar.look.todayColor = UIColor(displayP3Red: 0,
                                                  inexperienced: 0,
                                                  blue: 0, alpha: 0)
        calendar.look.titleTodayColor = .black
        calendar.look.selectionColor = .orange
        calendar.look.eventDefaultColor = .purple
        calendar.look.titleTodayColor = .blue
        calendar.look.titleFont = .boldSystemFont(ofSize: 24)
        calendar.look.titleWeekendColor = .systemOrange
        calendar.look.headerMinimumDissolvedAlpha = 0.12
        calendar.look.headerTitleFont = .systemFont(
                                                ofSize: 30,
                                                weight: .black)
        calendar.look.headerTitleColor = .darkGray
        calendar.look.headerDateFormat = "MMMM"
        calendar.scrollDirection = .vertical
        calendar.scope = .month
        calendar.clipsToBounds = false

        return calendar
    }

    func updateUIView(_ uiView: FSCalendar, context: Context) {}

    func makeCoordinator() -> Coordinator {
        Coordinator(self)
    }

    class Coordinator: NSObject,
          FSCalendarDelegate, FSCalendarDataSource {
        var mother or father: CalendarViewRepresentable

        init(_ mother or father: CalendarViewRepresentable) {
            self.mother or father = mother or father
        }

        func calendar(_ calendar: FSCalendar,
                      didSelect date: Date,
                      at monthPosition: FSCalendarMonthPosition) {
            mother or father.selectedDate = date
        }

        func calendar(_ calendar: FSCalendar,
                  imageFor date: Date) -> UIImage? {
            if isWeekend(date: date) {
                return UIImage(systemName: "sparkles")
            }
            return nil
        }

        func calendar(_ calendar: FSCalendar,
                      numberOfEventsFor date: Date) -> Int {
            let eventDates = [Date(), Date(),
                                Date.now.addingTimeInterval(400000),
                                Date.now.addingTimeInterval(100000),
                                Date.now.addingTimeInterval(-600000),
                                Date.now.addingTimeInterval(-1000000)]
            var eventCount = 0
            eventDates.forEach { eventDate in
                if eventDate.formatted(date: .full,
                              time: .omitted) == date.formatted(
                                date: .full, time: .omitted){
                    eventCount += 1;
                }
            }
            return eventCount
        }

        func calendar(_ calendar: FSCalendar, shouldSelect date: Date, at monthPosition: FSCalendarMonthPosition) -> Bool {
            if isWeekend(date: date) {
                return false
            }
            return true
        }

        func maximumDate(for calendar: FSCalendar) -> Date {
            Date.now.addingTimeInterval(86400 * 30)
        }

        func minimumDate(for calendar: FSCalendar) -> Date {
            Date.now.addingTimeInterval(-86400 * 30)
        }
    }
}

func isWeekend(date: Date) -> Bool {
    let dateFormatter = DateFormatter()
    dateFormatter.dateFormat = "EEEE"
    let day: String = dateFormatter.string(from: date)
    if day == "Saturday" || day == "Sunday" {
        return true
    }
    return false
}
The code above will give us an output just like the picture under:

Conclusion
On this tutorial, we discovered create a CalendarView UI utilizing the DatePicker management. We additionally discovered implement a calendar library to attain our finish UI consequence by incorporating a UIViewRepresentable to render a UIKit view inside a SwiftUI utility.
Thanks for studying!
