
On this article, we’ll be utilizing Whisper to create a speech-to-text software. Whisper requires Python backends, so we’ll create the server for the applying with Flask.
React Native serves because the framework for constructing our cell shopper. I hope you benefit from the course of of making this software as a result of I certain did. Let’s dive proper into it.
Leap forward:
What’s speech recognition?
Speech recognition allows a program to course of human speech right into a written format. Grammar, syntax, construction, and audio are important for understanding and processing human speech.
Speech recognition algorithms are one of the vital complicated areas of laptop science. Synthetic intelligence, machine studying, the event of unsupervised pre-training strategies, and frameworks similar to Wav2Vec 2.0, that are efficient at self-supervised studying and studying from uncooked audio, have superior their capabilities.
Speech recognizers include the next elements:
- Speech enter
- A decoder, which depends on acoustic fashions, pronunciation dictionaries, and language fashions for outputs
- The phrase output
These elements and advances in know-how allow the consumption of huge datasets of unlabeled speech. Pre-trained audio encoders are able to studying high-quality representations of speech; their solely draw back is their unsupervised nature.
What’s a decoder?
A performant decoder maps speech representations to usable outputs. Decoders resolve the supervisory points with audio encoders. However, the decoder limits the effectiveness of frameworks similar to Wav2Vec for speech recognition. A decoder might be fairly complicated to make use of and requires a talented practitioner, particularly as a result of applied sciences similar to Wav2Vec 2.0 are troublesome to make use of.
The secret’s to mix as many high-quality speech recognition datasets as doable. Fashions educated on this method are simpler than these educated on a single supply.
What’s Whisper?
Whisper, or WSPR, stands for Internet-scale Supervised Pretraining for Speech Recognition. Whisper fashions obtain coaching to have the ability to predict the textual content of transcripts.
Whisper depends on sequence-to-sequence fashions to map between utterances and their transcribed varieties, which makes the speech recognition pipeline simpler. Whisper comes with an audio language detector, a fine-tuned mannequin educated on VoxLingua107.
The Whisper dataset consists of audio paired with transcripts from the web. The standard of the dataset improves with using automated filtering strategies.
Organising Whisper
To make use of Whisper, we’ll have to depend on Python for our backend. Whisper additionally wants the command-line device ffmpeg, which allows our software to file, convert, and stream each audio and video.
Under are the required instructions to put in ffgmeg on completely different machines:
# on Ubuntu or Debian
sudo apt replace && sudo apt set up ffmpeg


# on Arch Linux
sudo pacman -S ffmpeg


# on MacOS utilizing Homebrew (https://brew.sh/)
brew set up ffmpeg


# on Home windows utilizing Chocolatey (https://chocolatey.org/)
choco set up ffmpeg


# on Home windows utilizing Scoop (https://scoop.sh/)
scoop set up ffmpeg
Making a backend software with Flask
On this part, we’ll create the backend service for our app. Flask is an internet framework written in Python. I selected to make use of Flask for this software resulting from its ease of setup.
The Flask growth staff recommends utilizing the newest model of Python, although Flask maintains help for Python ≥ 3.7.
As soon as the set up of the stipulations completes, we are able to create our challenge folder to carry each our shopper and backend purposes.
mkdir translateWithWhisper && cd translateWithWhisper && mkdir backend && cd backend
Flask makes use of digital environments to handle challenge dependencies; Python has an out-of-the-box venv module for creating them.
Use the under command within the terminal window to create the venv folder. This folder holds our dependencies.
python3 -m venv venv
Specifying challenge dependencies
Utilizing a necessities.txt file, specify the required dependencies. The necessities.txt file lives within the root of the backend listing.
contact necessities.txt
code necessities.txt
Copy and paste the code under into the necessities.txt file:
numpy
tqdm
transformers>=4.19.0
ffmpeg-python==0.2.0
pyaudio
SpeechRecognition
pydub
git+https://github.com/openai/whisper.git
--extra-index-url https://obtain.pytorch.org/whl/cu113
torch
flask
flask_cors
Making a Bash shell script to put in dependencies
Within the root challenge listing, create a Bash shell script file. The Bash script handles the set up of dependencies within the Flask software.
Within the root challenge listing, open a terminal window. Use the under command to create the shell script:
contact install_dependencies.sh
code install_dependencies.sh
Copy and paste the under code block into the install_dependencies.sh file:
# set up and run backend
cd backend && python3 -m venv venv
supply venv/Scripts/activate

pip set up wheel
pip set up -r necessities.txt
Now, open a terminal window within the root listing and run the next command:
sh .install_dependencies.sh
Making a transcribe endpoint
Now, we’ll create a transcribe endpoint in our software, which is able to obtain audio inputs from the shopper. The applying will transcribe the enter and return the transcribed textual content to the shopper.
This endpoint accepts a POST request and processes the enter. When the response is a 200 HTTP response, the shopper receives the transcribed textual content.
Create an app.py file to carry the logic for processing the enter. Open a brand new terminal window and within the backend listing create an app.py file:
contact backend/app.py
code backend/app.py
Copy and paste the code block under into the app.py file:
import os
import tempfile
import flask
from flask import request
from flask_cors import CORS
import whisper

app = flask.Flask(__name__)
CORS(app)

// endpoint for dealing with the transcribing of audio inputs
@app.route('/transcribe', strategies=['POST'])
def transcribe():
    if request.technique == 'POST
        language = request.type['language']
        mannequin = request.type['model_size']

        # there aren't any english fashions for big
        if mannequin != 'giant' and language == 'english':
            mannequin = mannequin + '.en'
        audio_model = whisper.load_model(mannequin)

        temp_dir = tempfile.mkdtemp()
        save_path = os.path.be part of(temp_dir, 'temp.wav')

        wav_file = request.information['audio_data']
        wav_file.save(save_path)

        if language == 'english':
            outcome = audio_model.transcribe(save_path, language="english")
        else:
            outcome = audio_model.transcribe(save_path)

        return outcome['text']
    else:
        return "This endpoint solely processes POST wav blob"
Run the Flask software
Within the activated terminal window, which comprises the venv variable, run the next command to start out the applying:
$ cd backend
$ flask run –port 8000
The expectation is that the applying begins with none errors. If that’s the case, the next outcome must be seen within the terminal window:

That closes out the creation of our transcribe endpoint in our Flask software.
Internet hosting the server
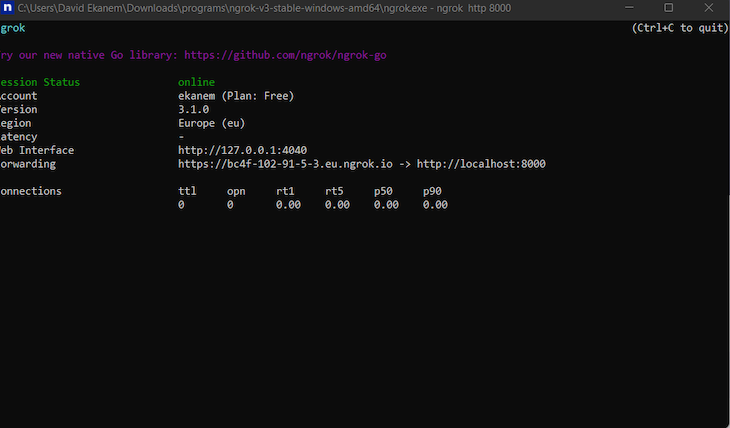
To make community requests to the created HTTP endpoint in iOS, we’ll have to path to an HTTPS server. ngrok solves the problem of making a re-route.
Obtain ngrok, then set up the bundle and open it. A terminal window fires up; enter the next command to host the server with ngrok:
ngrok http 8000
ngrok will generate a hosted URL, which can be used within the shopper software for requests.
Making a speech recognition cell software with React Native
For this a part of the tutorial, you’ll want to put in a couple of issues:
- Expo CLI: command-line device for interfacing with Expo instruments
- Expo Go app for Android and iOS: used for opening up the purposes served via the Expo CLI
In a brand new terminal window, initialize the React Native challenge:
npx create-expo-app shopper
cd shopper
Now, begin the event server:
npx expo begin
To open the app on an iOS system, open the digital camera and scan the QR code on the terminal. On Android gadgets, press Scan the QR code on the Dwelling tab of the Expo Go app.

Dealing with audio recording
Expo-av handles the recording of audio in our software. Our Flask server expects the file in .wav format. The expo-av bundle permits us to specify the format earlier than saving.
Set up obligatory packages within the terminal:
yarn add axios expo-av react-native-picker-select
Making a mannequin selector
It’s crucial that the applying is ready to choose the mannequin measurement. There are 5 choices to select from:
- Tiny
- Base
- Small
- Medium
- Massive
The chosen enter measurement determines what mannequin to match the enter to on the server.
Extra nice articles from LogRocket:
Within the terminal once more, use the under instructions to create a src folder and a sub-folder known as /elements:
mkdir src
mkdir src/elements
contact src/elements/Mode.tsx
code src/elements/Mode.tsx
Paste the code block into the Mode.tsx file:
import React from "react";
import { View, Textual content, StyleSheet } from "react-native";
import RNPickerSelect from "react-native-picker-select";

const Mode = ({
  onModelChange,
  transcribeTimeout,
  onTranscribeTimeoutChanged,
}: any) => {
  perform onModelChangeLocal(worth: any) {
    onModelChange(worth);
  }

  perform onTranscribeTimeoutChangedLocal(occasion: any) {
    onTranscribeTimeoutChanged(occasion.goal.worth);
  }

  return (
    <View>
      <Textual content model={kinds.title}>Mannequin Dimension</Textual content>
      <View model={{ flexDirection: "row" }}>
        <RNPickerSelect
          onValueChange={(worth) => onModelChangeLocal(worth)}
          useNativeAndroidPickerStyle={false}
          placeholder={{ label: "Choose mannequin", worth: null }}
          gadgets={[
            { label: "tiny", value: "tiny" },
            { label: "base", value: "base" },
            { label: "small", value: "small" },
            { label: "medium", value: "medium" },
            { label: "large", value: "large" },
          ]}
          model={customPickerStyles}
        />
      </View>
      <View>
        <Textual content model={kinds.title}>Timeout :{transcribeTimeout}</Textual content>
      </View>
    </View>
  );
};

export default Mode;
const kinds = StyleSheet.create({
  title: {
    fontWeight: "200",
    fontSize: 25,
    float: "left",
  },
});
const customPickerStyles = StyleSheet.create({
  inputIOS: {
    fontSize: 14,
    paddingVertical: 10,
    paddingHorizontal: 12,
    borderWidth: 1,
    borderColor: "inexperienced",
    borderRadius: 8,
    colour: "black",
    paddingRight: 30, // to make sure the textual content isn't behind the icon
  },
  inputAndroid: {
    fontSize: 14,
    paddingHorizontal: 10,
    paddingVertical: 8,
    borderWidth: 1,
    borderColor: "blue",
    borderRadius: 8,
    colour: "black",
    paddingRight: 30, // to make sure the textual content isn't behind the icon
  },
});
Creating the Transcribe output
The server returns an output with textual content. This element receives the output information and shows it.
mkdir src
mkdir src/elements
contact src/elements/TranscribeOutput.tsx
code src/elements/TranscribeOutput.tsx
Paste the code block into the TranscribeOutput.tsx file:
import React from "react";
import { Textual content, View, StyleSheet } from "react-native";
const TranscribedOutput = ({
  transcribedText,
  interimTranscribedText,
}: any) => {
  if (transcribedText.size === 0 && interimTranscribedText.size === 0) {
    return <Textual content>...</Textual content>;
  }

  return (
    <View model={kinds.field}>
      <Textual content model={kinds.textual content}>{transcribedText}</Textual content>
      <Textual content>{interimTranscribedText}</Textual content>
    </View>
  );
};
const kinds = StyleSheet.create({
  field: {
    borderColor: "black",
    borderRadius: 10,
    marginBottom: 0,
  },
  textual content: {
    fontWeight: "400",
    fontSize: 30,
  },
});

export default TranscribedOutput;
Creating shopper performance
The applying depends on Axios to ship and obtain the info from the Flask server; we put in it in an earlier part. The default language for testing the applying is English.
Within the App.tsx file, import the required dependencies:
import * as React from "react";
import {
  Textual content,
  StyleSheet,
  View,
  Button,
  ActivityIndicator,
} from "react-native";
import { Audio } from "expo-av";
import FormData from "form-data";
import axios from "axios";
import Mode from "./src/elements/Mode";
import TranscribedOutput from "./src/elements/TranscribeOutput";
Creating state variables
The applying wants to trace recordings, transcribed information, recording, and transcribing in progress. The language, mannequin, and timeouts are set by default within the state.
export default () => {
  const [recording, setRecording] = React.useState(false as any);
  const [recordings, setRecordings] = React.useState([]);
  const [message, setMessage] = React.useState("");
  const [transcribedData, setTranscribedData] = React.useState([] as any);
  const [interimTranscribedData] = React.useState("");
  const [isRecording, setIsRecording] = React.useState(false);
  const [isTranscribing, setIsTranscribing] = React.useState(false);
  const [selectedLanguage, setSelectedLanguage] = React.useState("english");
  const [selectedModel, setSelectedModel] = React.useState(1);
  const [transcribeTimeout, setTranscribeTimout] = React.useState(5);
  const [stopTranscriptionSession, setStopTranscriptionSession] =
    React.useState(false);
  const [isLoading, setLoading] = React.useState(false);
  return (
    <View model={kinds.root}></View>
)
}

const kinds = StyleSheet.create({
  root: {
    show: "flex",
    flex: 1,
    alignItems: "middle",
    textAlign: "middle",
    flexDirection: "column",
  },
});
Creating references, language, and mannequin choices variables
The useRef Hook allows us to trace the present initialized property. We wish to set useRef on the transcription session, language, and mannequin.
Paste the code block below the setLoading useState Hook:
  const [isLoading, setLoading] = React.useState(false);
  const intervalRef: any = React.useRef(null);

  const stopTranscriptionSessionRef = React.useRef(stopTranscriptionSession);
  stopTranscriptionSessionRef.present = stopTranscriptionSession;

  const selectedLangRef = React.useRef(selectedLanguage);
  selectedLangRef.present = selectedLanguage;

  const selectedModelRef = React.useRef(selectedModel);
  selectedModelRef.present = selectedModel;

  const supportedLanguages = [
    "english",
    "chinese",
    "german",
    "spanish",
    "russian",
    "korean",
    "french",
    "japanese",
    "portuguese",
    "turkish",
    "polish",
    "catalan",
    "dutch",
    "arabic",
    "swedish",
    "italian",
    "indonesian",
    "hindi",
    "finnish",
    "vietnamese",
    "hebrew",
    "ukrainian",
    "greek",
    "malay",
    "czech",
    "romanian",
    "danish",
    "hungarian",
    "tamil",
    "norwegian",
    "thai",
    "urdu",
    "croatian",
    "bulgarian",
    "lithuanian",
    "latin",
    "maori",
    "malayalam",
    "welsh",
    "slovak",
    "telugu",
    "persian",
    "latvian",
    "bengali",
    "serbian",
    "azerbaijani",
    "slovenian",
    "kannada",
    "estonian",
    "macedonian",
    "breton",
    "basque",
    "icelandic",
    "armenian",
    "nepali",
    "mongolian",
    "bosnian",
    "kazakh",
    "albanian",
    "swahili",
    "galician",
    "marathi",
    "punjabi",
    "sinhala",
    "khmer",
    "shona",
    "yoruba",
    "somali",
    "afrikaans",
    "occitan",
    "georgian",
    "belarusian",
    "tajik",
    "sindhi",
    "gujarati",
    "amharic",
    "yiddish",
    "lao",
    "uzbek",
    "faroese",
    "haitian creole",
    "pashto",
    "turkmen",
    "nynorsk",
    "maltese",
    "sanskrit",
    "luxembourgish",
    "myanmar",
    "tibetan",
    "tagalog",
    "malagasy",
    "assamese",
    "tatar",
    "hawaiian",
    "lingala",
    "hausa",
    "bashkir",
    "javanese",
    "sundanese",
  ];

  const modelOptions = ["tiny", "base", "small", "medium", "large"];
  React.useEffect(() => {
    return () => clearInterval(intervalRef.present);
  }, []);

  perform handleTranscribeTimeoutChange(newTimeout: any) {
    setTranscribeTimout(newTimeout);
  }
Creating the recording capabilities
On this part, we’ll write 5 capabilities to deal with audio transcription.
The startRecording perform
The primary perform is the startRecording perform. This perform allows the applying to request permission to make use of the microphone. The specified audio format is preset and now we have a ref for monitoring the timeout:
  async perform startRecording() {
    strive {
      console.log("Requesting permissions..");
      const permission = await Audio.requestPermissionsAsync();
      if (permission.standing === "granted") {
        await Audio.setAudioModeAsync({
          allowsRecordingIOS: true,
          playsInSilentModeIOS: true,
        });
        alert("Beginning recording..");
        const RECORDING_OPTIONS_PRESET_HIGH_QUALITY: any = {
          android: {
            extension: ".mp4",
            outputFormat: Audio.RECORDING_OPTION_ANDROID_OUTPUT_FORMAT_MPEG_4,
            audioEncoder: Audio.RECORDING_OPTION_ANDROID_AUDIO_ENCODER_AMR_NB,
            sampleRate: 44100,
            numberOfChannels: 2,
            bitRate: 128000,
          },
          ios: {
            extension: ".wav",
            audioQuality: Audio.RECORDING_OPTION_IOS_AUDIO_QUALITY_MIN,
            sampleRate: 44100,
            numberOfChannels: 2,
            bitRate: 128000,
            linearPCMBitDepth: 16,
            linearPCMIsBigEndian: false,
            linearPCMIsFloat: false,
          },
        };
        const { recording }: any = await Audio.Recording.createAsync(
          RECORDING_OPTIONS_PRESET_HIGH_QUALITY
        );
        setRecording(recording);
        console.log("Recording began");
        setStopTranscriptionSession(false);
        setIsRecording(true);
        intervalRef.present = setInterval(
          transcribeInterim,
          transcribeTimeout * 1000
        );
        console.log("erer", recording);
      } else {
        setMessage("Please grant permission to app to entry microphone");
      }
    } catch (err) {
      console.error(" Failed to start out recording", err);
    }
  }
The stopRecording perform
The stopRecording perform allows the consumer to cease the recording. The recording state variable shops and maintain the up to date recordings.
  async perform stopRecording() {
    console.log("Stopping recording..");
    setRecording(undefined);
    await recording.stopAndUnloadAsync();
    const uri = recording.getURI();
    let updatedRecordings = [...recordings] as any;
    const { sound, standing } = await recording.createNewLoadedSoundAsync();
    updatedRecordings.push({
      sound: sound,
      period: getDurationFormatted(standing.durationMillis),
      file: recording.getURI(),
    });
    setRecordings(updatedRecordings);
    console.log("Recording stopped and saved at", uri);
    // Fetch audio binary blob information

    clearInterval(intervalRef.present);
    setStopTranscriptionSession(true);
    setIsRecording(false);
    setIsTranscribing(false);
  }
The getDurationFormatted and getRecordingLines capabilities
To get the period of the recording and the size of the recorded textual content, create the getDurationFormatted and getRecordingLines capabilities:
  perform getDurationFormatted(millis: any) {
    const minutes = millis / 1000 / 60;
    const minutesDisplay = Math.ground(minutes);
    const seconds = Math.spherical(minutes - minutesDisplay) * 60;
    const secondDisplay = seconds < 10 ? `0${seconds}` : seconds;
    return `${minutesDisplay}:${secondDisplay}`;
  }

  perform getRecordingLines() {
    return recordings.map((recordingLine: any, index) => {
      return (
        <View key={index} model={kinds.row}>
          <Textual content model={kinds.fill}>
            {" "}
            Recording {index + 1} - {recordingLine.period}
          </Textual content>
          <Button
            model={kinds.button}
            onPress={() => recordingLine.sound.replayAsync()}
            title="Play"
          ></Button>
        </View>
      );
    });
  }
Create transcribeRecording perform
This perform permits us to speak with our Flask server. We entry our created audio utilizing the getURI() perform from the expo-av library. The language, model_size, and audio_data are the important thing items of information we ship to the server.
A 200 response signifies success. We retailer the response within the setTranscribedData useState Hook. This response comprises our transcribed textual content.
perform transcribeInterim() {
    clearInterval(intervalRef.present);
    setIsRecording(false);
  }

  async perform transcribeRecording() {
    const uri = recording.getURI();
    const filetype = uri.cut up(".").pop();
    const filename = uri.cut up("https://weblog.logrocket.com/").pop();
    setLoading(true);
    const formData: any = new FormData();
    formData.append("language", selectedLangRef.present);
    formData.append("model_size", modelOptions[selectedModelRef.current]);
    formData.append(
      "audio_data",
      {
        uri,
        kind: `audio/${filetype}`,
        title: filename,
      },
      "temp_recording"
    );
    axios({
      url: "https://2c75-197-210-53-169.eu.ngrok.io/transcribe",
      technique: "POST",
      information: formData,
      headers: {
        Settle for: "software/json",
        "Content material-Kind": "multipart/form-data",
      },
    })
      .then(perform (response) {
        console.log("response :", response);
        setTranscribedData((oldData: any) => [...oldData, response.data]);
        setLoading(false);
        setIsTranscribing(false);
        intervalRef.present = setInterval(
          transcribeInterim,
          transcribeTimeout * 1000
        );
      })
      .catch(perform (error) {
        console.log("error : error");
      });

    if (!stopTranscriptionSessionRef.present) {
      setIsRecording(true);
    }
  }
Assembling the applying
Let’s assemble all of the elements created to this point:
import * as React from "react";
import {
  Textual content,
  StyleSheet,
  View,
  Button,
  ActivityIndicator,
} from "react-native";
import { Audio } from "expo-av";
import FormData from "form-data";
import axios from "axios";
import Mode from "./src/elements/Mode";
import TranscribedOutput from "./src/elements/TranscribeOutput";

export default () => {
  const [recording, setRecording] = React.useState(false as any);
  const [recordings, setRecordings] = React.useState([]);
  const [message, setMessage] = React.useState("");
  const [transcribedData, setTranscribedData] = React.useState([] as any);
  const [interimTranscribedData] = React.useState("");
  const [isRecording, setIsRecording] = React.useState(false);
  const [isTranscribing, setIsTranscribing] = React.useState(false);
  const [selectedLanguage, setSelectedLanguage] = React.useState("english");
  const [selectedModel, setSelectedModel] = React.useState(1);
  const [transcribeTimeout, setTranscribeTimout] = React.useState(5);
  const [stopTranscriptionSession, setStopTranscriptionSession] =
    React.useState(false);
  const [isLoading, setLoading] = React.useState(false);
  const intervalRef: any = React.useRef(null);

  const stopTranscriptionSessionRef = React.useRef(stopTranscriptionSession);
  stopTranscriptionSessionRef.present = stopTranscriptionSession;

  const selectedLangRef = React.useRef(selectedLanguage);
  selectedLangRef.present = selectedLanguage;

  const selectedModelRef = React.useRef(selectedModel);
  selectedModelRef.present = selectedModel;

  const supportedLanguages = [
    "english",
    "chinese",
    "german",
    "spanish",
    "russian",
    "korean",
    "french",
    "japanese",
    "portuguese",
    "turkish",
    "polish",
    "catalan",
    "dutch",
    "arabic",
    "swedish",
    "italian",
    "indonesian",
    "hindi",
    "finnish",
    "vietnamese",
    "hebrew",
    "ukrainian",
    "greek",
    "malay",
    "czech",
    "romanian",
    "danish",
    "hungarian",
    "tamil",
    "norwegian",
    "thai",
    "urdu",
    "croatian",
    "bulgarian",
    "lithuanian",
    "latin",
    "maori",
    "malayalam",
    "welsh",
    "slovak",
    "telugu",
    "persian",
    "latvian",
    "bengali",
    "serbian",
    "azerbaijani",
    "slovenian",
    "kannada",
    "estonian",
    "macedonian",
    "breton",
    "basque",
    "icelandic",
    "armenian",
    "nepali",
    "mongolian",
    "bosnian",
    "kazakh",
    "albanian",
    "swahili",
    "galician",
    "marathi",
    "punjabi",
    "sinhala",
    "khmer",
    "shona",
    "yoruba",
    "somali",
    "afrikaans",
    "occitan",
    "georgian",
    "belarusian",
    "tajik",
    "sindhi",
    "gujarati",
    "amharic",
    "yiddish",
    "lao",
    "uzbek",
    "faroese",
    "haitian creole",
    "pashto",
    "turkmen",
    "nynorsk",
    "maltese",
    "sanskrit",
    "luxembourgish",
    "myanmar",
    "tibetan",
    "tagalog",
    "malagasy",
    "assamese",
    "tatar",
    "hawaiian",
    "lingala",
    "hausa",
    "bashkir",
    "javanese",
    "sundanese",
  ];

  const modelOptions = ["tiny", "base", "small", "medium", "large"];

  React.useEffect(() => {
    return () => clearInterval(intervalRef.present);
  }, []);

  perform handleTranscribeTimeoutChange(newTimeout: any) {
    setTranscribeTimout(newTimeout);
  }

  async perform startRecording() {
    strive {
      console.log("Requesting permissions..");
      const permission = await Audio.requestPermissionsAsync();
      if (permission.standing === "granted") {
        await Audio.setAudioModeAsync({
          allowsRecordingIOS: true,
          playsInSilentModeIOS: true,
        });
        alert("Beginning recording..");
        const RECORDING_OPTIONS_PRESET_HIGH_QUALITY: any = {
          android: {
            extension: ".mp4",
            outputFormat: Audio.RECORDING_OPTION_ANDROID_OUTPUT_FORMAT_MPEG_4,
            audioEncoder: Audio.RECORDING_OPTION_ANDROID_AUDIO_ENCODER_AMR_NB,
            sampleRate: 44100,
            numberOfChannels: 2,
            bitRate: 128000,
          },
          ios: {
            extension: ".wav",
            audioQuality: Audio.RECORDING_OPTION_IOS_AUDIO_QUALITY_MIN,
            sampleRate: 44100,
            numberOfChannels: 2,
            bitRate: 128000,
            linearPCMBitDepth: 16,
            linearPCMIsBigEndian: false,
            linearPCMIsFloat: false,
          },
        };
        const { recording }: any = await Audio.Recording.createAsync(
          RECORDING_OPTIONS_PRESET_HIGH_QUALITY
        );
        setRecording(recording);
        console.log("Recording began");
        setStopTranscriptionSession(false);
        setIsRecording(true);
        intervalRef.present = setInterval(
          transcribeInterim,
          transcribeTimeout * 1000
        );
        console.log("erer", recording);
      } else {
        setMessage("Please grant permission to app to entry microphone");
      }
    } catch (err) {
      console.error(" Failed to start out recording", err);
    }
  }
  async perform stopRecording() {
    console.log("Stopping recording..");
    setRecording(undefined);
    await recording.stopAndUnloadAsync();
    const uri = recording.getURI();
    let updatedRecordings = [...recordings] as any;
    const { sound, standing } = await recording.createNewLoadedSoundAsync();
    updatedRecordings.push({
      sound: sound,
      period: getDurationFormatted(standing.durationMillis),
      file: recording.getURI(),
    });
    setRecordings(updatedRecordings);
    console.log("Recording stopped and saved at", uri);
    // Fetch audio binary blob information

    clearInterval(intervalRef.present);
    setStopTranscriptionSession(true);
    setIsRecording(false);
    setIsTranscribing(false);
  }

  perform getDurationFormatted(millis: any) {
    const minutes = millis / 1000 / 60;
    const minutesDisplay = Math.ground(minutes);
    const seconds = Math.spherical(minutes - minutesDisplay) * 60;
    const secondDisplay = seconds < 10 ? `0${seconds}` : seconds;
    return `${minutesDisplay}:${secondDisplay}`;
  }

  perform getRecordingLines() {
    return recordings.map((recordingLine: any, index) => {
      return (
        <View key={index} model={kinds.row}>
          <Textual content model={kinds.fill}>
            {" "}
            Recording {index + 1} - {recordingLine.period}
          </Textual content>
          <Button
            model={kinds.button}
            onPress={() => recordingLine.sound.replayAsync()}
            title="Play"
          ></Button>
        </View>
      );
    });
  }

  perform transcribeInterim() {
    clearInterval(intervalRef.present);
    setIsRecording(false);
  }

  async perform transcribeRecording() {
    const uri = recording.getURI();
    const filetype = uri.cut up(".").pop();
    const filename = uri.cut up("https://weblog.logrocket.com/").pop();
    setLoading(true);
    const formData: any = new FormData();
    formData.append("language", selectedLangRef.present);
    formData.append("model_size", modelOptions[selectedModelRef.current]);
    formData.append(
      "audio_data",
      {
        uri,
        kind: `audio/${filetype}`,
        title: filename,
      },
      "temp_recording"
    );
    axios({
      url: "https://2c75-197-210-53-169.eu.ngrok.io/transcribe",
      technique: "POST",
      information: formData,
      headers: {
        Settle for: "software/json",
        "Content material-Kind": "multipart/form-data",
      },
    })
      .then(perform (response) {
        console.log("response :", response);
        setTranscribedData((oldData: any) => [...oldData, response.data]);
        setLoading(false);
        setIsTranscribing(false);
        intervalRef.present = setInterval(
          transcribeInterim,
          transcribeTimeout * 1000
        );
      })
      .catch(perform (error) {
        console.log("error : error");
      });

    if (!stopTranscriptionSessionRef.present) {
      setIsRecording(true);
    }
  }
  return (
    <View model={kinds.root}>
      <View model={{ flex: 1 }}>
        <Textual content model={kinds.title}>Speech to Textual content. </Textual content>
        <Textual content model={kinds.title}>{message}</Textual content>
      </View>
      <View model={kinds.settingsSection}>
        <Mode
          disabled= isRecording
          possibleLanguages={supportedLanguages}
          selectedLanguage={selectedLanguage}
          onLanguageChange={setSelectedLanguage}
          modelOptions={modelOptions}
          selectedModel={selectedModel}
          onModelChange={setSelectedModel}
          transcribeTimeout={transcribeTimeout}
          onTranscribeTiemoutChanged={handleTranscribeTimeoutChange}
        />
      </View>
      <View model={kinds.buttonsSection}>
        {!isRecording && !isTranscribing && (
          <Button onPress={startRecording} title="Begin recording" />
        )}
        {(isRecording || isTranscribing) && (
          <Button
            onPress={stopRecording}
            disabled={stopTranscriptionSessionRef.present}
            title="cease recording"
          />
        )}
        <Button title="Transcribe" onPress={() => transcribeRecording()} />
        {getRecordingLines()}
      </View>

      {isLoading !== false ? (
        <ActivityIndicator
          measurement="giant"
          colour="#00ff00"
          hidesWhenStopped={true}
          animating={true}
        />
      ) : (
        <Textual content></Textual content>
      )}

      <View model={kinds.transcription}>
        <TranscribedOutput
          transcribedText={transcribedData}
          interimTranscribedText={interimTranscribedData}
        />
      </View>
    </View>
  );
};

const kinds = StyleSheet.create({
  root: {
    show: "flex",
    flex: 1,
    alignItems: "middle",
    textAlign: "middle",
    flexDirection: "column",
  },
  title: {
    marginTop: 40,
    fontWeight: "400",
    fontSize: 30,
  },
  settingsSection: {
    flex: 1,
  },
  buttonsSection: {
    flex: 1,
    flexDirection: "row",
  },
  transcription: {
    flex: 1,
    flexDirection: "row",
  },
  recordIllustration: {
    width: 100,
  },
  row: {
    flexDirection: "row",
    alignItems: "middle",
    justifyContent: "middle",
  },
  fill: {
    flex: 1,
    margin: 16,
  },
  button: {
    margin: 16,
  },
});
Operating the applying
Run the React Native software utilizing the under command:
yarn begin
The challenge repository is publicly obtainable.
Conclusion
We now have discovered methods to create speech-to-text performance in a React Native app on this article. I foresee Whisper altering how narration and dictation work in on a regular basis life. The strategies coated on this article allow the creation of a dictation app.
I’m excited to see the brand new and modern methods, builders lengthen Whisper, e.g., utilizing Whisper to hold out actions on our cell and net gadgets, or utilizing Whisper to enhance accessibility in our web sites and purposes.
LogRocket: Immediately recreate points in your React Native apps.

LogRocket is a React Native monitoring resolution that helps you reproduce points immediately, prioritize bugs, and perceive efficiency in your React Native apps.
LogRocket additionally helps you enhance conversion charges and product utilization by displaying you precisely how customers are interacting together with your app. LogRocket’s product analytics options floor the the reason why customers do not full a specific move or do not undertake a brand new characteristic.
Begin proactively monitoring your React Native apps — strive LogRocket free of charge.
