
Testing an utility earlier than deploying it to manufacturing ensures an error-free product that features as meant. Understanding how you can carry out the suitable exams and debug your code is a needed talent that may make you a greater developer.
The React Testing Library, additionally referred to as RTL, supplies an answer for testing React parts to imitate how customers work together with them. This method avoids testing the implementation particulars, making our check code simple to take care of.
This lesson will present you how you can use the debug technique supplied by the React Testing Library to establish and analyze check errors. We are going to cowl:
To observe this lesson, guarantee you recognize React and are conversant in React Testing Library.
Including React Testing Library to React apps
To carry out a check on React app with RTL and establish check errors throughout debugging, we should add the testing library to our utility.
React initiatives created with the create-react-app CLI come bundled with RTL, so no set up is required. In any other case, we should add it utilizing npm, like so:
npm set up --save-dev @testing-library/react
We will additionally set up RTL utilizing Yarn, like so:
yarn add --dev @testing-library/react
Along with the testing library, we’ll add the jest-dom utility, which lets us use customized matchers corresponding to .toBeInTheDocument():
npm set up --save-dev @testing-library/jest-dom
Subsequent, let’s clone the React venture that we are going to be utilizing on this tutorial to learn to debug React apps:
git clone https://github.com/Ibaslogic/react-rtl-debug
Then, transfer to the venture folder and generate the node_modules folder:
cd react-rtl-debug

npm set up
# or
yarn
Lastly, run the venture:
npm run begin
# or
yarn begin
You must see the venture open within the browser at port 3000. If it doesn’t open robotically, go to http://localhost:3000/ after efficiently beginning the dev server:

As we are able to see within the GIF above, the appliance reveals a loading message on the preliminary web page load whereas attempting to retrieve and show a listing of posts from a backend server.
If you happen to want a refresher on creating the venture, this put up covers how you can fetch information right into a React venture. The venture file construction ought to look just like the next:
>venture
   ...
    ├── src
    │    ├── parts
    │    │      ├── App.js
    │    │      ├── Header.js
    │    │      └── Posts.js
    │    ├── app.css
    │    ├── index.js
    │    └── setupTest.js
   ...
Now, we are able to begin interacting with the React Testing Library.
Utilizing the React Testing Library
Earlier than we use the debug technique, allow us to discover the RTL amenities so we might be on the identical web page.
RTL supplies strategies that permit us question the DOM nodes and make assertions about their content material. In probably the most simple implementation, we’ll write a check to say that header textual content studying Fetch asynchronous posts shows within the UI of our utility.
In a textual content file referred to as parts/Header.check.js, we are able to add the next code:
import { render, display } from '@testing-library/react';
import Header from './Header';

check('ought to show heading textual content', () => {
  render(<Header />);
  const headingText = display.getByText('Fetch asynchronous posts');
  anticipate(headingText).toBeInTheDocument();
});
The render technique from the React Testing Library lets us render the React element that we need to check into the testing surroundings. In the meantime, the display object supplies entry to question strategies like getByText() to seek out DOM nodes.
Then, within the check block, we asserted that the textual content within the returned DOM node is current on the web page. We used the toBeInTheDocument() matcher from jest-dom for the assertion.
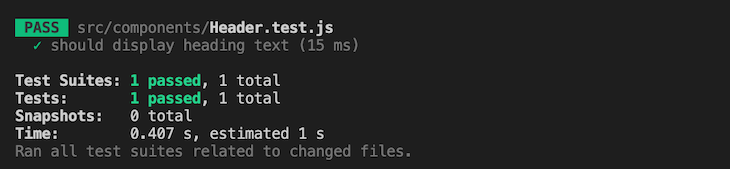
If we save the file and run the check with the npm run check command, the check ought to cross with the next outcome:
Debugging check failures with the React Testing Library
Typically, unknowingly, we might write a check to question a DOM aspect that doesn’t exist. For example, let’s modify the textual content contained in the question we wrote beforehand in order that it doesn’t match a selected aspect, like so:
const headingText = display.getByText(
  'Doesn't exist: Fetch asynchronous posts'
);
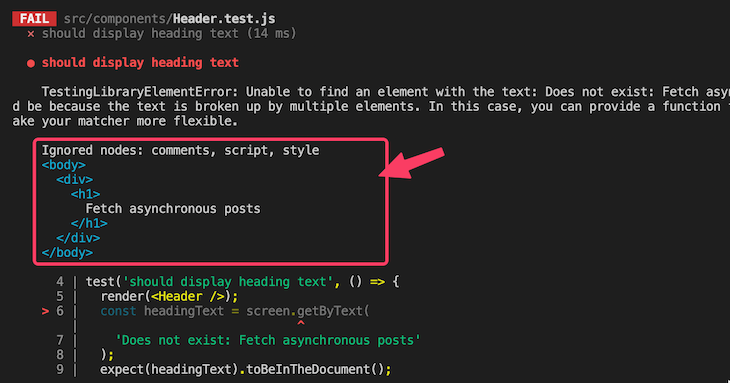
Because of the change above, the check will fail with the next outcome:
Let’s be taught extra about what this outcome tells us within the subsequent part.
Automated logging
When the display.getByText() technique doesn’t discover a matching DOM node, it throws a significant error message, as seen within the picture above. This error incorporates the present state of the DOM, as additionally highlighted within the picture.
This automated logging when a failure happens lets us visualize the DOM, giving us a touch as to why an assertion failed. The picture above reveals that the heading textual content doesn’t match what we supplied within the check block. Now that we’ve positioned the bug, we are able to repair the textual content within the block to make our check succeed.
One stress-reducing testing technique referred to as test-driven growth (TDD) may also help make growth a breeze. This method lets us write check instances primarily based on product necessities earlier than the product is absolutely developed.
Utilizing the display.debug() technique
React Testing Library exposes a debug() technique from the display object to print out the state of the DOM. Along with the automated logging we defined above, the debug() technique may allow us to visualize the DOM tree earlier than writing an assertion.
Understanding the display.debug() syntax
Check out the display.debug() syntax proven under:
display.debug(aspect, maxLengthToPrint, choices);
The primary parameter of the debug() technique is the aspect we wish this technique to print out. This parameter generally is a single aspect or a number of parts. If left undefined, it would default to printing the basis node.
The second parameter lets us specify the content material size to print. The default output size is 7000, which implies the content material can be truncated after seven thousand characters. We will improve or restrict the output size as wanted.
We may additionally need to configure check formatting utilizing the choices parameter. For example, we are able to flip off syntax highlighting within the terminal with the choices parameter like so:
display.debug(undefined, null, { spotlight: false });
Instance utilizing the debug() technique
Utilizing our final check instance, we’ll use the display.debug() technique to debug the doc states and the heading aspect.
First, let’s have a look at debugging the doc states:
check('ought to show heading textual content', () => {
  render(<Header />);
  display.debug();
  // assertion
});
Since we didn’t cross any argument to debug(), it would print the state of the DOM tree like so:
<physique>
  <div>
    <h1>
      Fetch asynchronous posts
    </h1>
  </div>
</physique>
By visualizing the DOM as seen above, we are able to simply establish and analyze check errors as we’ll see later within the lesson.
Extra nice articles from LogRocket:
Subsequent, let’s have a look at debugging the heading aspect. To log the heading aspect, we’ll cross the heading node to debug() like so:
check('ought to show heading textual content', () => {
  render(<Header />);
  const headingText = display.getByText('Fetch asynchronous posts');
  display.debug(headingText);
  // assertion
});
The output:
<h1>
  Fetch asynchronous posts
</h1>
With this output, printed by the debug() technique, we’re positive that the goal aspect is current at that growth stage. This can be useful in making a correct assertion in our check.
Ready for look and disappearance utilizing debug()
Let’s additional discover the React Testing Library debug() technique and see how we are able to use it to look at this system’s state at varied growth phases.
Earlier on this tutorial, we noticed a loading message displayed in our utility whereas information was fetching from the server. As quickly as the info was returned, the loading message disappeared.
We are going to now write a check for this asynchronous operation whereas additionally debugging the check code utilizing the debug() technique.
Creating our check file and checking the DOM state
The element file we’re utilizing in our venture to render the posts is the parts/Posts.js file. In the identical listing, we’ll create a check file referred to as Posts.check.js and add the next code:
import { render, display } from '@testing-library/react';
import Posts from './Posts.js';

check('ought to show loading message', () => {
  render(<Posts />);
  display.debug();
});
If we save the file, we must always see the present state of the DOM:
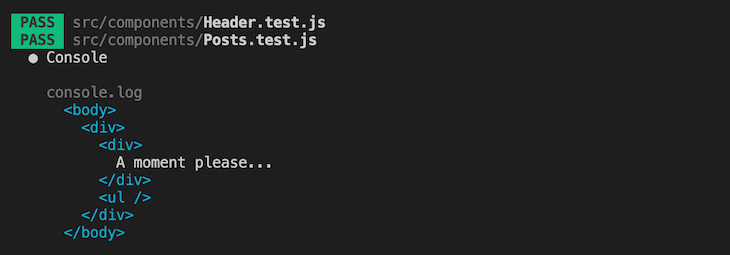
As we are able to see, the present state within the DOM incorporates the loading message. That was anticipated as a result of, at that time, the info hadn’t arrived.
Axios variations newer than v0.27.2 will break Jest exams in CRA
In case you are utilizing the newest model of Axios, it’s possible you’ll obtain the next error:
SyntaxError: Can't use import assertion exterior a module
Observe that this Jest error is because of how newer variations of Axios emit ES modules as an alternative of CommonJS.
A workaround for this error is to replace the check scripts within the package deal.json to the next:
"check": "react-scripts check --transformIgnorePatterns "node_modules/(?!axios)/"",
An alternative choice is to downgrade Axios to v0.27.2 utilizing npm like so:
npm i [email protected]
Then, cease your check with Ctrl + C and rerun it with npm run check. You must now see the present state of the DOM tree.
Asserting that our textual content is within the doc
Now that we all know what the React Testing Library is seeing, we are able to assert that the string A second please… is current within the doc. To take action, replace the check block to the next:
check('ought to show loading message', () => {
  render(<Posts />);
  // display.debug();
  const loadingMessage = display.getByText('A second please...');
  anticipate(loadingMessage).toBeInTheDocument();
});
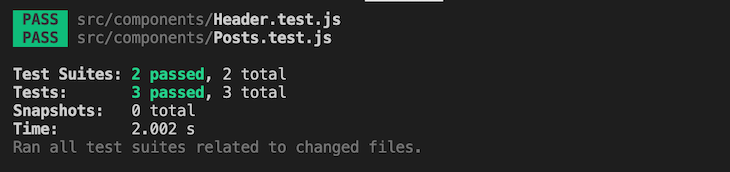
If we save the check file, the check ought to cross with the next outcome:

Testing for look
Right here, we’ll carry out a check exhibiting that our put up information returns from the server and is displayed within the shopper. We’ll additionally use the debug technique to make the testing course of simple.
Since we’re fetching the posts information asynchronously, we should arrange our check to attend for the posts earlier than it shows within the DOM.
RTL supplies async strategies like findBy* and waitFor for such operations. These strategies return guarantees, so we’ll deal with them as such by utilizing the await key phrase when calling them.
The code under performs an asynchronous check utilizing the findBy* async technique:
check('ought to fetch and show asynchronous posts', async () => {
  render(<Posts />);
  display.debug(); //put up initially not current
  const postItemNode = await display.findByText('qui est esse');
  display.debug(); //put up is current
});
findBy* returns a promise that can solely resolve when a component is discovered or rejected for different instances. We’ve dealt with this returned promise with the await key phrase to stop the check from finishing earlier than the async promise settles.
This motion helps keep away from false-positive failures — a state of affairs the place a check passes even when the appliance breaks.
Discover how we strategically positioned the debug() technique to visualise the DOM tree earlier than and after the put up information arrives. See the output under:
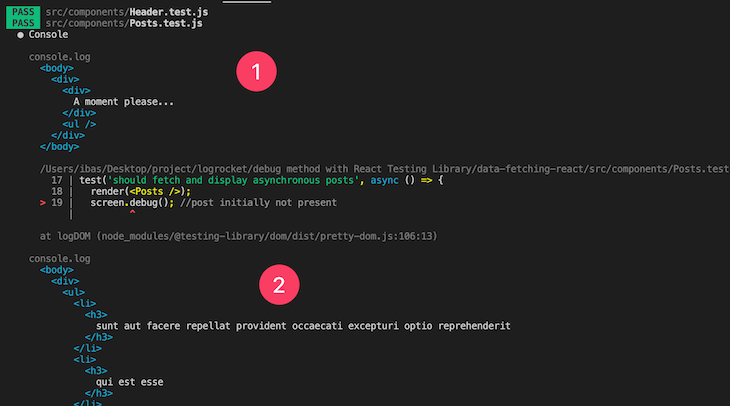
As we are able to see, the debug technique helps simulate the app’s habits. When the web page initially hundreds, it prints a loading message. When the info returns, it replaces the loading message with the info.
Now that we’re positive that the put up information has arrived, we are able to carry out an assertion {that a} put up merchandise is current within the DOM:
check('ought to fetch and show asynchronous posts', async () => {
  render(<Posts />);
  const postItemNode = await display.findByText('qui est esse');
  anticipate(postItemNode).toBeInTheDocument();
});
The check ought to cross with the next outcome:
Keep away from hitting the precise API
In actuality, we shouldn’t hit the precise API when performing a check. Avoiding this can stop the check from being sluggish and fragile. As an alternative, we must always create mock information to mannequin the API interplay.
As a result of this lesson focuses on the debug technique, we is not going to cowl mocking an API. Nonetheless, this venture’s GitHub repository implements API mocking utilizing Mock Service Employee (MSW).
Testing for disappearance
To complete up our lesson on the React Testing Library debug technique, we are able to check that the loading message is initially current on web page load after which disappears as soon as the put up information arrives. The check code appears to be like like so:
check('Ought to show loading message and disappear when posts arrive', async () => {
  render(<Posts />);
  display.debug(); //message initially current
  await waitForElementToBeRemoved(() =>
    display.getByText('A second please...')
  );
  display.debug(); //loading message not current
});
Although not the main target, RTL supplies the waitForElementToBeRemoved helper operate to check that a component initially seems and later disappears asynchronously. It returns a promise that can resolve when the goal node is faraway from the DOM.
The debug() technique placement lets us visualize the DOM tree earlier than and after the loading message disappears. See the output:
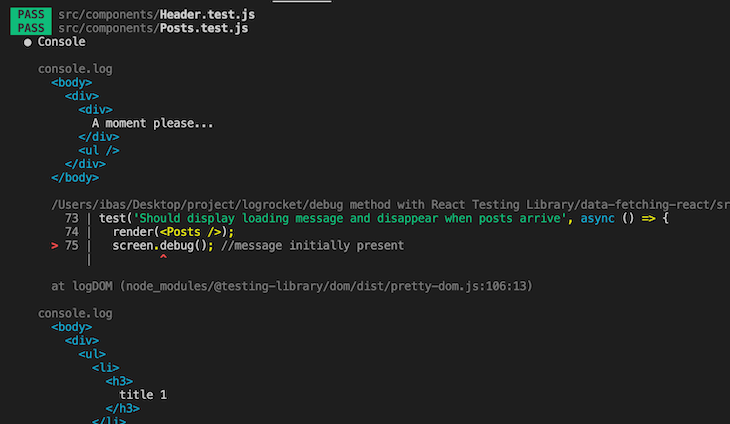
As seen within the picture above, the primary debug technique prints the DOM tree containing the loading message, whereas the second debug tell us that the message is not current as a result of the info has arrived from the server.
Bear in mind that we’ve applied a mock API utilizing MSW to intercept the community request and return a response. On this case, it returns the title 1 textual content seen above as an alternative of the API put up’s precise information.
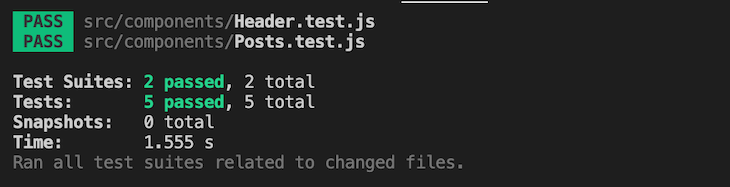
The check ought to now cross with the next outcome:
The logRoles operate
Just like the debug() technique, logRoles can log a component’s ARIA function or a listing of roles utilized to parts inside the DOM tree. This course of may also help make testing simpler, as you will notice in a second.
On this lesson, we used the getByText and findByText question strategies to seek out parts on the web page. Whereas that’s high-quality, RTL locations *ByRole counterparts on the prime of the precedence record.
To make use of *ByRole queries, we should be conversant in the implicit roles positioned on parts. For example, <button> aspect has an implicit function of button. Here’s a record of ARIA roles that apply to HTML parts.
Nonetheless, with the logRoles, we are able to simply log the aspect’s implicit ARIA roles to be used in our accessibility check.
If we revisit our earlier check utilizing findByText, we are able to apply the helper operate to our check code like so:
import {
  // ...
  logRoles,
} from '@testing-library/react';
// ...
check('ought to view implicit roles with logRoles', async () => {
  render(<Posts />);
  const postItemNode = await display.findByText('title 1');
  logRoles(postItemNode);
  anticipate(postItemNode).toBeInTheDocument();
});
Within the code above, we began by importing logRoles from the testing library. Then, we handed the goal node as an argument to the operate. The output will give us the ARIA function of that aspect:
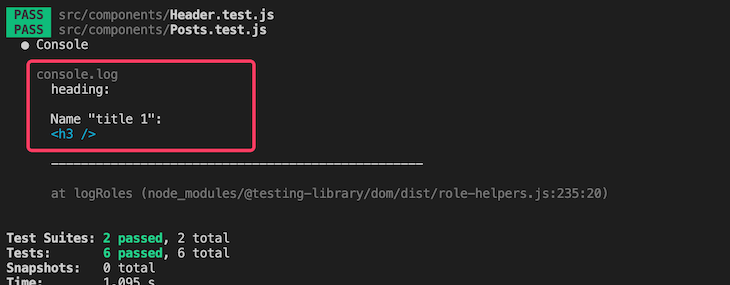
As we are able to see from the output proven within the picture above, the ARIA function is heading. We will now refactor the check code to make use of the findByRole accessible question as an alternative of findByText, so now we have the next:
check('ought to view implicit roles with logRoles', async () => {
  render(<Posts />);
  const postItemNode = await display.findByRole('heading', {
    title: 'title 1',
  });
  anticipate(postItemNode).toBeInTheDocument();
});
We must always think about using *ByRole earlier than the opposite question varieties to ensure that our UI is accessible.
To print a listing of ARIA roles utilized to parts inside the DOM tree, we are able to cross the rendered container aspect to the logRoles as an argument. The code will seem like this:
check('ought to view implicit roles with logRoles', async () => {
  const view = render(<Posts />);
  const postItemNode = await display.findByRole('heading', {
    title: 'title 1',
  });
  logRoles(view.container);
  anticipate(postItemNode).toBeInTheDocument();
});
The output will now seem like so:
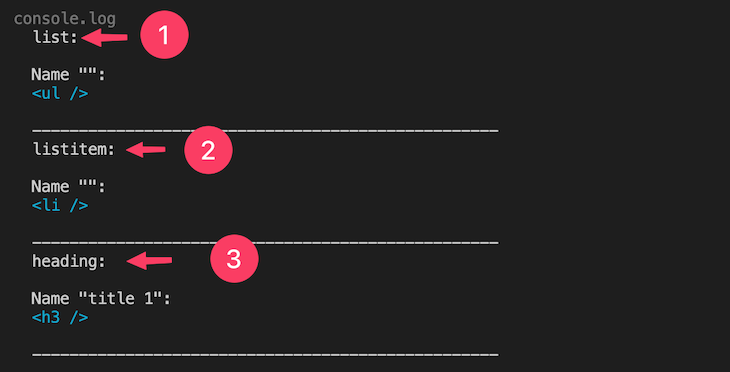
The output, as seen above, incorporates the DOM parts and their respective ARIA roles. We will goal these parts by their implicit roles. For example, if we need to assert {that a} li merchandise is seen within the DOM, we are able to write a check like so:
check('ought to record merchandise seen within the DOM', async () => {
  render(<Posts />);
  const postItemNode = await display.findByRole('listitem');
  anticipate(postItemNode).toBeVisible();
});
Conclusion
Testing might be cumbersome in case you are simply getting began. Nonetheless, the power to debug could make the method a breeze. On this lesson, we mentioned how you can use the debug technique from the React Testing Library to establish and analyze the check errors, thereby easing the debugging course of.
If you happen to loved this lesson, share this put up across the internet. You possibly can see the venture supply code on the GitHub repository.
Full visibility into manufacturing React apps
Debugging React purposes might be troublesome, particularly when customers expertise points which might be laborious to breed. If you happen to’re fascinated about monitoring and monitoring Redux state, robotically surfacing JavaScript errors, and monitoring sluggish community requests and element load time, attempt LogRocket. 

LogRocket is sort of a DVR for internet and cellular apps, recording actually all the things that occurs in your React app. As an alternative of guessing why issues occur, you’ll be able to mixture and report on what state your utility was in when a problem occurred. LogRocket additionally screens your app’s efficiency, reporting with metrics like shopper CPU load, shopper reminiscence utilization, and extra.
The LogRocket Redux middleware package deal provides an additional layer of visibility into your consumer periods. LogRocket logs all actions and state out of your Redux shops.
Modernize the way you debug your React apps — begin monitoring free of charge.
