Well being is basically essential. There’s a standard saying that well being is wealth — his is true even in software program engineering. Sure! Like residing issues, an software may be damaged too if we don’t care for it.
Well being checks in software program assist us determine inefficiencies in our functions to higher preserve them.
Very similar to how we see a physician to know if something is incorrect with us, proper, the identical precept applies to software program as we take note of the server or response time, as one instance.
On this article, we are going to look at the right way to do a well being test in a Node.js software.
Necessities
We’ll implement a fundamental Node.js well being test. Right here’s what’s essential to comply with alongside:
Why it is advisable have well being checks
As we’ve already talked about within the introduction; well being is wealth. Earlier than we leap into the right way to implement well being test in Node.js, let’s discuss its significance and why you need to get into the behavior of performing these checks.
We first have to acknowledge that the provision of software program or performance is extraordinarily essential. Routine well being checking of the provision of APIs, as an example, helps you study of essential points and remediate them as rapidly as attainable.
If downtime happens, the applying proprietor may be knowledgeable instantly so that there’s a speedy decision to it.
Well being checks change into much more essential because the infrastructure of our software program grows, and the necessity to be sure that all microservices and endpoints are working flawlessly turns into extra very important for the apps we handle.
A few of the issues we test when contemplating the well being of software program in any programming language or stack are the response time of a server when a request is made and the way the server connects to the database (if there may be one).
Another excuse why a well being test is important is to keep up the provision of your companies. Your software or product shouldn’t be seen because the one which has probably the most downtime amongst its rivals — it’s dangerous for enterprise, and a very good identify is healthier than fortune, as they are saying.
Implementing a well being test in Node.js
We’ll now have a look at the right way to implement a fundamental well being test in Node.js.
I will likely be utilizing an software I’ve constructed. Here’s a hyperlink to the tutorial for it. The Github code may be discovered right here.
You possibly can clone or obtain it from right here.
Use git clone to clone the repository into your personal machine:
git clone https://github.com/bigpreshy/mvc
Then transfer into the folder by doing this:
cd mvc
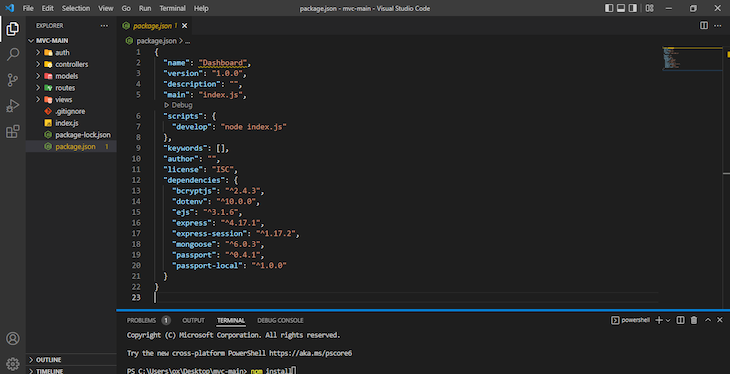
The bundle.json file ought to appear like this:
After that, run this command to put in all of the dependencies (packages) used within the software:
npm set up
After this has been accomplished, run:
npm run develop
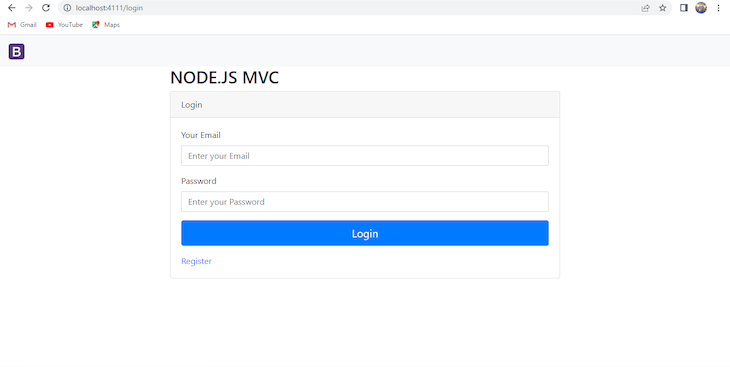
In your browser, go to http://localhost:4111/login (there are different routes like /register/dashboard).
Now the whole lot is operating. You possibly can comply with the MVC tutorial to connect with MongoDB Atlas
Including a well being test route
So as to add a fundamental well being test that performs checks (server well being and run time, and so forth.), add healthchecker.js in our route folder and add the next code:
//js
const specific = require("specific");
const router = specific.Router({});
router.get("https://weblog.logrocket.com/", async (_req, res, _next) => {

    const healthcheck = {
        uptime: course of.uptime(),
        message: 'OK',
        timestamp: Date.now()
    };
    strive {
        res.ship(healthcheck);
    } catch (error) {
        healthcheck.message = error;
        res.standing(503).ship();
    }
});
// export router with all routes included
module.exports = router;
What we’ve performed right here is added one other route, and this route has a healthcheck object that has three properties (uptime, message, and timestamp) which have respective values course of.uptime(), OK, and Date.now().
We even have a strive catch, which executes the code within the strive block. If an exception exists, it responds with an error (the message worth within the healthcheck object turns into the error) and sends a standing of 503.
Lastly, we’ve to export the module (router), therefore the module.exports = router; on the finish of the file.
Registering the healthcheck route
After we’ve created the route, go forward edit the index.js file. Simply add this line of code:
app.use('/healthcheck', require('./routes/healthchecker'));
After that, your full index.js file will appear like this:
const specific = require("specific");
const app = specific();
const mongoose = require("mongoose");
const dotenv = require("dotenv");
const session = require('express-session');
dotenv.config();
const passport = require("passport");
const { loginCheck } = require("./auth/passport");
loginCheck(passport);
// Mongo DB conncetion
const database = course of.env.MONGOLAB_URI;
mongoose
  .join(database, { useUnifiedTopology: true, useNewUrlParser: true })
  .then(() => console.log("e don join"))
  .catch((err) => console.log(err));
app.set("view engine", "ejs");
//BodyParsing
app.use(specific.urlencoded({ prolonged: false }));
app.use(session({
    secret:'oneboy',
    saveUninitialized: true,
    resave: true
  }));

app.use(passport.initialize());
app.use(passport.session());
//Routes
app.use("https://weblog.logrocket.com/", require("./routes/login"));
app.use('/healthcheck', require('./routes/healthchecker'));

const PORT = course of.env.PORT || 4111;
app.hear(PORT, console.log("Server has began at port " + PORT));
Pay attention to how our routes are registered. It’s added proper after our passport.session() and passport.initialize() strategies.
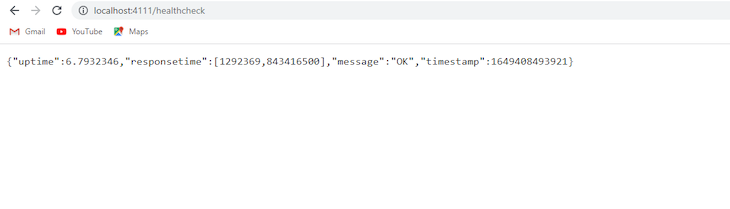
After that, cease the server and rerun npm run develop, then go to http://localhost:4111/healthcheck, it is going to present this:
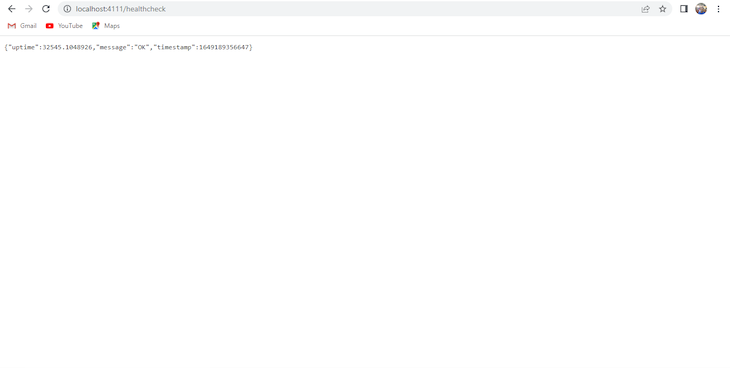
This has our uptime (how lengthy our server has been up and operating because it began), an “OK” message that signifies that the whole lot is sweet, and a timestamp is included, too.
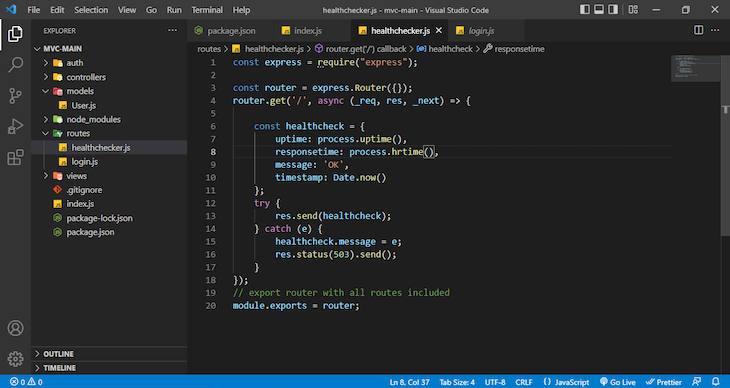
Including response time
One other factor to test is response time — how lengthy it takes your server to reply to requests.
To do that, we’re going to be including the next course of.hrtime() methodology as a worth to the processtime property within the healthcheck object that’s our healthchecker.js file in our route folder.
Your healthchecker.js ought to appear like this:
Refreshing your server and revisiting http://localhost:4111/healthcheck provides you with this. It would now have the responsetime property with the worth recorded in nanoseconds:
Additionally it is value noting that there are companies which have been constructed over time that routinely test the well being of our functions (not simply Node.js, however functions in different stacks too). I often use https://uptimerobot.com/ .
There are others. Logrocket does this for frontend monitoring, and there are additionally Freshping, Uptime, Logicmonitor,, all of which ought to let you know that the well being of functions is basically essential!
Conclusion
On this article, we’ve mentioned what well being checks entail and why we have to think about them in your functions for straightforward and fast subject decision.
Moreover, we checked out how well being checks may be carried out in Node.js with a pattern undertaking. This undertaking is solely a Mannequin-view-controller Node.js based mostly undertaking that handles person registration and login utilizing Mongo DB as a database.
Listed here are among the issues we checked for: the response time of the server, the uptime of the server, the standing code of the server (so long as it’s 200, we’re going to get an “OK” message), and the timestamp of the server.
You could take into consideration well being of your software if you end up creating. This lets you monitor intently what is going on and if finally, one thing unexpected occurs, you’d know the place to look.
200’s solely  Monitor failed and gradual community requests in manufacturing
Deploying a Node-based net app or web site is the straightforward half. Ensuring your Node occasion continues to serve sources to your app is the place issues get more durable. When you’re interested by making certain requests to the backend or third occasion companies are profitable, strive LogRocket.  https://logrocket.com/signup/
LogRocket is sort of a DVR for net and cellular apps, recording actually the whole lot that occurs whereas a person interacts together with your app. As a substitute of guessing why issues occur, you possibly can mixture and report on problematic community requests to rapidly perceive the basis trigger.
LogRocket devices your app to document baseline efficiency timings akin to web page load time, time to first byte, gradual community requests, and likewise logs Redux, NgRx, and Vuex actions/state. Begin monitoring totally free.
