Are you in search of a option to redirect customers after they’ve submitted a type in your WordPress website?
You’ll be able to lead customers to your top-performing weblog posts, show the most recent offers, or present a thanks web page to construct a relationship along with your viewers.
On this article, we’ll present you learn how to redirect customers after type submission in WordPress.
Why Redirect Customers After Kind Submission?
When a consumer submits a type in your WordPress website, many enterprise house owners would possibly suppose that’s the top of the method. Nevertheless, you need to use kinds to extend consumer engagement in your web site and get much more conversions.
For example, you may direct customers to a thanks web page after type submission and listing your high-converting articles. This fashion, you may get extra pageviews to your finest content material and drive extra gross sales.
On an on-line retailer, you may upsell merchandise and supply incentives like reductions and free delivery when a customer submits a type.
You would even redirect customers to a web page the place they’ll obtain a free useful resource after submitting the shape. For instance, you may create a lead magnet the place folks can fill out a type in change for a free useful resource like an eBook, podcast, media file, or PDF.
That mentioned, let’s see 4 alternative ways you may simply redirect customers after type submission in WordPress. Merely click on the hyperlinks under to leap forward to your most well-liked part:
Redirect Customers After Kind Submission in WordPress
The simplest method of redirecting customers after they’ve crammed out a type is by utilizing WPForms. It’s the finest contact type plugin for WordPress, and over 5 million professionals use it to create various kinds of kinds for his or her web sites.
WPForms comes with a built-in setting to allow you to select in the event you’d like to point out a thanks message, present a particular web page, or redirect customers to a different URL altogether. Plus, you get a drag-and-drop type builder to simply customise your type.
For this tutorial, we’ll use the WPForms Lite model as a result of it’s free to make use of, and you may redirect customers after type submission in only a few clicks. There may be additionally a WPForms Professional model which presents extra pre-built type templates, customization choices, and highly effective addons.
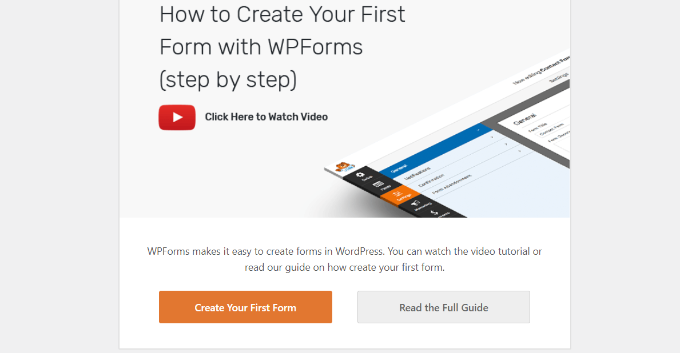
First, you’ll want to put in and activate the WPForms plugin. For extra particulars, please see our information on learn how to set up a WordPress plugin.
Upon activation, you will note the WPForms welcome web page in your WordPress dashboard. Go forward and click on the ‘Create Your First Kind’ button.
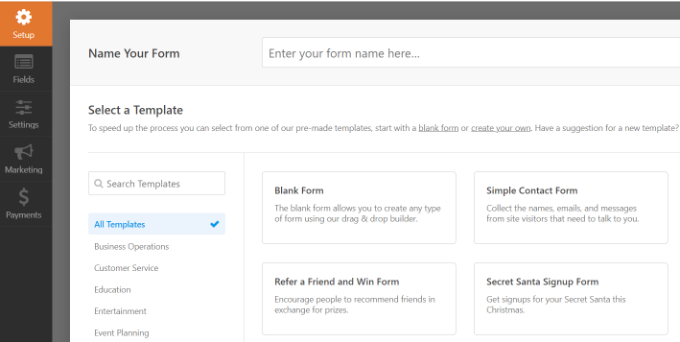
After that, WPForms may have you select from a number of, free type templates. You’ll be able to choose any template and rapidly customise it in keeping with your wants.
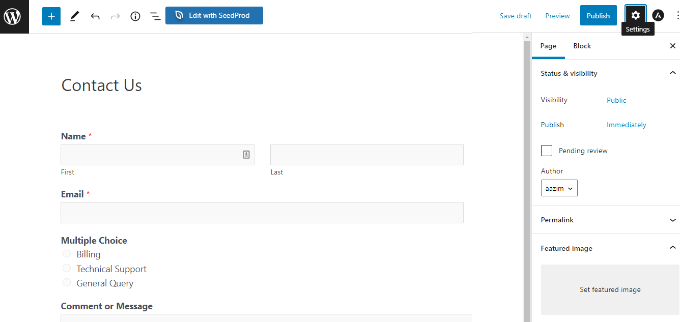
Let’s begin by getting into a reputation for our type on the prime after which deciding on the ‘Easy Contact Kind’ template.
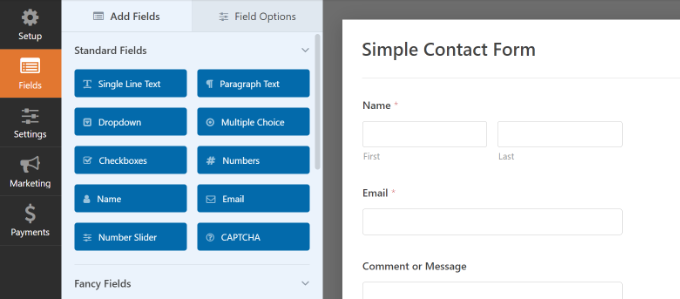
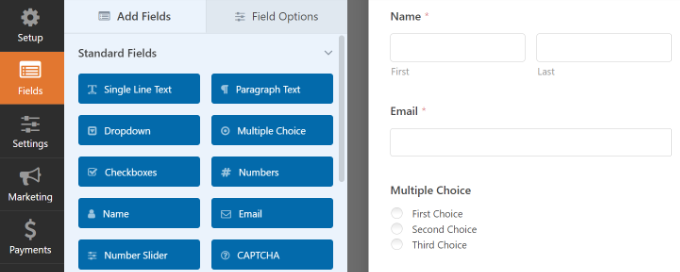
After deciding on a template, the WPForms type builder will launch.
Right here, you may customise your type and add new fields from the menu in your left. Merely drag and drop the fields you’d like so as to add. You’ll be able to then rearrange their order to your liking.
If you wish to add fancy fields like an internet site URL, telephone quantity, tackle, file add possibility, and extra, then we suggest upgrading to the WPForms Professional license.
You can even additional customise present fields on the template. For extra particulars, please see our information on learn how to create a contact type in WordPress.
Set Up the Redirect URL after Kind Submission
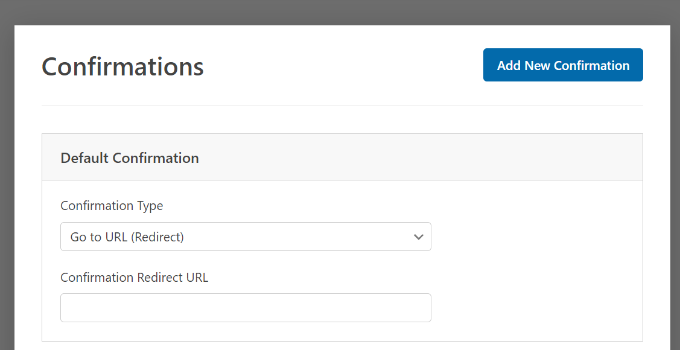
When you’ve custom-made your contact type, merely go to Settings » Confirmations within the type builder.
Below the Affirmation Sort setting, click on the dropdown menu and choose the ‘Go to URL (Redirect)’ possibility.
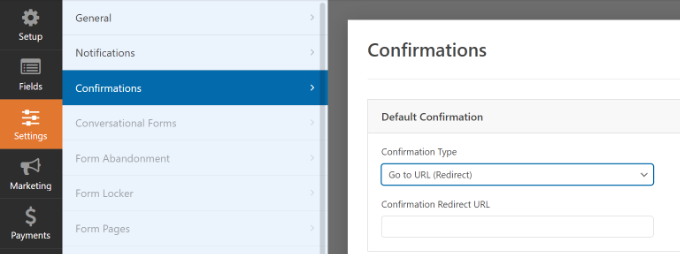
After that, merely enter a hyperlink within the ‘Affirmation Redirect URL’ area and specify the place you’d prefer to redirect customers after they’ve submitted a type.
The right way to Embed Your Kind in WordPress
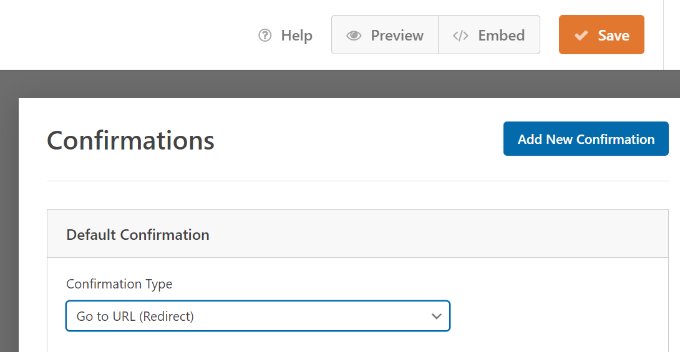
When you’ve added a redirect URL, the following step is to embed the shape in your web site.
Go forward and click on the ‘Save’ button on the prime to retailer your type settings after which click on the ‘Embed’ button beside it.
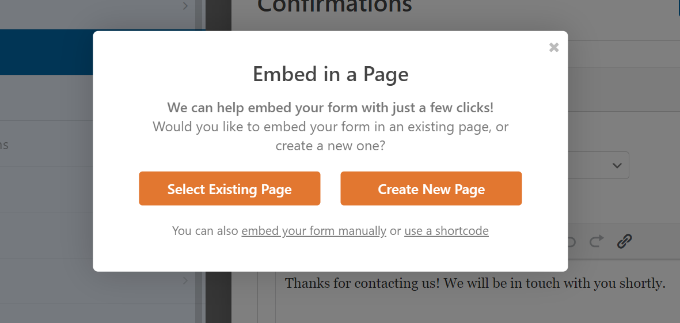
WPForms will now ask in the event you’d prefer to embed the shape on an present web page or on a brand new web page.
We’ll select the ‘Create New Web page’ possibility for this tutorial.
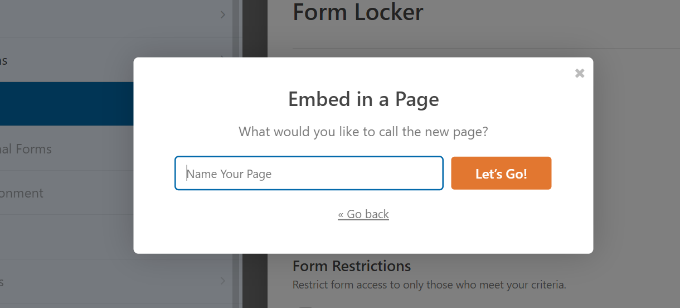
Subsequent, you’ll must enter a reputation in your new web page.
After getting into the title, merely click on the ‘Let’s Go’ button.
The plugin will now mechanically add your type to the WordPress content material editor contained in the WPForms block.
If you’re prepared, merely click on the ‘Publish’ button on the prime.
Redirect Customers Primarily based on Their Responses After Kind Submission
WPForms additionally permits you to arrange conditional logic, which mechanically redirects customers to totally different pages based mostly on their responses when submitting a type.
For instance, let’s say you’ve got totally different groups that deal with questions despatched by customers, like billing, technical assist, and normal inquiries. Primarily based on the selection a consumer selects within the type, you may redirect them to a particular URL that pertains to their wants.
Observe that you just’ll want a WPForms Professional license to make use of the conditional logic function. You additionally get extra type fields so as to add to the template, and you need to use addons like Consumer Journey to see how folks work together along with your kinds.
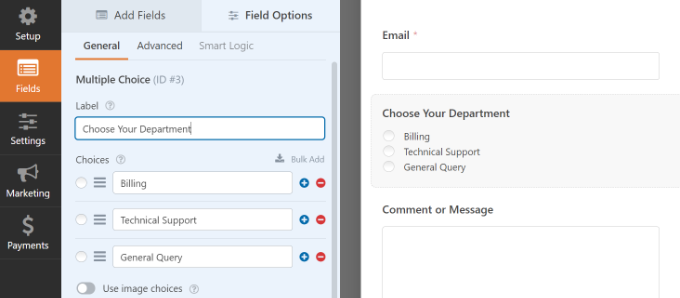
First, you may add a a number of selection, checkbox, or every other area that permits customers to pick totally different choices. We’ll add a ‘A number of Selection’ area in our tutorial.
Subsequent, you may edit the choices within the ‘A number of Selection’ type area by merely clicking on the fields within the template to the precise.
For example, you may see within the picture under that we renamed the choices to totally different departments that might deal with particular questions.
After that, you may head to Settings » Confirmations within the type builder.
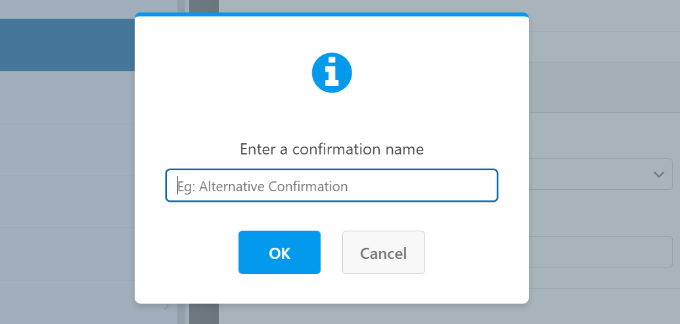
Now click on the ‘Add New Affirmation’ button to arrange conditional logic.
Subsequent, you’ll have to enter a reputation in your new redirect. Be particular so you’ll be able to monitor it simply.
Merely click on the ‘OK’ button once you’re performed.
For this tutorial, we wish to direct customers to particular pages based mostly on the division they choose within the type.
First, you may choose ‘Go to URL (Redirect)’ from the Affirmation Sort dropdown menu after which enter a hyperlink to the respective web page within the ‘Affirmation Redirect URL’ area.
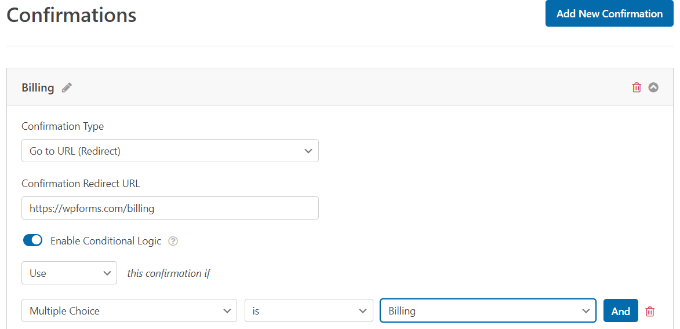
Subsequent, you will want to click on the ‘Allow Conditional Logic’ toggle. When you try this, extra choices will seem.
Go forward and choose ‘Use’ this affirmation if ‘A number of Selection’ is ‘Billing’ within the conditional logic settings. This may redirect customers to a URL that holds extra details about billing after they submit a type.
That’s all! Merely save the shape and the WPForms block you added earlier will mechanically redirect customers to totally different the URL you set based mostly on their responses.
Subsequent, you may simply repeat this step for different a number of selection choices within the type and create new affirmation notifications with conditional logic.
Do you know that you may redirect customers to totally different pages when you have first-time commenters in your WordPress website?
For instance, you may present a easy thanks web page with an e-mail signup type and get customers to subscribe to your publication after commenting. Equally, you may redirect folks to a web page along with your social media hyperlinks and improve followers.
Redirecting customers after remark submission may also assist enhance pageviews and conversions. You’ll be able to redirect commenters to your prime weblog posts, present a particular supply or coupon web page, or show a lead magnet web page to get extra conversions.
The simplest method of setting remark redirects is by utilizing the Yoast Remark Hacks plugin. For extra info, see our step-by-step information on learn how to set up a WordPress plugin.
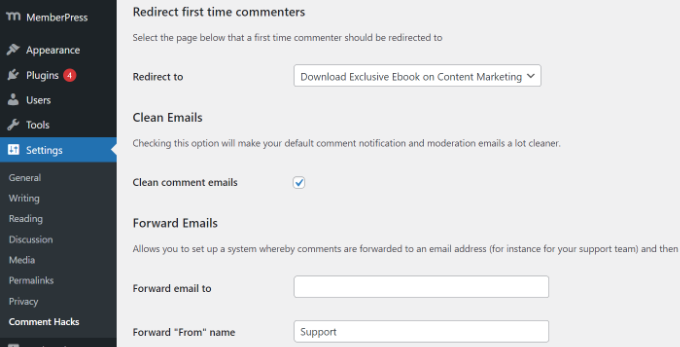
It permits you to select which web page to show after a first-time consumer leaves a remark.
All it’s important to do is navigate to Settings » Feedback Hacks in your WordPress admin dashboard. Then simply choose the precise web page you wish to ship them with the ‘Redirect to’ dropdown.
You’ll want to save the web page to retailer your settings once you’re completed.
For extra particulars, please see our information on learn how to redirect your consumer’s consideration with a remark redirect.
Redirect Customers After Registration Kind Submission
When you permit consumer registration in your web site, then redirecting folks can turn out to be useful.
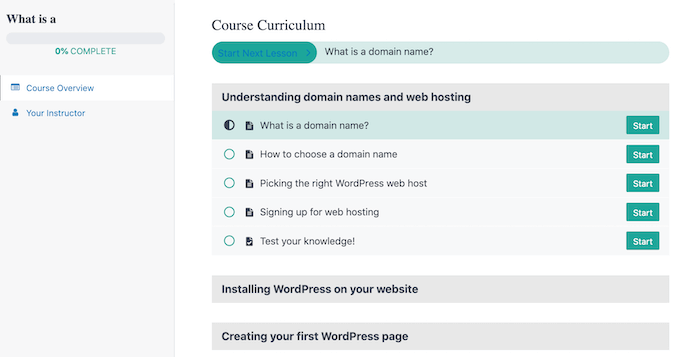
For example, in the event you run membership web site or promote on-line programs, you may redirect customers to their account space or dashboard upon submitting a registration type. This fashion, customers can entry their obtain recordsdata, license keys, course supplies, curriculums, and extra.
With MemberPress, you may simply limit entry to totally different sections of your web site. It’s the finest membership plugin for WordPress and permits you to arrange a number of membership ranges.
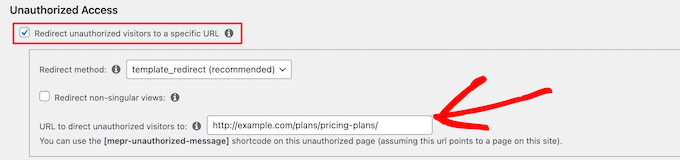
Utilizing MemberPress, you may as well create a pricing web page utilizing one of many plugin’s built-in templates. If an unregistered consumer tries to entry restricted content material, then you may redirect them to a pricing web page.
When you’ve created a customized pricing web page, merely enter the URL within the ‘Unauthorized Entry’ part of MemeberPress to redirect unregisted customers to your pricing web page or registration web page.
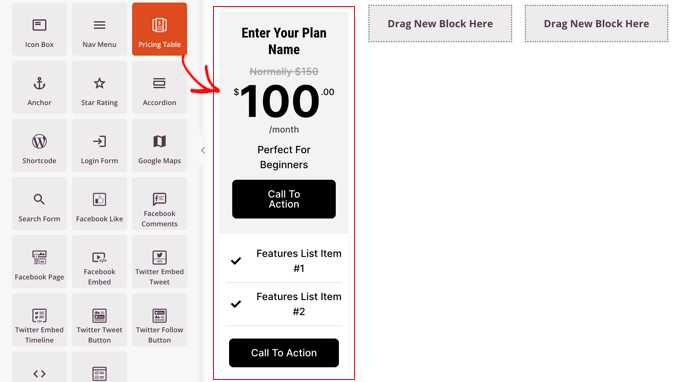
In order for you much more choices, we suggest utilizing a web page builder like SeedProd. SeedProd is a drag-and-drop web page builder that makes it tremendous simple to customise the format and design of any web page.
You’ll be able to add parts like a ‘Pricing Desk’ to the web page you redirect customers to. For extra particulars, please see our information on learn how to add a lovely pricing desk in WordPress.
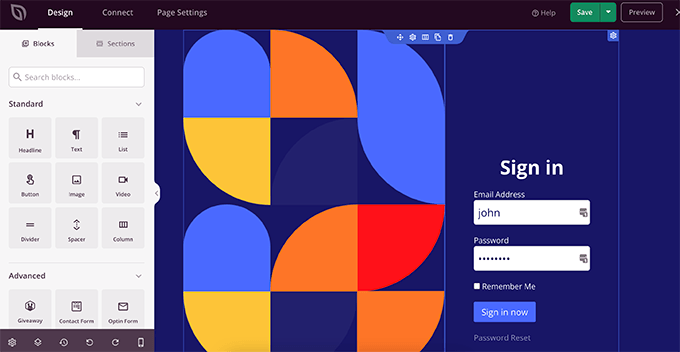
The default WordPress registration web page is obvious and solely accommodates the WordPress emblem and branding.
You may make it extra partaking by utilizing a SeedProd template after which including a ‘Pricing Desk’ block to create a customized login and registration web page.
When you need assistance, then please see our information on learn how to create a customized consumer registration type in WordPress.
We hope this text helped you discover ways to redirect customers after type submission in WordPress. You might also wish to see our information on how to decide on the very best design software program and a comparability between WordPress.com vs WordPress.org.
When you appreciated this text, then please subscribe to our YouTube Channel for WordPress video tutorials. You can even discover us on Twitter and Fb.
