
Galleries present an efficient strategy to showcase a set of high-quality pictures. In net tasks, builders create picture galleries to show pictures in a grid-like format, making it simpler for customers to browse them.
There are a number of methods to create the sort of format. On this tutorial, we are going to cowl the way to use the CSS Versatile Field Format Module (flexbox) to create a responsive picture gallery that appears superb on all gadgets.
We are going to use three instance tasks to reveal how flexbox lets us create numerous layouts.
On this tutorial:
The primary and second tasks are naturally responsive with out utilizing CSS media queries, which is likely one of the advantages of flexbox. Nonetheless, the second and third tasks present a extra correct picture preview by sustaining picture side ratios.
On the finish of this tutorial, we are going to perceive how flexbox is utilized to ascertain three varieties of responsive picture gallery layouts.
To comply with this tutorial, a fundamental information of HTML and CSS is required.
CSS flexbox overview
Flexbox is a mannequin designed for creating layouts in a single dimension (i.e., rows or columns) at a time. It supplies entry to properties that let you align and justify flex objects inside flex containers.
As well as, flexbox can wrap objects onto a number of strains to realize a grid-like construction, as seen within the instance tasks beneath.
When flexbox wraps objects, it treats each line as a separate flex line within the flex container. Thus, it justifies this stuff primarily based on their measurement and the obtainable area on that flex line. Within the subsequent part, we are going to get began with the utilization.
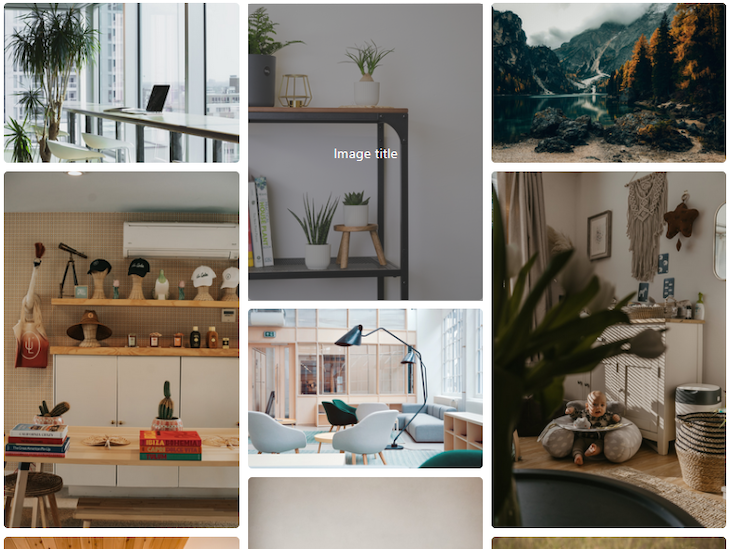
Responsive picture gallery with uniform picture dimensions
The primary venture makes use of a easy format, as seen beneath:
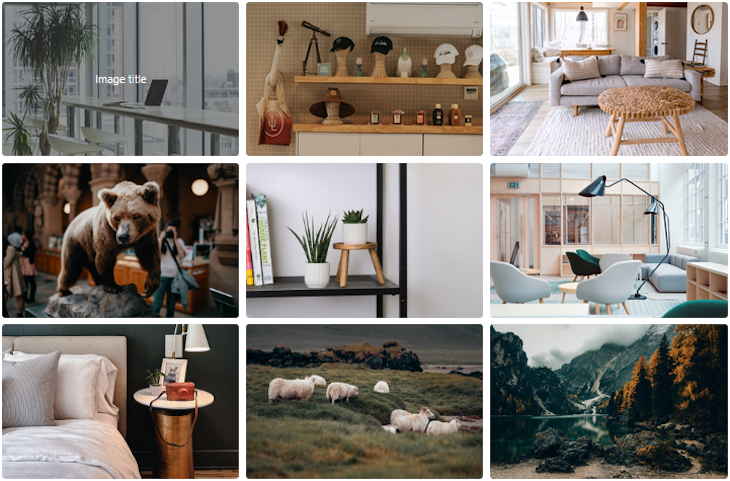
This gallery format is good for uniform picture dimensions.
To create this primary flexbox venture, let’s create an HTML file and add the next markup:
<div class="container">
  <!-- heading textual content -->
  <ul class="image-gallery">
    <li>
      <img src="https://supply.unsplash.com/VWcPlbHglYc/640x416" alt="" />
      <div class="overlay"><span>Picture title</span></div>
    </li>
    <!-- different objects right here -->
  </ul>
</div>
We used a ul component to group a set of pictures positioned within the li. We will additionally use one other component, reminiscent of div. For brevity, the code block above solely exhibits one merchandise throughout the ul container. See the entire markup on CodeSandbox.
Each li component incorporates an img component together with a div component that may present an overlay at any time when we hover over a picture. For this venture, we’re utilizing free pictures and appending equal dimensions to the supply URL to get pictures of the identical measurement.
Presently, no kinds are utilized, so the pictures will default to stacking on prime of one another.
Customizing the responsive picture gallery format with flexbox
Now, we will introduce flexbox to put our pictures out. The main focus is on the ul wrapper component holding all of the picture objects.
First, we should make the ul wrapper a flex container by setting its show property to flex. As soon as we do that, its direct kids (the li components) develop into flex objects.
.image-gallery {
  show: flex;
}
Now, all of the flex objects instantly line up on the primary axis. By default, the primary axis is the row dimension. This habits is the results of flexbox being a one-dimensional format mannequin.
Presently, our pictures overflow the viewport as a result of they can not slot in. We are going to handle this by updating the kinds utilized to the flex container. These fashion guidelines will mechanically apply to the flex container’s objects.
.image-gallery {
  show: flex;
  flex-wrap: wrap;
  justify-content: middle;
  hole: 10px;
}

.image-gallery > li {
  flex-basis: 350px; /* width: 350px; */
}

.image-gallery li img {
  object-fit: cowl;
  width: 100%;
  top: 100%;
  vertical-align: center;
  border-radius: 5px;
}
Let’s take a more in-depth take a look at the kinds being utilized within the flex container:
- The
flex-wrapproperty ensures that flex objects will wrap onto one other line - The
justify-contentproperty with a price ofmiddlewill middle objects on the primary axis - The
holeproperty will set a niche between rows and columns (on this case,10px)
We additionally gave every flex merchandise an preliminary size of 350px. Making use of object-fit to a picture retains its side ratio and makes certain it clips to suit. In the long run, the format appears like so:
Final row alignment with flexbox
As seen above, the objects within the final row don’t align with the earlier row. It is a frequent drawback with flexbox.
We talked about earlier that when flex objects wrap, each line is a brand new flex line and objects are justified primarily based on the obtainable area in that flex line. On this case, objects within the final row are centered as a result of we utilized justify-content: middle; to the flex container.
A fast repair is to make use of ::after to create a pseudo-element within the flex container. Then, we will set the scale of the flex-basis CSS property as equal to the scale of the flex objects.
.image-gallery::after {
  content material: "";
  flex-basis: 350px;
}
This strategy works effectively. An alternate strategy is to make use of CSS grid, a two-dimensional format system.
Displaying overlay on hover
Let’s say we need to show some overlay textual content at any time when customers hover over the pictures. To attain this, begin by updating the li to incorporate the next fashion declarations:
.image-gallery > li {
  /* ... */
  place: relative;
  cursor: pointer;
}
Then, replace the CSS file to incorporate the next guidelines:
.overlay {
  place: absolute;
  width: 100%;
  top: 100%;
  background: rgba(57, 57, 57, 0.502);
  prime: 0;
  left: 0;
  remodel: scale(0);
  transition: all 0.2s 0.1s ease-in-out;
  colour: #fff;
  border-radius: 5px;
  /* middle overlay textual content */
  show: flex;
  align-items: middle;
  justify-content: middle;
}

/* hover */
.image-gallery li:hover .overlay {
  remodel: scale(1);
}
Let’s save and check our venture to make sure it really works as anticipated. That’s all for the primary venture. See the demo right here and the full code on CodeSandbox.
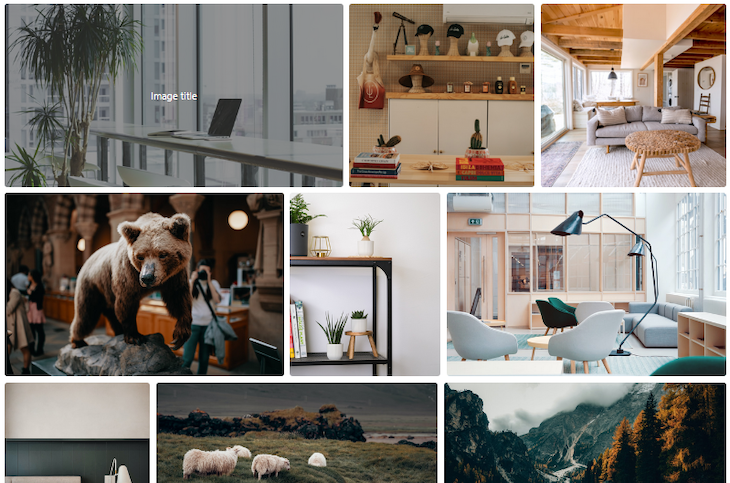
Responsive picture gallery sustaining picture side ratios
Within the second and third instance tasks, we are going to create layouts that may preserve the pictures’ side ratios.
The second venture’s format will preserve the pictures’ side ratios, as seen beneath:
The markup for the second venture is usually the identical as within the first venture. The distinction is that we’ll not append fastened dimensions to the picture URLs, like so:
<div class="container">
  <!-- heading textual content -->
  <ul class="image-gallery">
    <li>
      <img src="https://supply.unsplash.com/VWcPlbHglYc" alt="" />
      <div class="overlay"><span>Picture title</span></div>
    </li>
    <!-- different objects right here -->
  </ul>
</div>
Subsequent, we introduce flexbox and alignment guidelines by including the next to our CSS file:
.image-gallery {
  show: flex;
  flex-wrap: wrap;
  hole: 10px;
}

.image-gallery > li {
  top: 300px;
  cursor: pointer;
  place: relative;
}

.image-gallery li img {
  object-fit: cowl;
  width: 100%;
  top: 100%;
  vertical-align: center;
  border-radius: 5px;
}
Let’s evaluate the above guidelines to the primary venture. First, as an alternative of an outlined width on the li flex objects, now we have an outlined top. Additionally, discover we aren’t aligning the objects with the justify-content property. With this, the format appears like so:
Now, we will proportionally distribute the pictures by making the objects develop from their preliminary size and fill the obtainable area. Let’s replace our code to incorporate the flex-grow with a optimistic worth, like so:
.image-gallery > li {
  flex-grow: 1;
  /* ... */
}
By default, flex objects have values of flex-grow: 0, flex-shrink: 1, and flex-basis: auto. In different phrases, they are going to use their pure content material measurement if no different measurement is outlined. In addition they shrink from their flex-basis and by no means develop from it.
We will additionally use the flex shorthand to realize the identical habits:
.image-gallery > li {
  flex: 1 1 auto; /* or flex: auto; */
  /* ... */
}
Now that the flex objects have crammed the obtainable area, now we have once more encountered the last-row alignment problem with flexbox. On this case, the 2 objects within the final row will develop to replenish three columns’ price of area.
To treatment this habits, we are going to use the ::after pseudo-element as soon as once more on the flex container, like so:
.image-gallery::after {
  content material: "";
  flex-grow: 999;
}
We will play with the flex-grow worth to find out an output that fits our format. Let’s save our information and guarantee it really works as anticipated. See the demo right here and the full code right here. This brings us to the tip of the second venture.
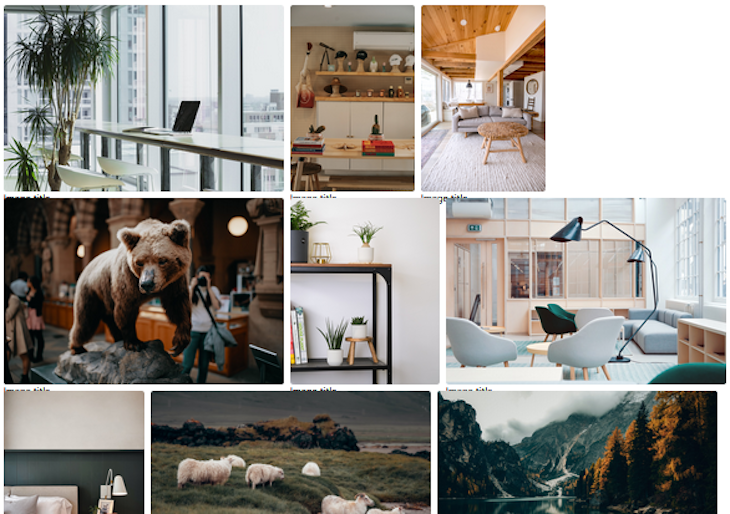
Sustaining picture side ratios in a three-column format
Within the second venture, we realized the way to create a responsive picture gallery format that maintains picture side ratios with out utilizing media queries. Nonetheless, utilizing flexbox with media queries permits us to realize a particular format whereas nonetheless sustaining picture side ratios.
To reveal this, we are going to create a third responsive picture gallery venture that may preserve picture side ratios, however in a three-column format, like this:
This responsive picture gallery will show three columns on large screens and one column on small screens. To attain this, we are going to create a markup containing three columns of components, like so:
<div class="container">
  <!-- heading textual content -->
  <div class="image-gallery">
    <div class="column">
      <div class="image-item">
        <img src="https://supply.unsplash.com/VWcPlbHglYc" alt="" />
        <div class="overlay"><span>Picture title</span></div>
      </div>
      <!-- different objects right here -->
    </div>
    <div class="column">
      <!-- different objects right here -->
    </div>
    <div class="column">
      <!-- different objects right here -->
    </div>
  </div>
</div>
Every of those columns ought to include an inventory of the pictures you need to show. For brevity, the code block above solely exhibits one picture. See the full markup on CodeSandbox.
As we all know from our expertise with flexbox to date, these columns generally is a flex container for the pictures, or flex objects, contained inside them. Likewise, the columns themselves may be flex objects throughout the wrapper component.
Because of this, we are going to apply the next fashion guidelines:
.image-gallery {
  /* Cell first */
  show: flex;
  flex-direction: column;
  hole: 10px;
}

.image-gallery .column {
  show: flex;
  flex-direction: column;
  hole: 10px;
}

.image-item img {
  width: 100%;
  border-radius: 5px;
  top: 100%;
  object-fit: cowl;
}

@media solely display and (min-width: 768px) {
  .image-gallery {
    flex-direction: row;
  }
}
Beginning with the cell format, we ensured all objects are displayed as a column. Not like the sooner tasks, we added a flex-direction property to alter the default row alignment to be a column as an alternative.
Then, for giant screens (min-width: 768px), we modified the route of the outer flex container to be a row.
Let’s save our information and guarantee it really works. See the full code on CodeSandbox.
Conclusion
Flexbox has the potential to wrap, align, and justify objects in a container. This makes it helpful to create a responsive format in a grid-like construction.
On this tutorial, we used it to create three responsive picture gallery tasks that look superb on all gadgets.
In case you have questions or contributions, share your ideas within the remark part. And in the event you loved studying this tutorial, endeavor to share it across the net.
Is your frontend hogging your customers’ CPU?
As net frontends get more and more complicated, resource-greedy options demand an increasing number of from the browser. For those who’re occupied with monitoring and monitoring client-side CPU utilization, reminiscence utilization, and extra for your whole customers in manufacturing, strive LogRocket. https://logrocket.com/signup/
LogRocket is sort of a DVR for net and cell apps, recording all the pieces that occurs in your net app or website. As a substitute of guessing why issues occur, you’ll be able to combination and report on key frontend efficiency metrics, replay consumer classes together with software state, log community requests, and mechanically floor all errors.
Modernize the way you debug net and cell apps — Begin monitoring free of charge.
