
On this information, we are going to stroll by way of the way to construct a full-stack utility with RedwoodJS.
You could have seen a number of tutorials and guides round constructing a full-stack utility with x framework (or) expertise, however, RedwoodJS is completely different and useful in sure methods, together with:
- RedwoodJS contains Typescript, GraphQL, Prisma, and a testing framework
- Startups can construct and prototype a product because it gives modules equivalent to authentication, authorization, and CRUD operations. All we have to do is to design enterprise logic for our necessities
- CLI is likely one of the greatest options of RedwoodJS; it makes the event course of quicker and simpler
Check out this demo to what the ultimate app will seem like from this tutorial:
Redwood_LogRocket.mp4
Dropbox is a free service that allows you to deliver your images, docs, and movies anyplace and share them simply. By no means e-mail your self a file once more!
Right here we’re going to construct a discussion board to know how RedwoodJS apps are constructed. It contains all of the functionalities that assist you perceive all of the frameworks’ features.
The functionalities that we’re going to construct are:
- Login and signup
- Create, learn, and replace posts
- Commenting system
- Consumer-based entry on posts
Together with RedwoodJS, we are going to use Typescript for kind checking and TailwindCSS for styling.
Desk of Contents
RedwoodJS set up and setup
RedwoodJS makes use of yarn as a package deal supervisor. As soon as you put in it, you may create a brand new venture utilizing the next command:
yarn create redwood-app --ts ./redwoodblog
It scaffolds all of the modules to construct a full-stack utility. Right here, you may see the entire construction of a RedwoodJS utility.
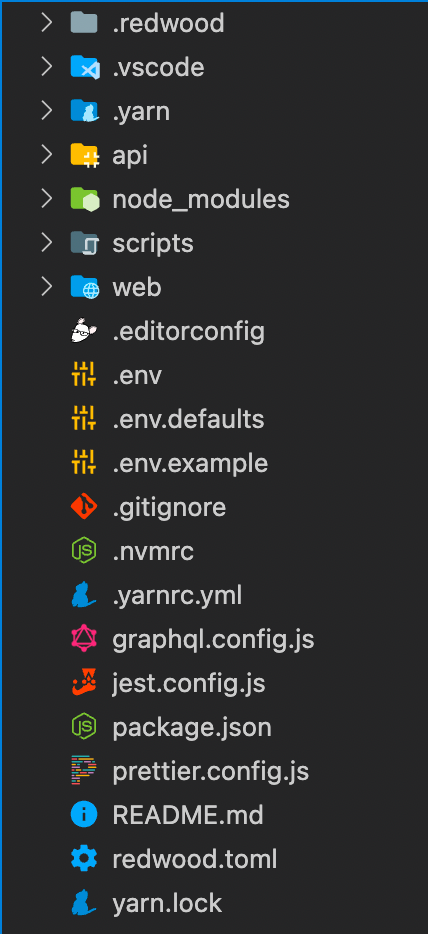
There are three main directories. They’re api, scripts, and net. Let’s talk about them intimately.
.redwood: Accommodates the construct of the applying.api: Serves the backend of the applying. It primarily comprisesdb, which serves the database schema of the applying. All backend functionalities can be insrclistingsrc: Accommodates all of your backend code. It comprises 5 directories, that are as follows:directives: Accommodates GraphQL schema directives to regulate entry to GraphQL queriesfeatures: RedwoodJS runs the GraphQL API as serverless features. It auto-generatesgraphql.ts; you may add further serverless perform on high of itgraphql: Accommodates GraphQL schema written in schema definition language (SDL)lib: Accommodates all of the reusable features throughout the backend API. for instance, authenticationproviders: Accommodates enterprise logic associated to your information. It runs the performance associated to the API and returns the outcomes
Organising TailwindCSS
Putting in TailwindCSS is easy; run the next command within the root listing:
yarn rw setup ui tailwindcss
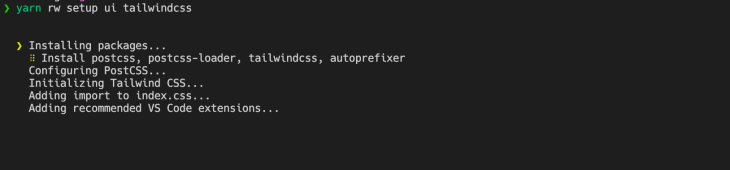
To substantiate the set up of TailwindCSS, go to net/src/index.css and see the Tailwind lessons in that file.
Connecting database
To attach the Postgres database, we are going to use Docker for native growth.
(Word: To put in docker, see the documentation from official docker web site)
Create docker-utils/postgres-database.sh in root listing and add the next script:
Extra nice articles from LogRocket:
#!/bin/bash

set -e
set -u

perform create_user_and_database() {
        native database=$1
        echo "  Creating consumer and database '$database'"
        psql -v ON_ERROR_STOP=1 --username "$POSTGRES_USER" <<-EOSQL
            CREATE USER $database;
            CREATE DATABASE $database;
            GRANT ALL PRIVILEGES ON DATABASE $database TO $database;
EOSQL
}

if [ -n "$POSTGRES_MULTIPLE_DATABASES" ]; then
        echo "A number of database creation requested: $POSTGRES_MULTIPLE_DATABASES"
        for db in $(echo $POSTGRES_MULTIPLE_DATABASES | tr ',' ' '); do
                create_user_and_database $db
        finished
        echo "A number of databases created"
fi
This script implements a perform to create a consumer and database in Postgres. When you create the script, you should use docker-compose up to run the Postgres database.
Create docker-compose.yml and add the next code:
model: "3.6"
providers:
  postgres:
    picture: postgres
    restart: unless-stopped
If you wish to create completely different variations of docker-compose up based mostly on the atmosphere, you are able to do that as nicely. To do that, create docker-compose.override.yml and add the next code:
model: "3"
providers:
  postgres:
    picture: postgres
    atmosphere:
      - POSTGRES_USER=api
      - POSTGRES_PASSWORD=development_pass
      - POSTGRES_MULTIPLE_DATABASES="redwoodforum-api","redwoodforum-api-testing"
    volumes:
      - ./docker-utils:/docker-entrypoint-initdb.d
      - redwoodforum_api_data:/information/postgres
    ports:
      - 5440:5432
volumes:
  redwoodforum_api_data: {}
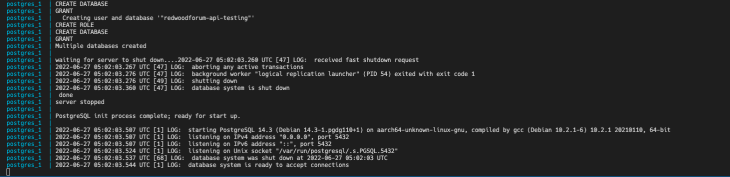
When you add the script, you may run the database utilizing this command:
docker-compose up
To attach a Redwood utility to Postgres, change the Prisma configuration to a PostgreSQL supplier and add database URL in an atmosphere variable.
Go to api/db/schema.prisma and alter the db supplier to postgresql. Add DATABASE_URL in your .env.
DATABASE_URL=postgres://api:[email protected]:5440/redwoodforum-api
Designing database
As you may see within the demo, we wish to construct a discussion board. Nevertheless, earlier than we implement the performance, Listed below are the important thing issues we wish customers to have the ability to do in our utility:
- Customers can log in/signup into the app
- As soon as customers log in, they’ll create a publish within the discussion board
- Customers can touch upon any publish, and the proprietor can delete any feedback
- Consumer can view their publish and go to the House web page to view all posts
Let’s design an ER diagram for the applying.
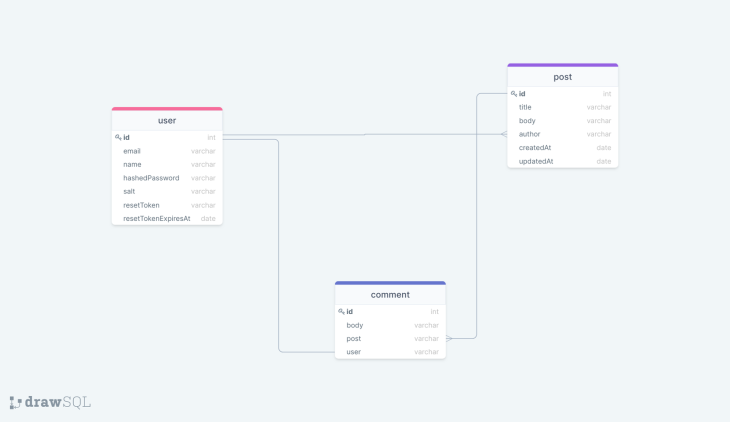
Right here we’ve the consumer, publish, and remark schemas.
consumer and publish have a one-to-many relationship, and publish and remark have a one-to-many relationship, whereas remark and consumer have a one-to-one relationship.
Now we’ve the ER diagram for the applying. let’s create the schema for the database. For that, go to api/db/schema.prisma.
(Word: RedwoodJS makes use of Prisma for database. In case you’re new to Prisma world, try their documentation for extra info)
Now, create the schemas in a Prisma file:
mannequin Consumer {
  id           Int            @id @default(autoincrement())
  e-mail        String         @distinctive
  identify         String?
  hashedPassword     String
  salt String
  resetToken String?
  resetTokenExpiresAt DateTime?
  posts   Put up[]
  feedback Remark[]
}

mannequin Put up {
  id           Int            @id @default(autoincrement())
  title        String
  physique         String
  feedback     Remark[]
  writer     Consumer    @relation(fields: [authorId], references: [id])
  authorId   Int
  createdAt    DateTime  @default(now())
  updatedAt    DateTime  @default(now())
}

mannequin Remark {
  id     Int    @id @default(autoincrement())
  physique   String
  publish   Put up   @relation(fields: [postId], references: [id])
  postId Int
  writer Consumer   @relation(fields: [authorId], references: [id])
  authorId Int
  createdAt DateTime @default(now())
  updatedAt DateTime @default(now())
}
As you may see, we’ve a relationship between the Consumer, Put up, and Remark schemas.
Defining a relationship in Prisma is easy. You may consult with the documentation to study extra intimately.
When you outline a schema in Prisma, you have to run the migration to create these schemas as a desk in Postgres.
Prisma migration
One of many options of Prisma is you can handle migration for various phases. Right here, we’re going to run the migration just for growth. For that, you should use this command:
yarn redwood prisma migrate dev
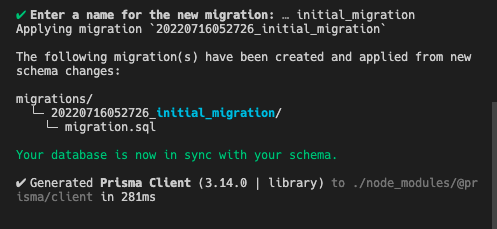
To examine if the migration was profitable, you may go to Prisma Studio and see all of the tables after migration. you may see all of the tables and columns inside of every desk by visiting http://localhost:5555.
yarn redwood prisma studio
Now, we’ve database and schema for the API and frontend, let’s create authentication for the applying.
Authentication
RedwoodJS gives authentication out of the field. A single CLI command will get you every thing that you must get authentication working.
yarn rw setup auth dbAuth
It’s going to create a auth.ts serverless perform that checks the cookie if the consumer exists within the database and token expiry. Then, it returns the response based mostly on that to a consumer.
It additionally creates lib/auth.ts to deal with functionalities, equivalent to getCurrent consumer from session, examine if authenticated, require authentication and many others.
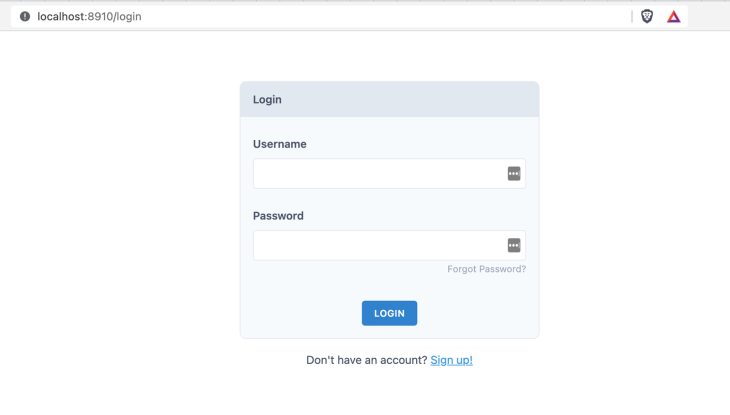
To this point, we’ve the authentication performance for the API and database. Let’s create pages for login, signup, and forgot password. Then, you should use the command to scaffold the login, signup, and forgot password pages.
yarn rw g dbAuth
It’s going to create all of the pages for authentication. You may examine these pages at net/src/pages.

For styling the pages, you should use the elements from the supply code and customise them based mostly in your preferences. Right here is the entire login web page from the implementation:
To attach an API for login and signup performance, RedwoodJS gives hooks that do all of the magic below the hood.
import { useAuth } from '@redwoodjs/auth'

// gives login and signup performance out of the field
const { isAuthenticated, signUp, logIn, logOut } = useAuth()
Within the type onSubmit perform, we are able to use that signup and logIn to make the API request and ship the payload.
const onSubmit = async (information) => {
    const response = await signUp({ ...information })

    if (response.message) {
      toast(response.message)
    } else if (response.error) {
      toast.error(response.error)
    } else {
      // consumer is signed in robotically
      toast.success('Welcome!')
    }
  }
As soon as the consumer indicators up or logs in, you may entry the consumer info throughout the applying utilizing currentUser.
const { currentUser } = useAuth()
Now, we’ve the consumer logged in to the applying. Subsequent, let’s construct the performance to publish and remark.
As soon as the customers log in, they land on the house web page, the place we have to present all of the posts within the discussion board. Then, the consumer can create a brand new publish and replace a publish.
To implement the itemizing web page, create a route with the House web page element and fetch the information from the API to indicate it on the consumer aspect.
Fortunately, RedwoodJS gives scaffolding that generates all of the implementation for us. Let’s say you wish to scaffold all of the pages, together with GraphQL backend implementation, you should use the next command:
yarn redwood g scaffold publish
It’s going to generate pages, SDL, and repair for the publish mannequin. You may consult with all of the RedwoodJS instructions of their documentation.
Since we’re going to customise the pages. Let’s scaffold SDL and providers solely. Use this command:
yarn redwood g sdl --typescript publish
It’s going to create publish area recordsdata in graphql/posts.sdl.ts and providers/posts — let’s create pages on the internet.
Regardless that we customise the pages and elements, we don’t must create every thing from scratch. As a substitute, we are able to use scaffolding and modify it based mostly on our necessities.
Let’s create a House web page utilizing this command:
yarn redwood g web page dwelling
It’s going to create a house web page and add that web page contained in the Routes.tsx. So now, you could have the essential dwelling web page element.
Now, to listing all of the posts on the house web page, that you must fetch the information from api and present it on the pages. To make this course of simpler, RedwoodJS gives cells. Cells are a declarative method to information fetching — it executes a GraphQL question and manages its lifecycle.
To generate cells, use this command:
yarn rw generate cell dwelling
It’s going to create a GraphQL question and its lifecycle:
import kind { FindPosts } from 'varieties/graphql'

import { Hyperlink } from '@redwoodjs/router'
import kind {
  CellSuccessProps,
  CellFailureProps,
  CellLoadingProps,
} from '@redwoodjs/net'

export const QUERY = gql`
  question FindPosts {
    posts {
      id
      title
      physique
      feedback {
        id
      }
      createdAt
      updatedAt
    }
  }
`

export const Loading: React.FC<CellLoadingProps> = () => <div>Loading...</div>

export const Empty = () => <div>No posts discovered</div>

export const Failure = ({ error }: CellFailureProps) => (
  <div>Error loading posts: {error.message}</div>
)

export const Success = ({ posts }: CellSuccessProps<FindPosts>) => {
  return (
    <div>
      <ul>
        {posts.map((publish) => (
          <li key={publish.id}>
            {' '}
            <Hyperlink to={`/posts/${publish.id}`}>
              <div className="p-2 my-2 rounded-lg shadow cursor-pointer">
                <h4 className="text-xl font-medium">{publish.title}</h4>

                <p>{publish.physique}</p>
              </div>
            </Hyperlink>
          </li>
        ))}
      </ul>
    </div>
  )
}
Protected route
To guard the route within the RedwoodJS utility, you should use Personal from @redwoodjs/router and wrap every thing contained in the route.
<Personal unauthenticated="login">
        <Set wrap={NavbarLayout}>
          <Set wrap={ContainerLayout}>
            <Route path="/new" web page={NewpostPage} identify="newpost" />
            <Set wrap={SidebarLayout}>
              <Route path="https://weblog.logrocket.com/" web page={HomePage} identify="dwelling" />
              // routes come right here
            </Set>
          </Set>
        </Set>
</Personal>
Creating posts
To create a brand new publish, scaffold a brand new publish web page utilizing the next command:
yarn redwood g web page newpost /new
If you wish to customise the route URL, you may go that as a parameter right here. RedwoodJS provides routes based mostly on the offered identify. RedwoodJS gives varieties and validations out of the field,
import {
  FieldError,
  Kind,
  Label,
  TextField,
  TextAreaField,
  Submit,
  SubmitHandler,
} from '@redwoodjs/varieties'
As soon as a consumer submits type, you may name the GraphQL mutation to create a publish.
const CREATE_POST = gql`
  mutation CreatePostMutation($enter: CreatePostInput!) {
    createPost(enter: $enter) {
      id
    }
  }
`
const onSubmit: SubmitHandler<FormValues> = async (information) => {
    attempt {
      await create({
        variables: {
          enter: { ...information, authorId: currentUser.id },
        },
      })
      toast('Put up created!')
      navigate(routes.dwelling())
    } catch (e) {
      toast.error(e.message)
    }
  }
Put up particulars
Create a publish particulars web page and cell for information fetching to view publish particulars. You may comply with the identical course of that we did earlier than.
yarn redwood g web page postdetails
This can create the web page and route in routes.tsx. To go URL params within the route, you may modify it like this:
<Route path="/posts/{id:Int}" web page={PostDetails} identify="postdetails" />
You may go ID into the element as props. Then, create a cell to fetch the publish particulars and render it contained in the element.
yarn redwood g cell publish
Add the next code to fetch the information and feedback for a particular publish:
import kind { FindPosts } from 'varieties/graphql'
import { format } from 'date-fns'
import { useAuth } from '@redwoodjs/auth'
import kind {
  CellSuccessProps,
  CellFailureProps,
  CellLoadingProps,
} from '@redwoodjs/net'

export const QUERY = gql`
  question FindPostDetail($id: Int!) {
    publish: publish(id: $id) {
      id
      title
      physique
      writer {
        id
      }
      feedback {
        id
        physique
        writer {
          id
          identify
        }
        createdAt
      }
      createdAt
      updatedAt
    }
  }
`

export const Loading: React.FC<CellLoadingProps> = () => <div>Loading...</div>

export const Empty = () => <div>No posts discovered</div>

export const Failure = ({ error }: CellFailureProps) => (
  <div>Error loading posts: {error.message}</div>
)

export const Success = ({ publish }: CellSuccessProps<FindPosts>) => {
  const { currentUser } = useAuth()

  return (
    <div>
      <div>
        <h2 className="text-2xl font-semibold">{publish.title}</h2>
        <p className="mt-2">{publish.physique}</p>
      </div>

      <div className="mt-4 ">
        <hr />
        <h3 className="my-4 text-lg font-semibold text-gray-900">Feedback</h3>
        {publish.feedback.map((remark) => (
          <div
            key={remark.id}
            className="flex justify-between sm:px-2 sm:py-2 border rounded-lg"
          >
            <div className="my-4 flex-1  leading-relaxed">
              <robust>{remark.writer.identify}</robust>{' '}
              <span className="text-xs text-gray-400">
                {format(new Date(remark.createdAt), 'MMM d, yyyy h:mm a')}
              </span>
              <p>{remark.physique}</p>
            </div>
            {currentUser && currentUser.id === publish.writer.id && (
              <div className="m-auto">
                <button
                  kind="button"
                  className="focus:outline-none text-white bg-red-700 hover:bg-red-800 focus:ring-4 focus:ring-red-300 font-medium rounded-lg text-sm px-5 py-2.5 mr-2 mb-2 darkish:bg-red-600 darkish:hover:bg-red-700 darkish:focus:ring-red-900"
                >
                  Delete
                </button>
              </div>
            )}
          </div>
        ))}
      </div>
    </div>
  )
}
An vital factor to notice right here is the situation to examine if the present logged in consumer is the writer of publish. In that case, we offer an choice to delete feedback.
Consumer-based entry
To offer user-based entry inside the applying, you may get the present consumer utilizing useAuth hooks and add situations on it. For instance, To point out a listing of posts created by the consumer, you should use the present consumer ID to fetch posts by writer.
const { currentUser } = useAuth()
MyPostCell.tsx
import { Hyperlink } from '@redwoodjs/router'
import kind { FindPosts } from 'varieties/graphql'
import kind {
  CellSuccessProps,
  CellFailureProps,
  CellLoadingProps,
} from '@redwoodjs/net'

export const QUERY = gql`
  question FindMyPosts($id: Int!) {
    consumer: consumer(id: $id) {
      id
      identify
      posts {
        id
        title
        physique
      }
    }
  }
`

export const Loading: React.FC<CellLoadingProps> = () => <div>Loading...</div>

export const Empty = () => <div>No posts discovered</div>

export const Failure = ({ error }: CellFailureProps) => (
  <div>Error loading posts: {error.message}</div>
)

export const Success = ({ consumer }: CellSuccessProps<FindPosts>) => {
  return (
    <div>
      <ul>
        {consumer.posts.map((publish) => (
          <li key={publish.id}>
            {' '}
            <Hyperlink to={`/posts/${publish.id}`}>
              <div className="shadow rounded-lg p-2 my-2 cursor-pointer">
                <h4 className="text-xl font-medium">{publish.title}</h4>

                <p>{publish.physique}</p>
              </div>
            </Hyperlink>
          </li>
        ))}
      </ul>
    </div>
  )
}
Conclusion
RedwoodJS gives every thing out of the field. It’s all about constructing the applying based mostly on our necessities. Some vital ideas are cells, pages, Prisma schema and migration, and understanding how the system works.
When you perceive RedWoodJS, you may construct a full-stack utility with little or no time, as we’ve seen on this publish. Yow will discover the supply code for this tutorial right here.
Writing a number of TypeScript? Watch the recording of our latest TypeScript meetup to study writing extra readable code.
TypeScript brings kind security to JavaScript. There could be a rigidity between kind security and readable code. Watch the recording for a deep dive on some new options of TypeScript 4.4.
