
Serverless computing continues to show productive to builders, permitting us to put in writing functions that comprise server-side performance with out the effort of managing a bodily server. This structure offloads server duties like authentication, database administration, and extra to a vendor, permitting for faster improvement time and diminished value. It is usually a observe adopted within the Jamstack neighborhood.
Netlify, a pioneering Jamstack platform, created a service known as Netlify Id, which you need to use to implement authentication in your net functions shortly. Netlify Id is a plug-and-play microservice backed by the Netlify GoTrue API. This service comes with a full suite of authentication performance (login, password restoration, OAuth suppliers), forestalling the necessity to roll out your authentication system.
On this article, you’ll discover ways to implement authentication in a Subsequent.js app with Netlify Id.
Conditions
To observe alongside, you’ll want:
Deploying a Subsequent.js mission to Netlify
For this tutorial, we are going to try to arrange Id in a pre-existing Jamstack weblog from Netlify’s templates repository. You may view the completed mission and supply code.
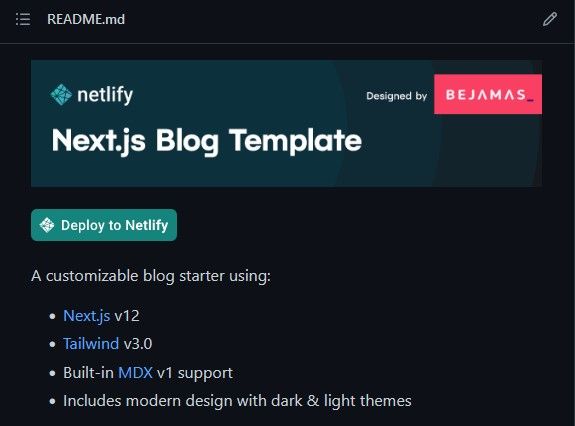
Click on on the Deploy to Netlify button seen above within the mission’s README.md file to deploy your web site to Netlify. This can take you to Netlify’s web site, prompting you to attach Netlify to your GitHub account.
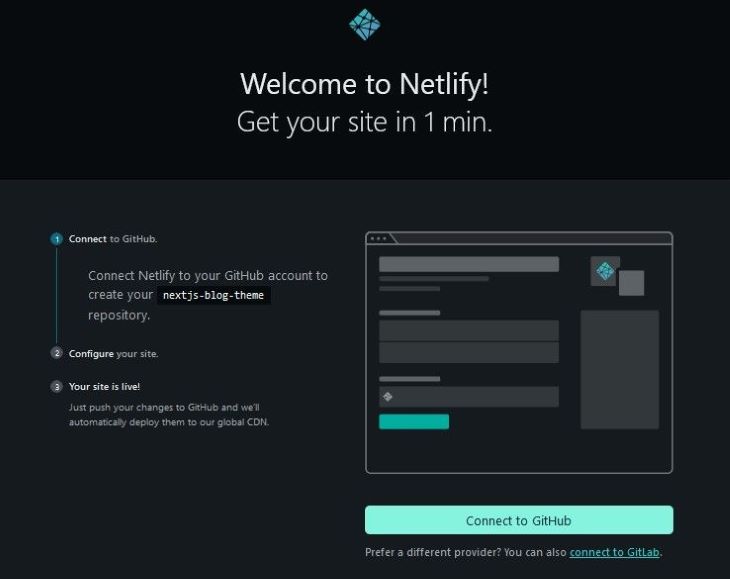
After linking your account and following the onscreen steps, a repository will likely be created below your GitHub profile, and in a second, your web site must be dwell on Netlify.
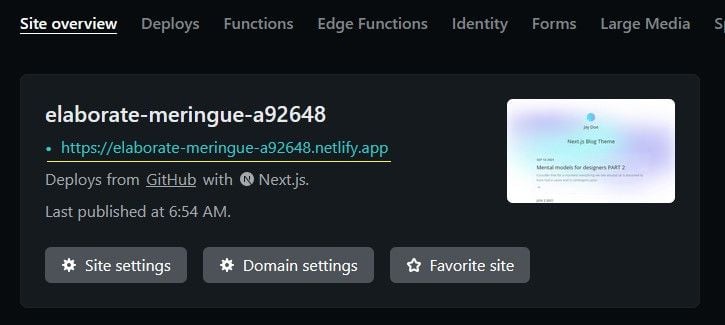
Discover the positioning’s dwell URL underlined above. Save this URL for later as Id will want it to find your utility.
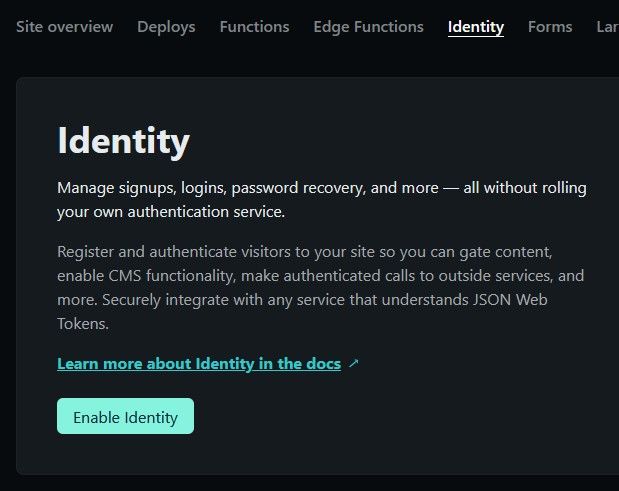
Earlier than Id can work in your mission, Netlify requires you to allow the Id characteristic within the mission’s settings. Out of your dashboard, navigate to the Id tab and click on the Allow Id button:
Now your utility is about to start out authenticating customers! Subsequent, we are going to set up a JavaScript widget for Netlify Id into this mission.
The Netlify Id widget is a part constructed round GoTrue.js — the JavaScript consumer library for the GoTrue API. GoTrue.js exposes a number of strategies that can be utilized as a constructing block for setting up the UI for signups, login flows, and logout flows. You too can use this library to construct your customized Id authentication UI.
Find the template’s repository below your GitHub profile and clone it domestically with the next command:
git clone https://github.com/{your-github-username}/nextjs-blog-theme.git
Subsequent, set up the Netlify Id widget:
npm set up netlify-identity-widget
or
yarn set up netlify-identity-widget
Now we will start to arrange an authentication context utilizing React.createContext().
Creating the authentication context
The React Context API is a mechanism for creating and sharing knowledge globally throughout React functions, with out having to move a prop by means of many ranges of the part tree.
Utilizing React.createContext creates a context object with two vital React elements: Supplier and Shopper. Youngster components wrapped within the Supplier part can entry and subscribe to state adjustments utilizing React.useContext.
We will implement this API to trace the consumer’s authentication standing. Create a folder named context within the mission’s root and add an AuthContext.js file:
// context/AuthContext.js
import { useState, createContext } from 'react';

export const AuthContext = createContext();

export const AuthContextProvider = ({ kids }) => {
  const [user, setUser] = useState(null);

  const contextValues = { consumer };
  return (
    <AuthContext.Supplier worth={contextValues}>
      {kids}
    </AuthContext.Supplier>
  );
};
Right here we’ve created and exported an AuthContext object created with createContext. We’ve then initialized a consumer state with the useState Hook.
AuthContext‘s Supplier part has a worth prop that accepts an object for the worldwide state. I’ve summarized the context values right into a contextValues object and assigned them to worth.
AuthContext.Supplier can then be used to wrap the whole utility, permitting any youngster part to entry its international state:
// _app.js
import '../types/globals.css';
import 'prismjs/themes/prism-tomorrow.css';
import { AuthContextProvider } from '../context/authContext';

perform MyApp({ Element, pageProps }) {
  return (
    <>
      <span className="theme-bejamas" />
      <AuthContextProvider>
        <Element {...pageProps} />
      </AuthContextProvider>
    </>
  );
}
export default MyApp;
Initializing Netlify Id
To make use of the Netlify Id Widget in your mission, you need to first initialize it utilizing the init() technique — view the widget’s full API right here. We will do that inside a useEffect Hook as such:
// context/AuthContext.js
import { useState, useEffect, createContext } from 'react';
import netlifyIdentity from 'netlify-identity-widget';

export const AuthContext = createContext();

export const AuthContextProvider = ({ kids }) => {
  const [user, setUser] = useState(null);

  useEffect(() => {
    // initialize netlify id
    netlifyIdentity.init();
  }, []);

  const contextValues = { consumer };
  return (
    <AuthContext.Supplier worth={contextValues}>
      {kids}
    </AuthContext.Supplier>
  );
};
When the widget initializes within the browser, the consumer’s authentication standing is made out there. You may sync this worth with the consumer context by listening for an init occasion and updating the state accordingly. The Netlifiy Id library supplies an on() handler for binding to authentication occasions. It additionally returns a callback perform that incorporates the information of the at the moment authenticated consumer.
netlifyIdentity.on("init" | "login" | "logout", (consumer) => {
  console.log(consumer.e mail) // [email protected]
})
With this, you’ll be able to pay attention for an init occasion and replace AuthContext’s consumer state as such:
// context/AuthContext.js
import { useState, useEffect, createContext } from 'react';
import netlifyIdentity from 'netlify-identity-widget';

export const AuthContext = createContext();

export const AuthContextProvider = ({ kids }) => {
  const [user, setUser] = useState(null);

  useEffect(() => {
    // initialize netlify id
    netlifyIdentity.init();
  }, []);

  useEffect(() => {
    // replace consumer state on init occasion
    netlifyIdentity.on('init', (consumer) => {
      setUser(consumer);
    });
  }, []);

  const contextValues = { consumer };
  return (
    <AuthContext.Supplier worth={contextValues}>
      {kids}
    </AuthContext.Supplier>
  );
};
For higher readability, I’ve written this occasion handler in a separate useEffect Hook. Subsequent, you’re going to see methods to register and log in customers.
Id registration and login
The Netlify Id Widget API supplies an open() technique for opening the signup/login modal beneath:
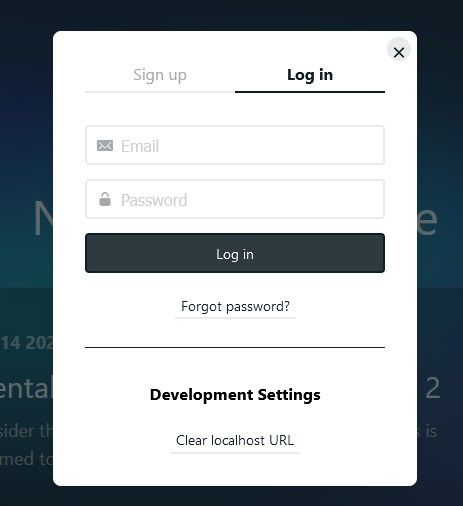
By default, the modal opens to the Login tab, however you’ll be able to specify which tab you need open:
netlifyIdentity.open("login" | "signup")
Create a login perform in AuthContext.js and name netlifyIdentity.open():
// context/AuthContext.js
import { useState, useEffect, createContext } from 'react';
import netlifyIdentity from 'netlify-identity-widget';

export const AuthContext = createContext();

export const AuthContextProvider = ({ kids }) => {
  const [user, setUser] = useState(null);

  useEffect(() => {
    // initialize netlify id
    netlifyIdentity.init();
  }, []);

  useEffect(() => {
    // replace consumer state on 'init occasion
    netlifyIdentity.on('init', (consumer) => {
      setUser(consumer);
    });
  }, []);

  const login = () => {
    netlifyIdentity.open('login');
  };

  const contextValues = { consumer, login };
  return (
    <AuthContext.Supplier worth={contextValues}>
      {kids}
    </AuthContext.Supplier>
  );
};
Bear in mind to incorporate this perform within the contextValues object so it’s out there all through the applying. Subsequent, we are going to use the netlifyIdentity.on() technique to pay attention for a login occasion. When the widget detects this occasion, we are going to replace the context’s consumer state as such:
// context/AuthContext.js
import { useState, useEffect, createContext } from 'react';
import netlifyIdentity from 'netlify-identity-widget';

export const AuthContext = createContext();

export const AuthContextProvider = ({ kids }) => {
  const [user, setUser] = useState(null);

  useEffect(() => {
    // initialize netlify id
    netlifyIdentity.init();
  }, []);

  useEffect(() => {
    // replace consumer state on 'init occasion
    netlifyIdentity.on('init', (consumer) => {
      setUser(consumer);
    });
     // replace consumer state after login
    netlifyIdentity.on('login', (consumer) => {
      setUser(consumer);
      // shut the modal
      netlifyIdentity.shut();
    });
  }, []);

  const login = () => {
    netlifyIdentity.open('login');
  };

  const contextValues = { consumer, login };
  return (
    <AuthContext.Supplier worth={contextValues}>
      {kids}
    </AuthContext.Supplier>
  );
};
Notice that Netlify Id permits for a most of 1000 registered customers per web site on the free tier.
Accessing context values with useContext
The React.useContext Hook can be utilized by youngster elements to learn and subscribe to state adjustments from the Context object handed to it:
const { consumer } = React.useContext(AuthContext)
conosle.log(consumer.e mail) // [email protected]
Create an AuthButton.js file within the elements folder and add the code block beneath:
// elements/AuthButton.js
import { useContext } from 'react';
import { AuthContext } from '../context/authContext';

const AuthButton = () => {
  const { consumer, login } = useContext(AuthContext);
  return (
    <div className="absolute top-5 right-5">
      {!consumer ? (
        <button
          onClick={login}
          className="py-2 px-4 mr-2 bg-sky-500 hover:bg-sky-600 font-semibold rounded-md"
        >
          Login
        </button>
      ) : (
        <button
          className="py-2 px-4 mr-2 bg-sky-500 hover:bg-sky-600 font-semibold rounded-md"
        >
          Logout
        </button>
      )}
    </div>
  );
};
export default AuthButton;
We begin by calling useContext and passing within the AuthContext object. In doing so, you’ll be able to destructure the 2 values at the moment in AuthContext — consumer and login. Subsequent, we’ve used the consumer state to conditionally render a login or logout button relying on the authentication standing of the consumer. login is then connected to the onClick handler of the login button.
Now, let’s render this button part on the house display screen:
// pages/index.js
import { useContext } from 'react';
import { getPosts } from '../utils/mdx-utils';
import Header from '../elements/Header';
import Structure, { GradientBackground } from '../elements/Structure';
import { getGlobalData } from '../utils/global-data';
import website positioning from '../elements/website positioning';
import { AuthContext } from '../context/authContext';
import AuthButton from '../elements/AuthButton';

export default perform Index({ posts, globalData }) {
  const { consumer } = useContext(AuthContext);

  return (
    <Structure>
      <website positioning title={globalData.identify} description={globalData.blogTitle} />
      <Header identify={consumer?.e mail} />
      <AuthButton />
      <fundamental className="w-full">
        {/* markup for fundamental ingredient */}
      </fundamental>
}

export perform getStaticProps() {
  const posts = getPosts();
  const globalData = getGlobalData();
  return { props: { posts, globalData } };
}
Discover that useContext has been used above to learn and show the e-mail of the consumer within the Header part.
Now you’ll be able to click on the Login/Signup button to start the authentication course of.
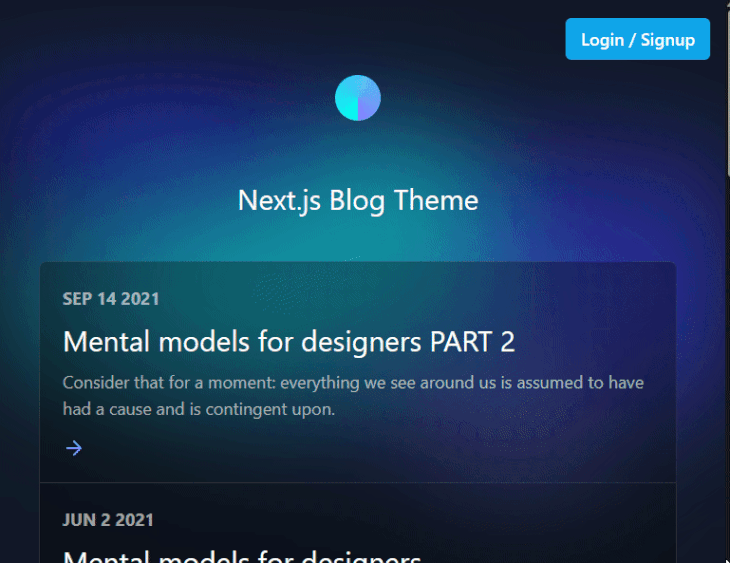
When opening the authentication modal for the primary time, the widget will immediate you to set your Netlify’s Dwell Website URL from earlier. After that, your utility can begin to acquire consumer info. Notice that Netlify Id permits for a most of a thousand customers per web site on the Free tier.
Subsequent, let’s see methods to log a consumer out.
Extra nice articles from LogRocket:
Id Logout
We’ll start by including a logout perform to the context, which can name netlifyIdentity.logout:
// context/AuthContext.js
import { useState, useEffect, createContext } from 'react';
import netlifyIdentity from 'netlify-identity-widget';

export const AuthContext = createContext();

export const AuthContextProvider = ({ kids }) => {
  const [user, setUser] = useState(null);

  useEffect(() => {
    // initialize netlify id
    netlifyIdentity.init();
  }, []);

  useEffect(() => {
    // replace consumer state after login
    netlifyIdentity.on('login', (consumer) => {
      setUser(consumer);
      netlifyIdentity.shut();
    });
    netlifyIdentity.on('logout', () => {
      setUser(null);
    });
    netlifyIdentity.on('init', (consumer) => {
      setUser(consumer);
    });
  }, []);

  const login = () => {
    netlifyIdentity.open('login');
  };

  const logout = () => {
    netlifyIdentity.logout();
  };

  const contextValues = { consumer, login, logout };

  return (
    <AuthContext.Supplier worth={contextValues}>
      {kids}
    </AuthContext.Supplier>
  );
};
We’ve additionally used the netlifyIdentity.on technique to pay attention for a logout occasion and subsequently clear the consumer state.
Now we will name this logout perform from AuthButton as such:
// elements/AuthButton.js
import { useContext } from 'react';
import { AuthContext } from '../context/authContext';

const AuthButton = () => {
  const { consumer, login, logout } = useContext(AuthContext);
  return (
    <div className="absolute top-5 right-5">
      {!consumer ? (
        <button
          onClick={login}
          className="py-2 px-4 mr-2 bg-sky-500 hover:bg-sky-600 font-semibold rounded-md"
        >
          Login
        </button>
      ) : (
        <button
          onClick={logout}
          className="py-2 px-4 mr-2 bg-sky-500 hover:bg-sky-600 font-semibold rounded-md"
        >
          Logout
        </button>
      )}
    </div>
  );
};
export default AuthButton;
AuthButton might be additional simplified to the code block beneath:
// elements/AuthButton.js
import { useContext } from 'react';
import { AuthContext } from '../context/authContext';

const AuthButton = () => {
  const { consumer, login, logout } = useContext(AuthContext);

  return (
    <div className="absolute top-5 right-5">
      <button
        onClick={!consumer ? login : logout}
        className="py-2 px-4 mr-2 bg-sky-500 hover:bg-sky-600 font-semibold rounded-md"
      >
        {!consumer ? 'Login / Signup' : 'Logout'}
      </button>
    </div>
  );
};
export default AuthButton;
Conclusion
Authentication is a vital and delicate a part of any main net utility, and having an exterior service like Netlify Id handle this characteristic for you is truthfully refreshing. Not solely do however these exterior auth libraries elevate off a lot of the burden, they’re additionally safer and fewer liable to cybersecurity assaults in comparison with your advert hoc auth implementation.
On this put up, you’ve discovered methods to use Netlify Id to implement fundamental authentication performance, however the options of this service prolong past the scope of this text. You may discover different Id options like OAuth authentication, creating gated content material with the supplied JWT, and way more.
LogRocket: Full visibility into your net and cell apps

LogRocket is a frontend utility monitoring answer that permits you to replay issues as in the event that they occurred in your personal browser. As an alternative of guessing why errors occur, or asking customers for screenshots and log dumps, LogRocket enables you to replay the session to shortly perceive what went fallacious. It really works completely with any app, no matter framework, and has plugins to log extra context from Redux, Vuex, and @ngrx/retailer.
Along with logging Redux actions and state, LogRocket data console logs, JavaScript errors, stacktraces, community requests/responses with headers + our bodies, browser metadata, and customized logs. It additionally devices the DOM to report the HTML and CSS on the web page, recreating pixel-perfect movies of even probably the most complicated single-page and cell apps.
