Upgrading storage is simply as simple as upgrading RAM. Yup, you simply want to slip your new storage drive proper in identical to you insert a USB drive into an USB port.
Relying on what sort of laptop computer you’ve, there are two methods to go about this. The primary methodology is the best one!
a) M.2 SSD Improve:
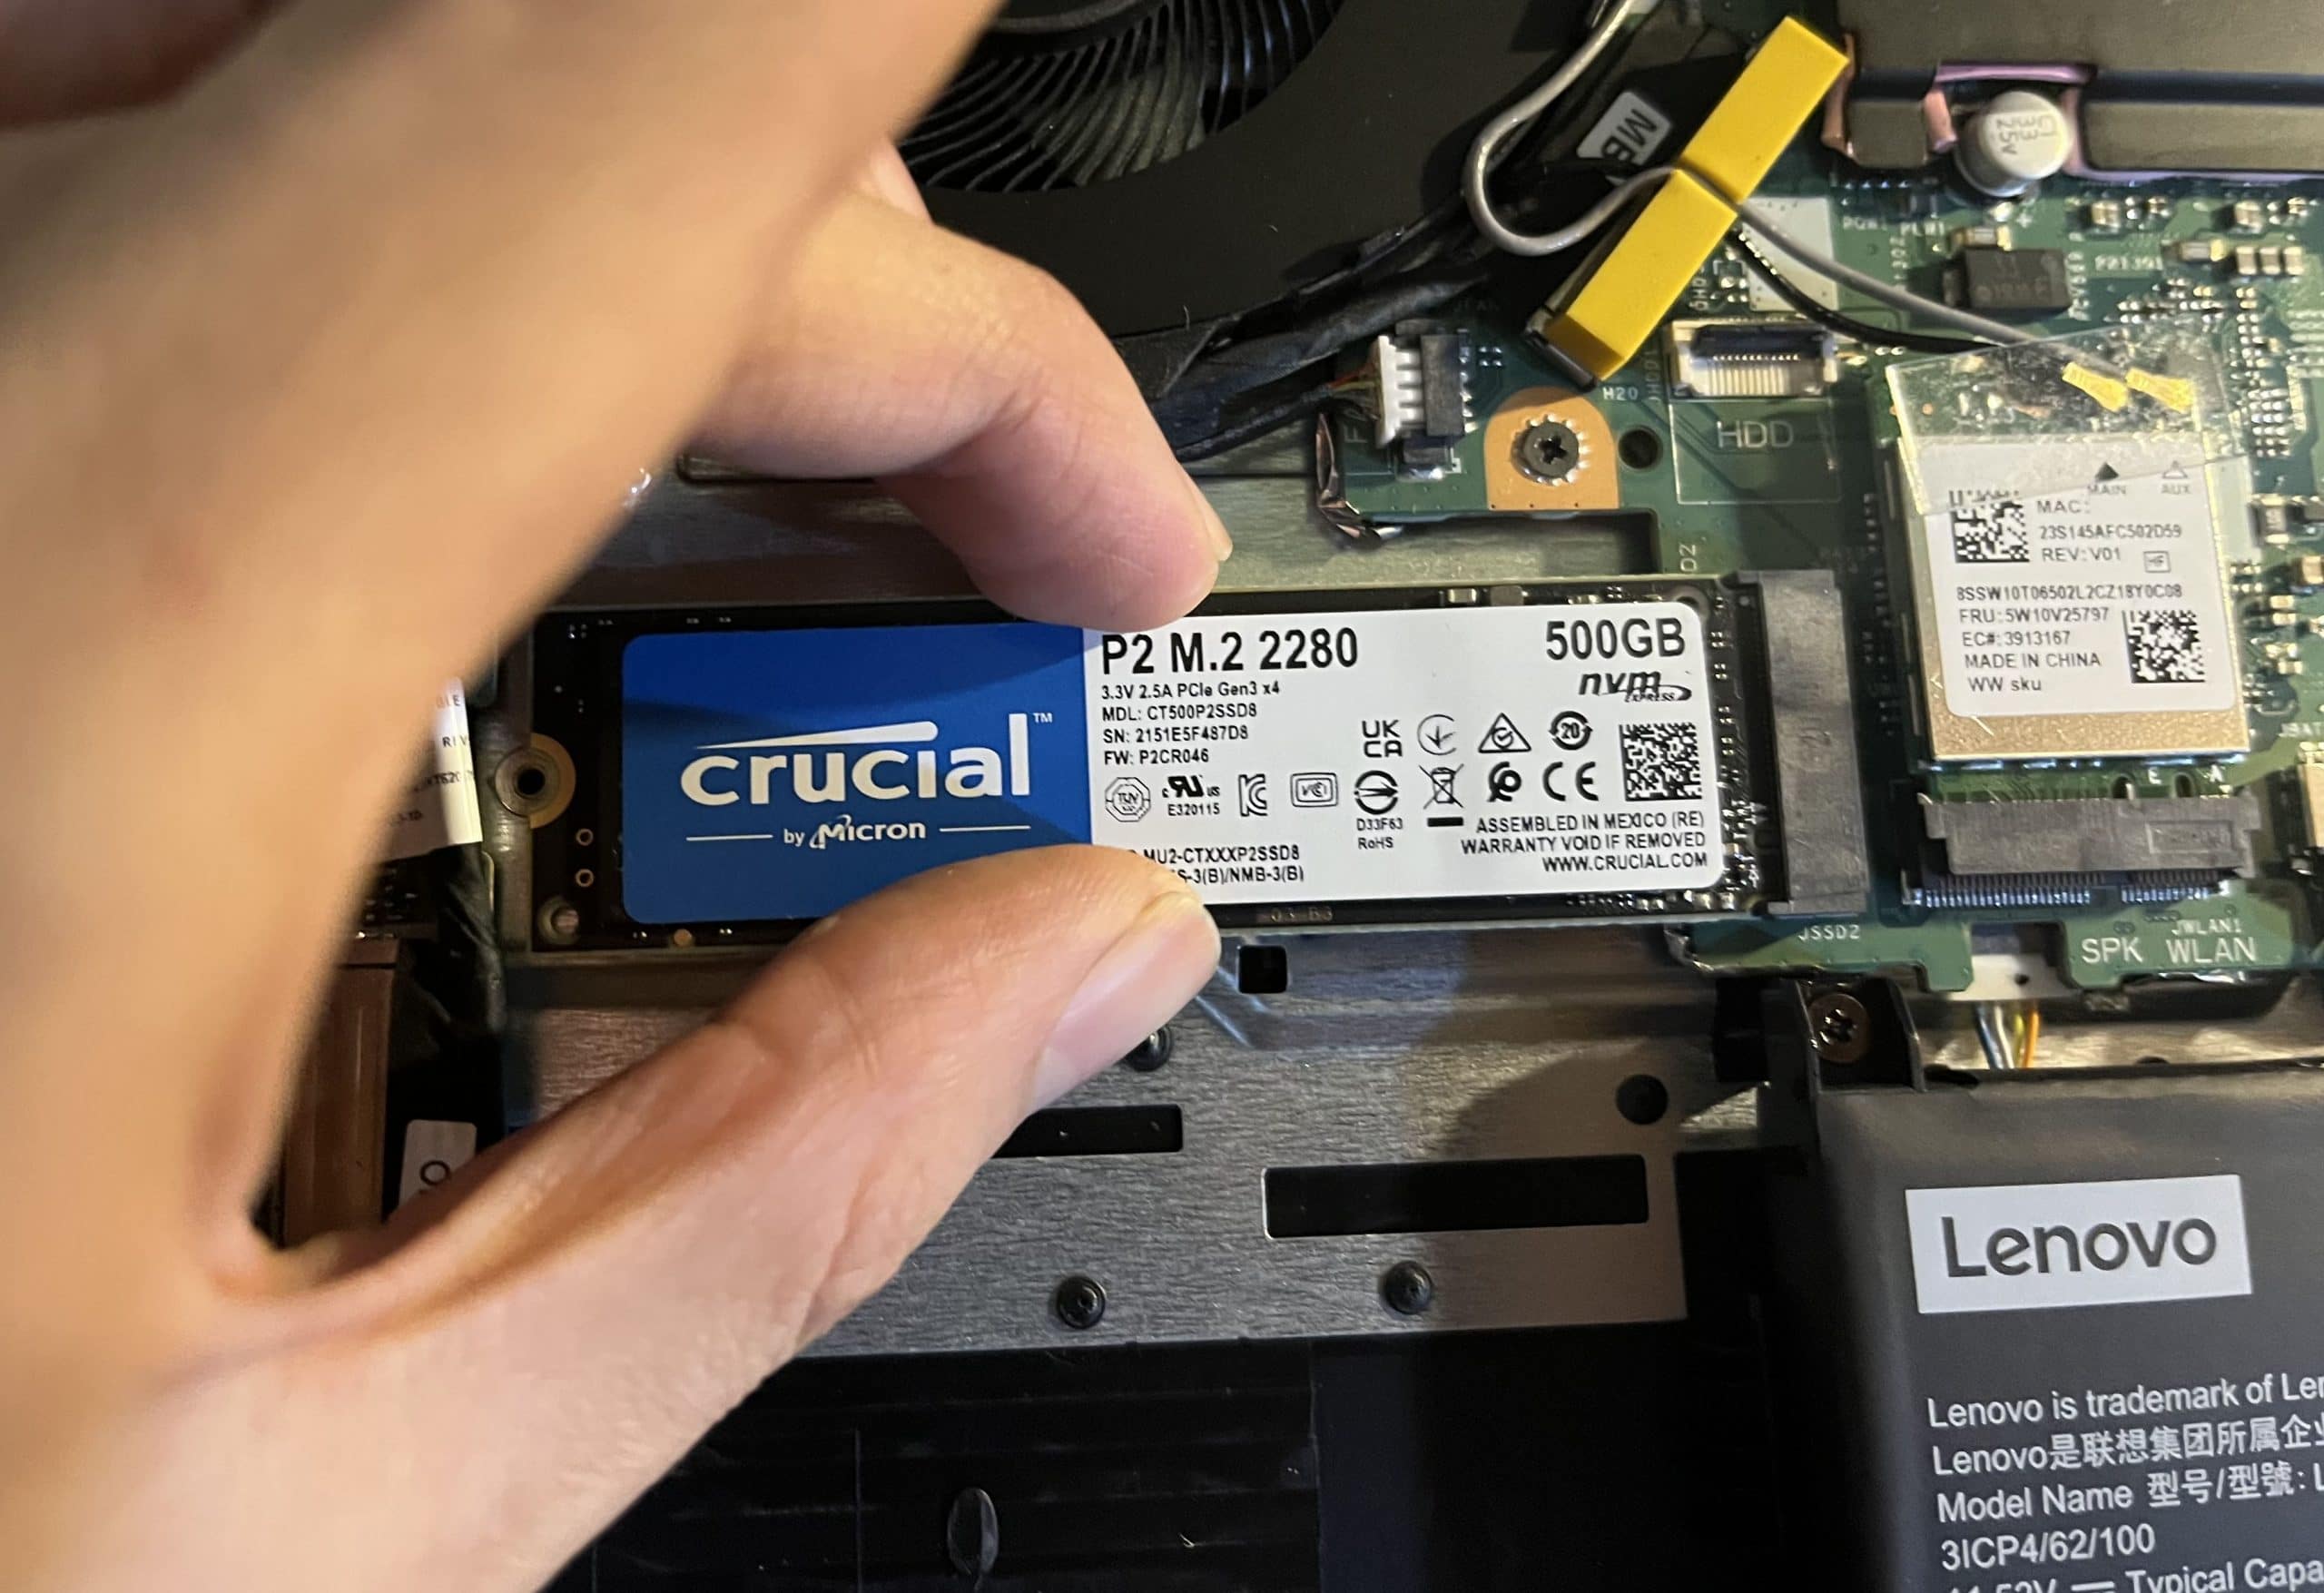
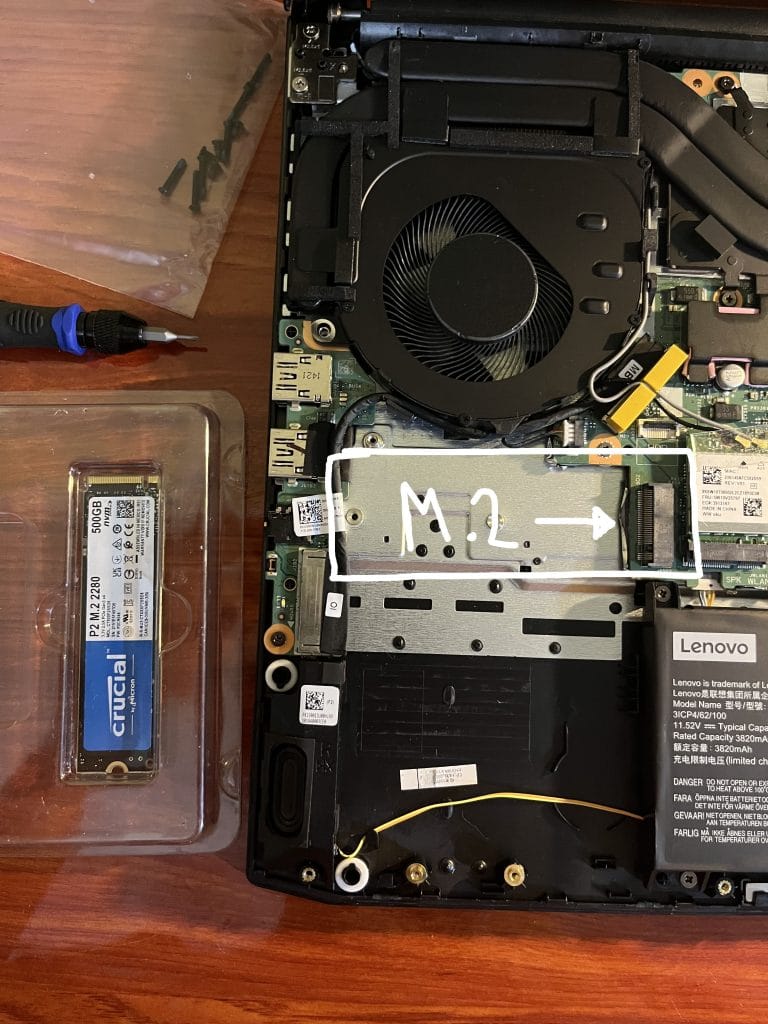
It’s referred to as M.2 as a result of the SSD you see within the image under has a M.2 kind issue thus it suits into the M.2 slot.
b) 2.5 ” SATA Improve:
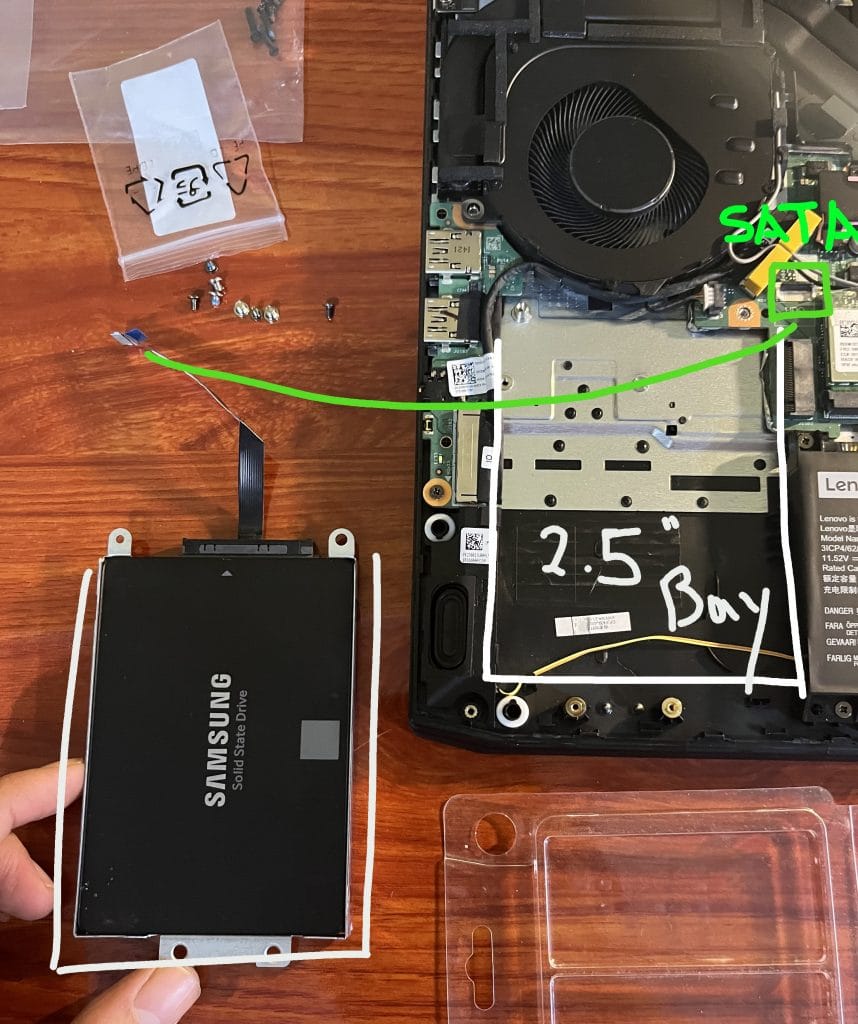
Like clever, it’s referred to as SATA improve as a result of the two.5” SSD Drive you see under it’s linked to the SATA port ( inexperienced ) under.
What’s the distinction? Which of the 2 is one of the simplest ways to do it?
Assuming you are able to do the set up accurately, there’s no distinction in efficiency.
Utilizing an M.2 SSD nonetheless will make transfering recordsdata from one place to a different (USB/exterior HDD) barely quicker thus in case you are a photographer shifting recordsdata ALL the time ALL day you might save your self a couple of minutes right here and there.
For gaming and some other functions, each upgrades provide the identical efficiency.
Which manner is the best?
If you happen to have a look at the 2 photos, clearly the M.2 SSD improve is the way in which to go. You simply slide a SSD stick proper in and also you’re finished.
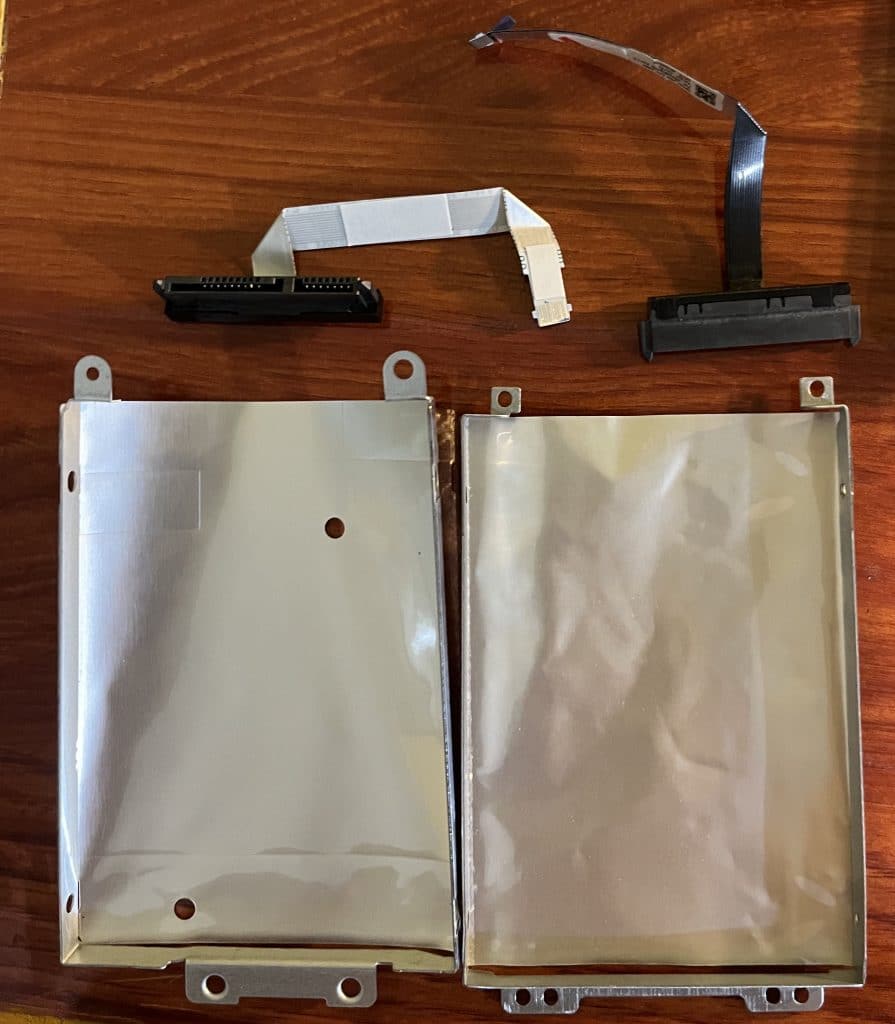
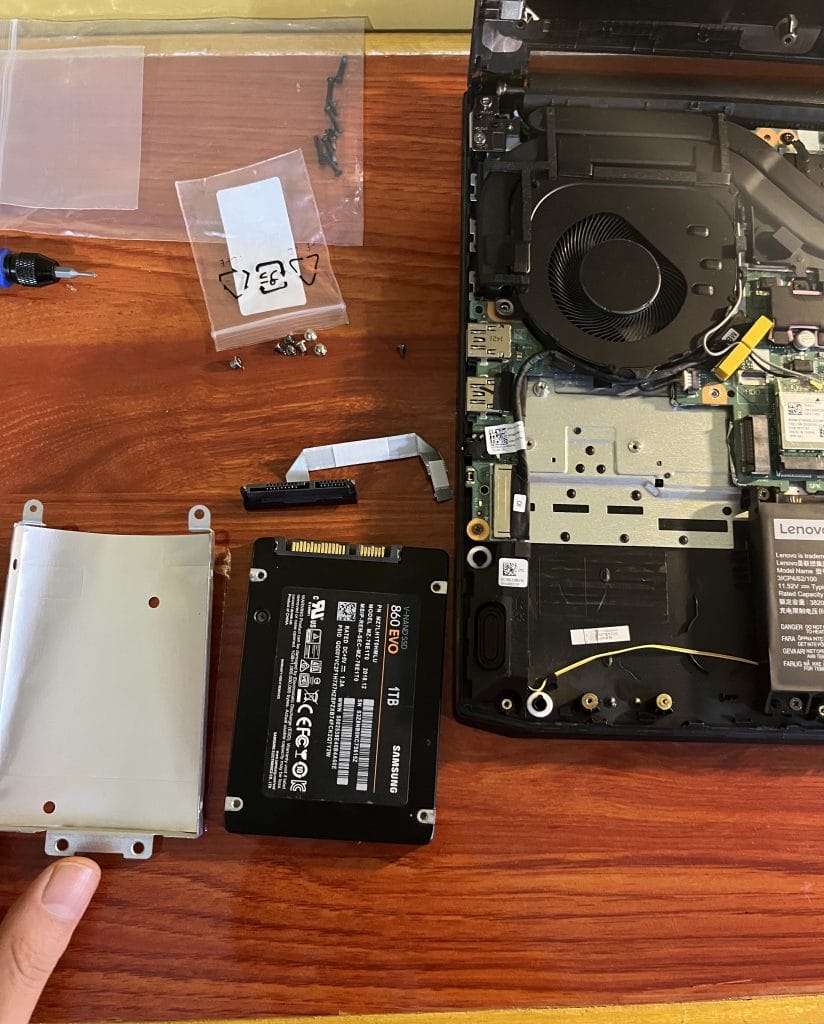
The two.5” improve, nonetheless, requires you to GET A 2.5” CADDY and a SATA connector cable as you’ll be able to see within the first image ON YOUR OWN. Producers will not often offer you these instruments! So yup it’s fairly annoying!
So Ought to I do the M.2 Improve then?
Nicely in case you have the selection sure!
Nevertheless it isn’t seemingly your laptop computer gives you each selections (except it’s a 2022 gaming laptop computer).
Thus in case your laptop computer is comparatively previous likelihood is you’ll be able to solely do the two.5” SATA improve.
We’ll go over each upgrades right here.
Earlier than you do the improve:
1. Discover out whether or not your laptop computer lets you do a M.2 or a 2.5” SSD .
For that you simply don’t must take away the underside panel.
You possibly can simply kind your laptop computer’s mannequin title on google + Upgrades.
Ex: “Acer Aspire 5 Upgrades”
If you happen to don’t know your mannequin’s title, simply kind “System data” in your Home windows 10 or Home windows 11 Search bar.
2. Get a New Storage Drive
Okay when you discovered your choices, purchase an SSD:
A) If you happen to’re upgrading storage by means of an M.2 Drive:
I like to recommend this mannequin right here which is the one I used on each laptop computer on this web site and the one we’ll use on this tutorial:
You don’t want to purchase a caddy or a cable connector or anything in addition to the M.2 SSD Drive itself as proven above
B) If you happen to’re upgrading storage by means of the two.5 SSD Drive:
I’ve no particular suggestions however the one we’re going to make use of right here is the Samsung EVO. We select it over all of the others just because it’s the quickest one.
Observe:
If you happen to’re doing the two.5” bay improve, you additionally want to purchase a caddy SPECIFICALLY designed on your laptop computer’s mannequin. There are some situations in which you will not want to purchase a caddy however it’s very uncommon. You’ll no less than want a SATA III cable conector.
C) Discovering a Caddy: Right here’s how I discover caddyes for the laptops we use on this web site:
- Verify the producer’s web site. (They’ll have one for you however often very costly)
- Use the Amazon search bar and sort “Laptop computer’s mannequin + Caddy”. That is going to be a lot less expensive.
- Use the eBay search bar to discover a caddy. This will not be the most cost effective however it’s the surest method to discover a Caddy. It would take fairly a very long time to get it shipped although.
3. Doing the Improve
When you’ve bought your M.2 SSD or SATA III SSD.
A) Discover the instruments to take away the underside cowl
You’re going to wish the next instruments:
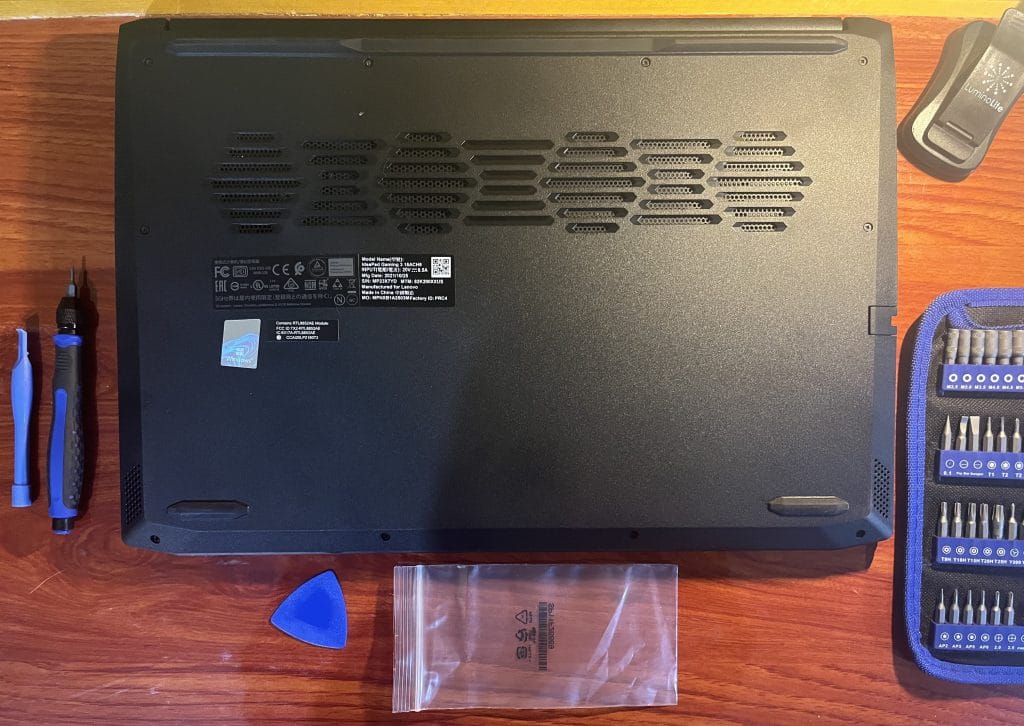
– A screwdriver (needs to be small so discover a bunch of skinny screwdrivers)
– A choose or a plastic spurge (in the event you can’t discover both round the home, use a guitar choose or a bit of plastic)
– A small bag or container (to retailer the screws in).
– Further Screws (to put the SSD you’ll want 1 for the M.2 Improve and a number of other for the Sata Improve). You purchase them off right here for five bucks and get a whole bunch.
I additionally extremely advocate you get your self a laptop computer software equipment since you’ll get a number of screwdrives that may match just about ANY screw on ANY laptop computer and also you additionally get a plastic spurge which makes it SO MUCH simpler to take away the underside panel as you’ll see oon
B) Take away the Backside Cowl
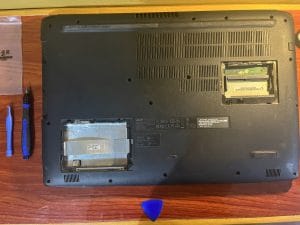
The next assumes your laptop computer doesn’t have a storage compartment as proven above for which in case you do not want to take away your complete backside panel simply the compartment.

i) Take away all screws
Take away each single screw on sight even those that appear pointless.

You don’t need to pull aside the duvet when there are nonetheless screws in, this may increasingly harm the plastic (although it gained’t actually make your laptop computer cease working, you’ll simply have huge scratches and dimps).
Don’t overlook to put the screws in a container. That is necessary as a result of you might must take away extra screws when you open the underside cowl and also you don’t need to combine them up.
ii) Take away the Backside Panel
You should utilize a bit of plastic like a guitar choose and loosen up the underside cowl as proven under:
You may also use (it’s really higher) a plastic spurdge. The underside cowl will simply come out:
C) Set up the SSD
i) M.2 SSD Improve
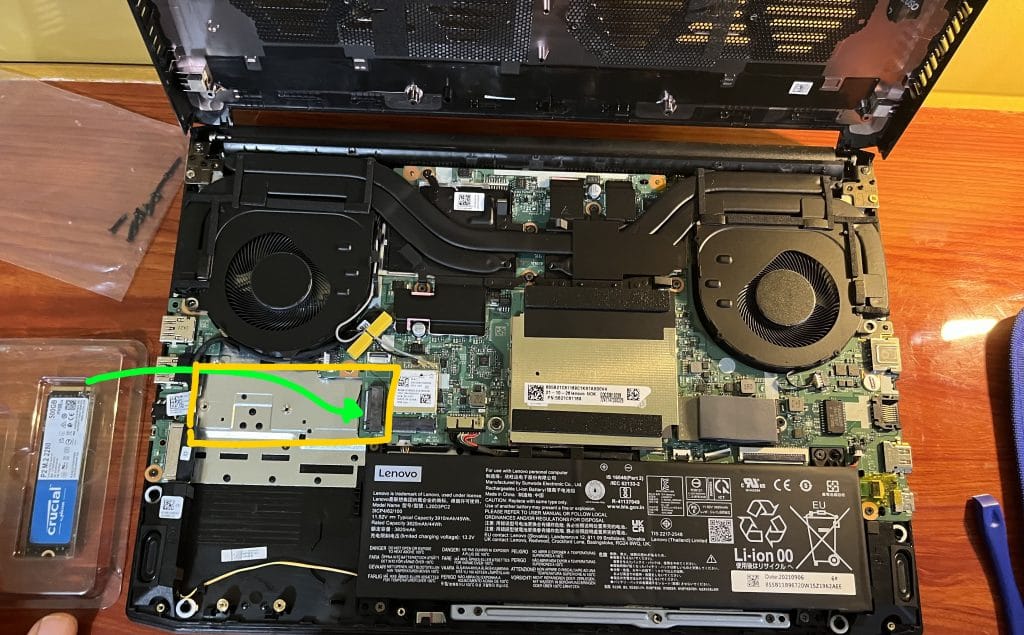
You don’t want to use a lot drive. Simply give it slightly thug as proven within the video under.
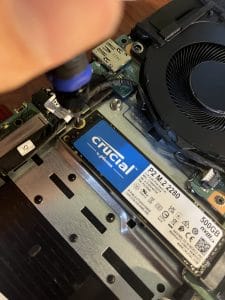
Screw the SSD in.
Put the again cowl in and You’re finished!
There’s a ultimate step you might must do to make your PC acknowledge your new SSD. Skip to the final step “Make Home windows Acknowledge the SSD”.
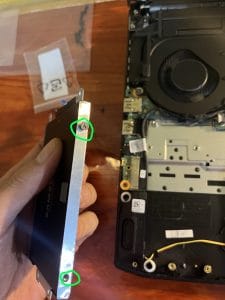
ii) SATA SSD Improve
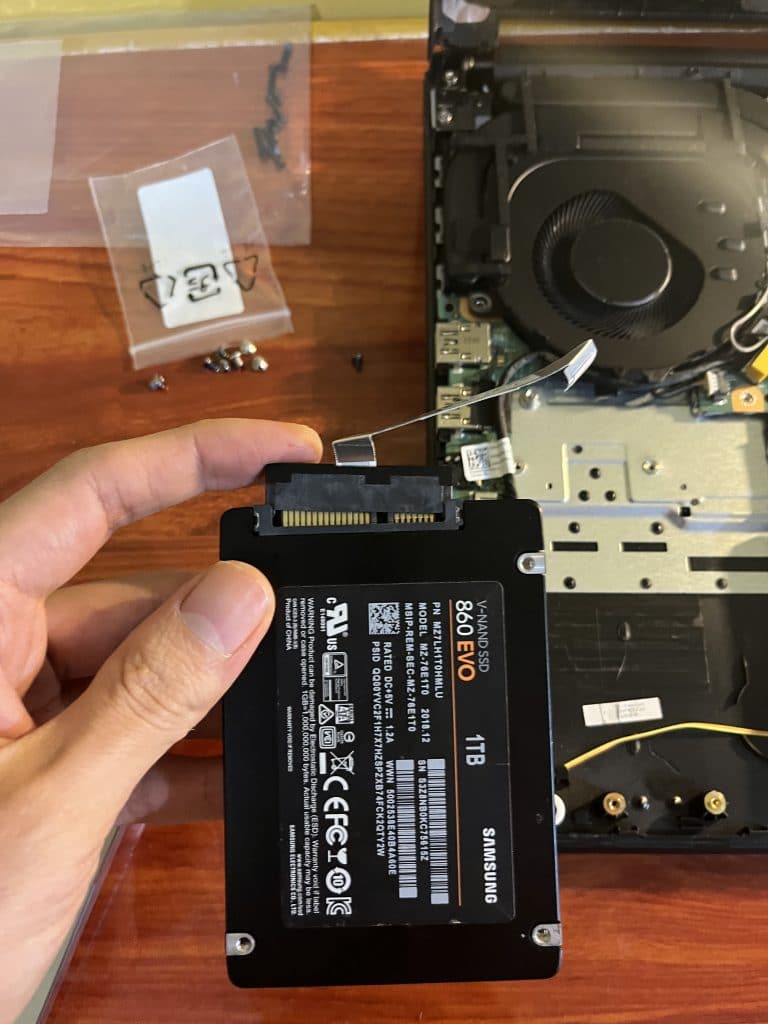
Take the SATA cable and plug it into the SSD Drive
Take the SSD and place into the two.5 Caddy as proven under.
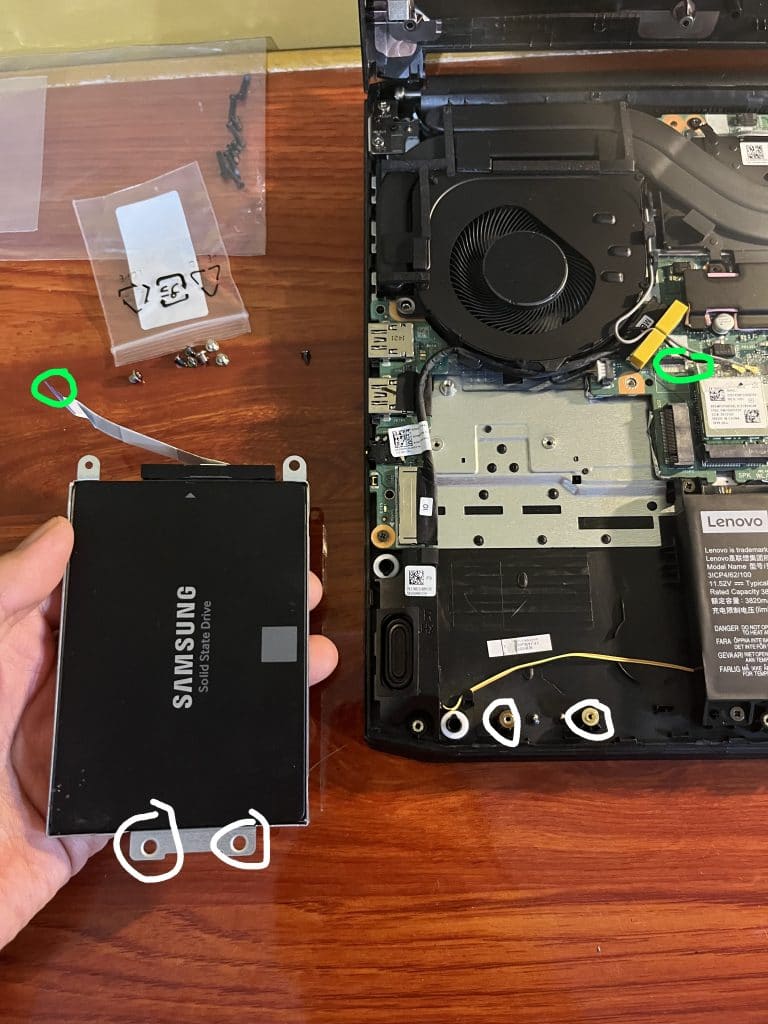
It should be finished in such manner that the SATA connector may be simply inserted into the SATA slot (inexperienced) and the pinholes and screwholes match collectively (white) as proven under:
If it doesn’t match, don’t panic. Simply flip the SSD over and test whether or not this time all the pieces suits properly. If it doesn’t you in all probability have both the incorrect caddy, the incorrect SATA cable connector or each.
If it suits, now you can take it screw the SSD into the Caddy. The screwholes are about 4 and so they’re situated on its sides as proven under:
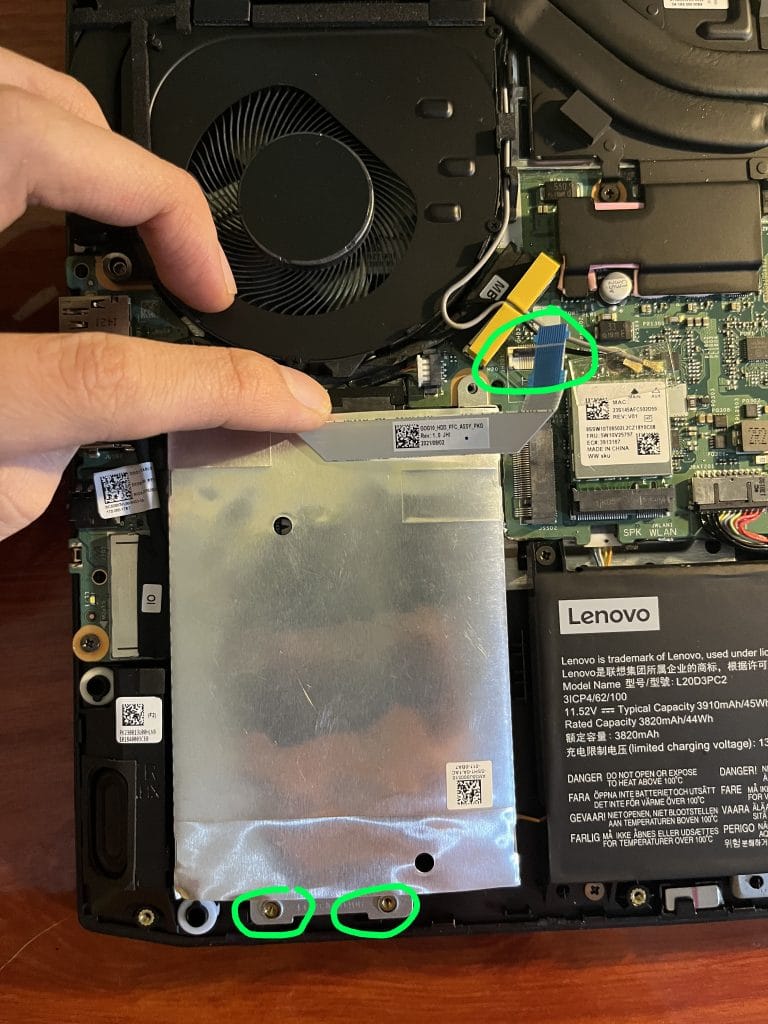
Now place the SSD+Caddy into the two.5” Bay and join the SATA cable connector into the SATA slot as proven under. It’s important to open the small gate (circled in inexperienced) earlier than you attempt to plug within the connector. You do that by lifting it up with one finger.
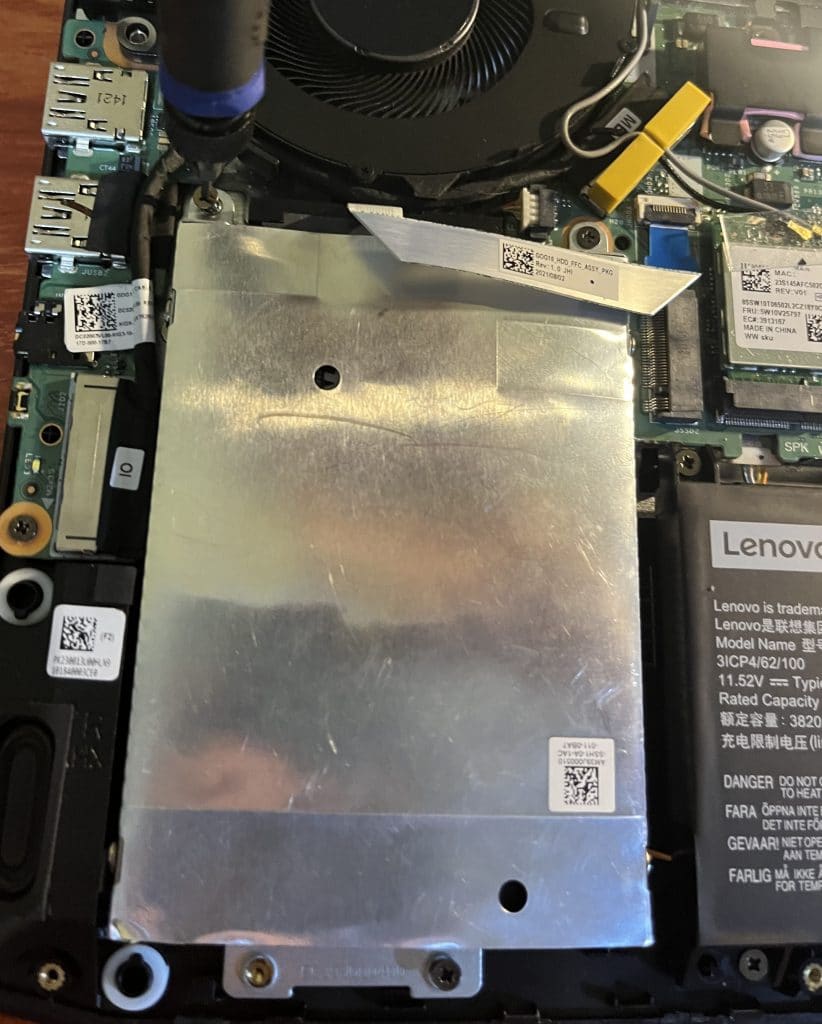
You do that by sliding it from under identical to throwing a carpet under the couch. As soon as in , it ought to appear to be this:
![]()
Now you’ll be able to push down the gate to safe it in place. After that screw your complete Caddy+SSD into the two.5” bay as proven under.
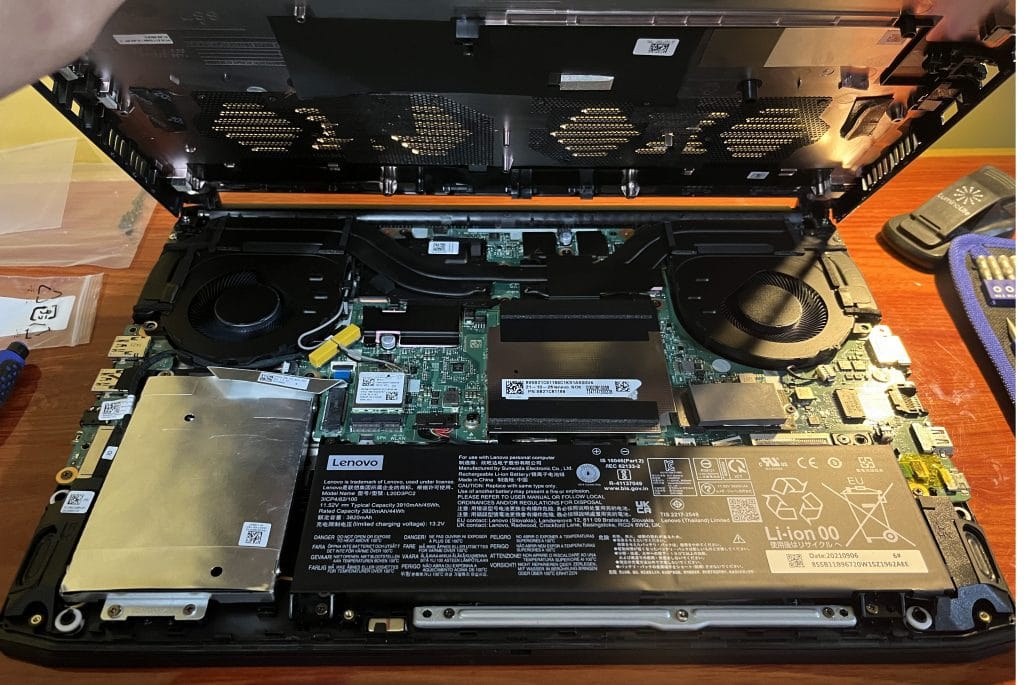
And also you’re finished! Now you can put the duvet again in!
4) Bonus: Make Home windows Acknowledge your NEW Storage Drive
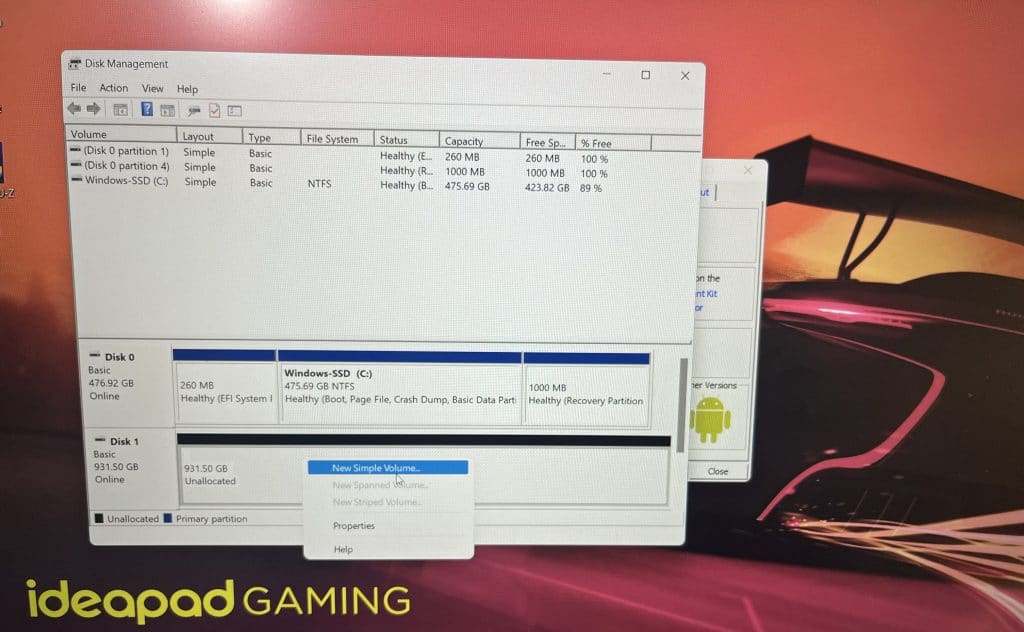
Sort Disk Administration within the Home windows Search Bar and click on on the primary end result. This could pop up:
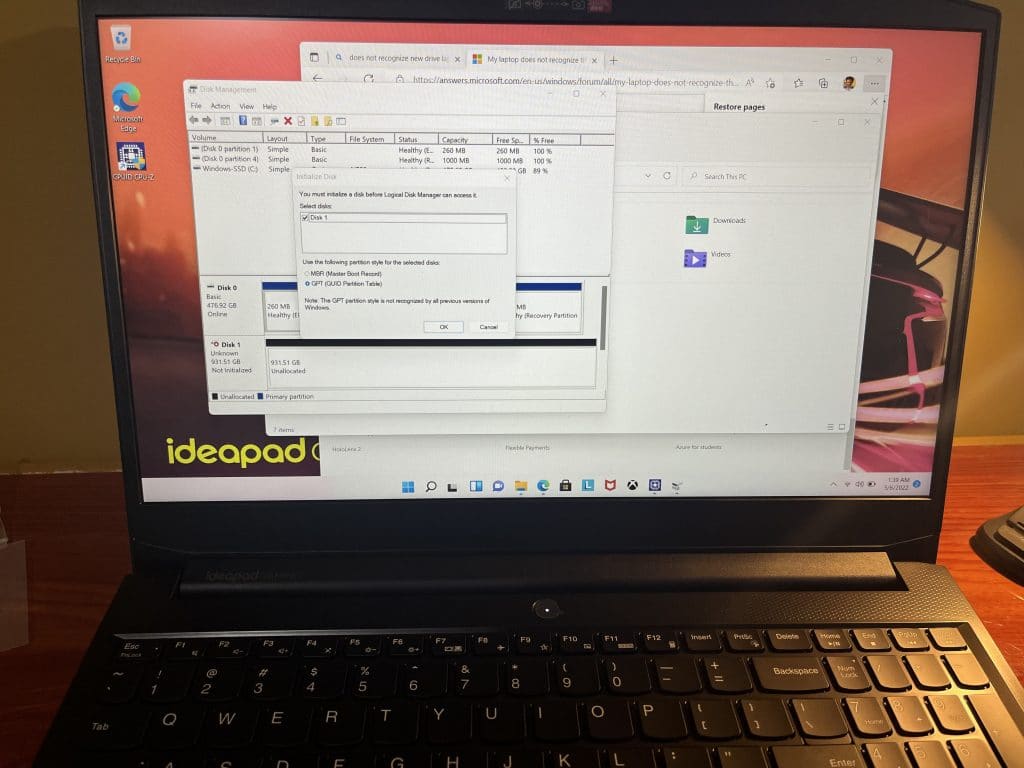
Proper click on on Disk #1 “Unallocated” and click on on New Pattern Quantity:
A wizard will pop up simply click on subsequent, click on subsequent after which select whether or not or not you need to partition the brand new SSD Drive.
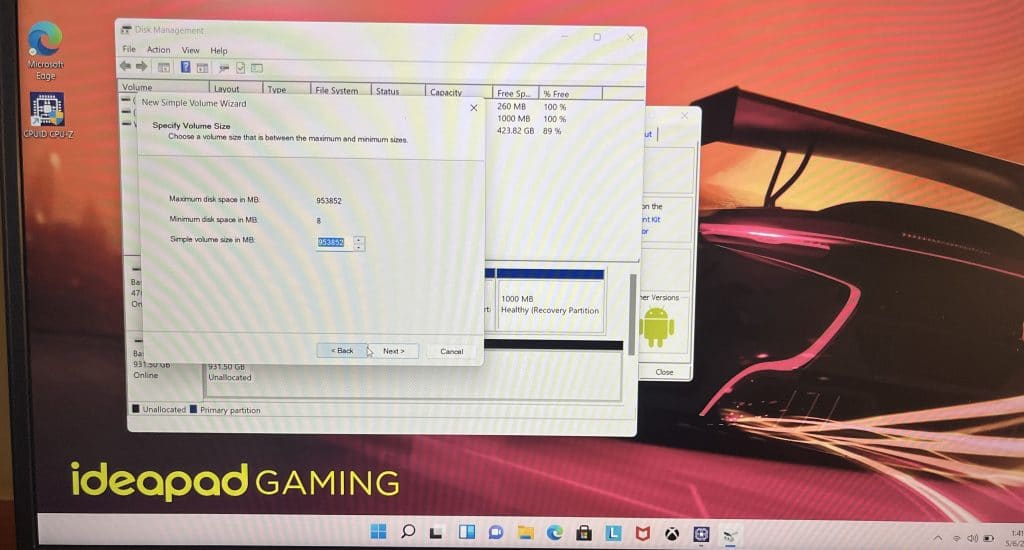
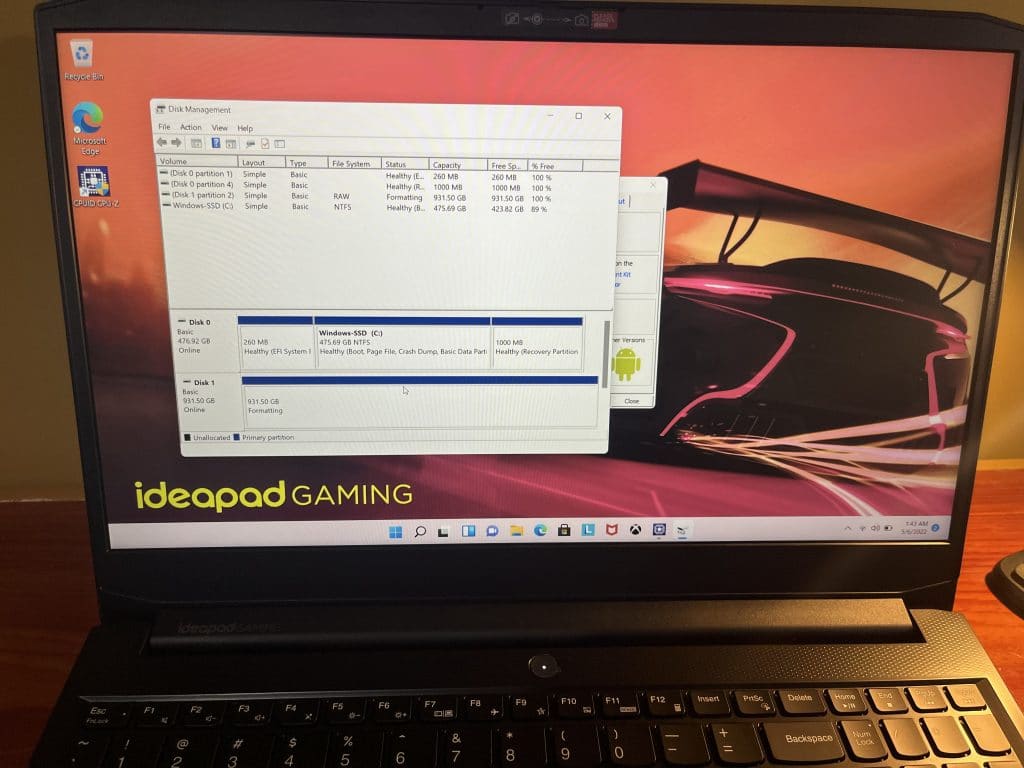
Or simply click on subsequent subsequent and subsequent and the brand new SSD Storage is not going to be partitioned and also you’re finished. There will likely be a fast automated formatting you then’re able to go!
Feedback?
When you’ve got any questions, strategies or suggestions please depart a remark under.
