
This submit comprises affiliate hyperlinks. I could earn a small fee charge in case you make a purchase order by the hyperlinks. Thanks.
In earlier tutorials, we mentioned the right way to deploy Laravel and Django purposes on Linux servers, however we missed two crucial matters.
- Easy methods to arrange a server in order that it’s safe and protected to make use of.
- Easy methods to map your area to your server in order that it’s accessible to the general public.
We’re going to deal with these issues on this article.
After we speak about an online server, we’re normally referring to a digital non-public server. A digital non-public server (VPS), in layman’s phrases, is a pc that serves information and assets in your web site. When your web site is visited, that laptop will switch these assets to the consumer. As for the title “digital”, it means this laptop additionally makes use of the virtualization know-how to separate one bodily server into a number of digital servers in order that they might be extra reasonably priced to you.
Select a VPS supplier
There are lots of nice firms that present VPS companies, equivalent to Digital Ocean, Vultr, and Linode. Every of them affords totally different functionalities.
On this article, I’ll use Vultr for example. You should utilize this hyperlink to obtain $100 to get you began. However, simply in case you’re utilizing a distinct supplier, I will not be utilizing any of its additional functionalities. Let’s persist with the fundamentals and arrange every part manually.
First, go to Merchandise and click on on Deploy Server:

Subsequent, select what sort of server you need. I like to recommend all the time beginning with the most affordable choice if you do not know what to decide on. You possibly can all the time improve to higher servers, however no VPS supplier affords downgrade companies as a result of that may danger information loss.

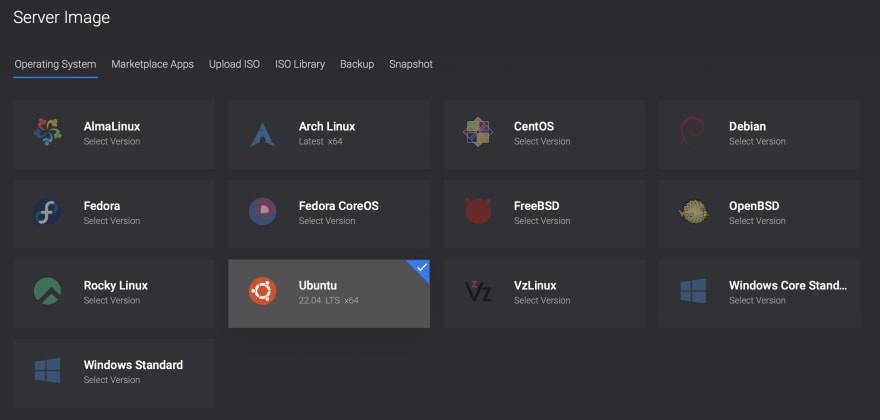
Subsequent, select your CPU, server location, and Working system. At all times select a distribution you’re accustomed to. Right here I am going to use Ubuntu for demonstration functions:
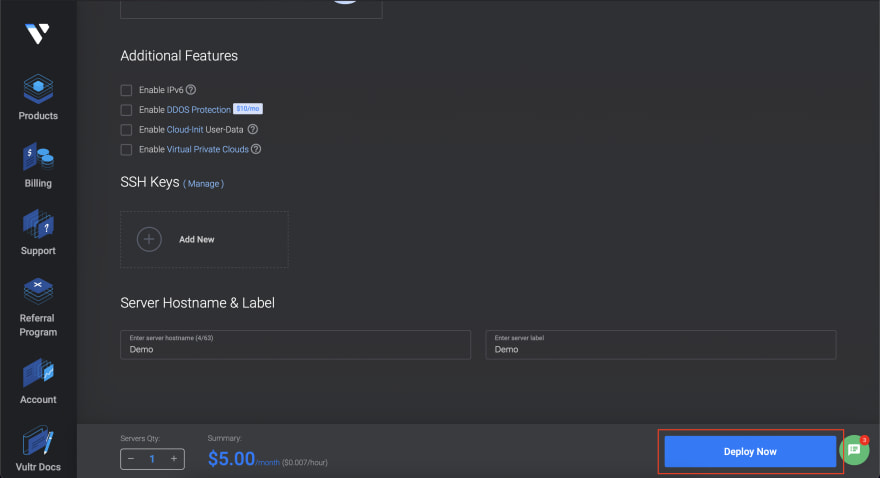
Select your server measurement, once more, it’s best to begin with the most affordable choice. For the Extra Options, you’ll be able to depart them unchecked if you do not know what they’re. You possibly can all the time add them later in case you want them. Lastly, give your server a hostname and click on Deploy Now:
It might take a couple of minutes for the server to put in. As soon as its standing turns into Operating, the server will probably be assigned an IP handle, and a root consumer will probably be created:

You should utilize the IP handle to entry the server. By yourself laptop, open the terminal and kind in:
ssh root@<ip_address>
You may be prompted to kind within the root consumer’s password. The password is not going to be displayed as you kind, that’s only a safety measure, not a bug.

In the event you see the identical output, meaning you’re prepared to make use of your new server!
Put together your server
Earlier than you begin deploying your initiatives, there are nonetheless some preparations you could do, or your server will probably be weak to assaults.
Create a brand new consumer
To start with, you should not be utilizing the root consumer. The root consumer has the facility to do something to your server, and nobody ought to have that a lot energy. You possibly can create a brand new consumer (let’s name him jack) account utilizing the next command:
adduser jack
Create a brand new password for consumer jack, and kind in his data:

Give this new consumer root privileges by including him to the sudo group:
usermod -aG sudo jack
DO NOT shut the terminal in case one thing goes mistaken. Open up a brand new terminal window and register as the brand new consumer:
ssh jack@<ip_address>

Be sure you can run instructions because the administrator:
sudo <command>
You may be prompted to kind in jack‘s password. If this works for you, then it’s protected to shut the root consumer’s home windows. To any extent further, we’ll be working as the brand new consumer, jack.
Subsequent, you could be sure nobody can register because the root consumer. The foundation sign-in could be disabled within the sshd_config file. Open up the file utilizing the next command:
sudo nano /and so forth/ssh/sshd_config
Scroll down and discover PermitRootLogin:
. . .
# Instance of overriding settings on a per-user foundation
#Match Person anoncvs
#       X11Forwarding no
#       AllowTcpForwarding no
#       PermitTTY no
#       ForceCommand cvs server
PasswordAuthentication sure
PermitRootLogin sure
Change sure to no:
PermitRootLogin no
Press CTRL+X to exit the nano editor, and kind Y to avoid wasting the buffer:
Save modified buffer?
 Y Sure
 N No           ^C Cancel
Press ENTER to exit:
File Identify to Write: /and so forth/ssh/sshd_config
^G Assist             M-D DOS Format      M-A Append          M-B Backup File
^C Cancel           M-M Mac Format      M-P Prepend         ^T Browse
For this alteration to take impact, you could restart the sshd daemon:
sudo systemctl restart sshd
Now you’ll be able to attempt to register because the root consumer, and you’re going to get a Permission denied message:

Register through SSH keys
After which there may be the password. Passwords, irrespective of how advanced, are nonetheless too straightforward to crack. You might want to be sure the one solution to register to your server is through Safe Shell Protocol (SSH) keys.
First, you could create a key pair. There must be a public key, which is positioned in your server, and a personal key, which is held by you. If the important thing pair match, then you may be signed in.
Utilizing your personal laptop, create the important thing pair with the next command:
ssh-keygen
This command will work on each Home windows and macOS, however I like to recommend organising WSL in case you are utilizing Home windows. By default, it would create a 3072-bit RSA key pair. In the event you want to make it safer, you’ll be able to add an optionally available -b flag like this:
ssh-keygen -b 4096
It is best to see the next output:
Producing public/non-public rsa key pair.
Enter file by which to avoid wasting the important thing (/Customers/<your_home>/.ssh/id_rsa):
By default, the non-public key will probably be generated below your private home listing, within the .ssh folder. You possibly can change its vacation spot if you wish to. I am going to maintain the default path and press ENTER:
Enter passphrase (empty for no passphrase):
You possibly can create an optionally available passphrase for the important thing pair. That is an additional layer of safety in your server, and it’s extremely advisable if the information in your server is essential.
After you’re accomplished, it’s best to get the next output:
Your identification has been saved in /Customers/<your_home>/.ssh/id_rsa
Your public key has been saved in /Customers/<your_home>/.ssh/id_rsa.pub
The important thing fingerprint is:
SHA256:EiQgE7ZQB/2v40ccfrXxnQrFs383qS/DgQ1xK8pjQ4Q erichu@Erics-MacBook-Professional.native
The important thing's randomart picture is:
+---[RSA 3072]----+
| =+++o . .      |
| o------------. |
| .   .. .   + . |
| .... oo=       |
| .+S...*+o..    |
| .=*.o.+...     |
| o..o o + .     |
| o .    = +o    |
| ..o     .=.+   |
+----[SHA256]-----+
Open the .ssh listing, and it’s best to see the generated key pair.

Subsequent, you could ship the general public key (id_rsa.pub) to your server. By yourself laptop, run the next command:
ssh-copy-id jack@<ip_address>
It is best to see the next output:
/usr/bin/ssh-copy-id: INFO: Supply of key(s) to be put in: "/Customers/erichu/.ssh/id_rsa.pub"
/usr/bin/ssh-copy-id: INFO: trying to log in with the brand new key(s), to filter out any which are already put in
/usr/bin/ssh-copy-id: INFO: 1 key(s) stay to be put in -- in case you are prompted now it's to put in the brand new keys
After you have typed in jack‘s password:
Variety of key(s) added:        1

Now strive logging into the machine, with:   "ssh 'jack@45.63.0.91'"
and examine to ensure that solely the important thing(s) you needed have been added.
Sadly, this command utility isn’t accessible on Home windows techniques, so you’ll be able to both arrange WSL, or you’ll be able to comply with this tutorial from Digital Ocean, which affords an all-in-one command that copies the general public key to your server:
cat ~/.ssh/id_rsa.pub | ssh username@remote_host "mkdir -p ~/.ssh && contact ~/.ssh/authorized_keys && chmod -R go=$$ ~/.ssh && cat >> ~/.ssh/authorized_keys"However as you’ll be able to see, this command requires you to have a good understanding of Linux techniques.
Subsequent, you’ll be able to open up one other terminal and attempt to register as jack. This time you may be prompted to kind within the passphrase in your non-public key as an alternative of jack’s password. In the event you did not arrange a passphrase, you’d be signed in immediately.
Lastly, you could disable the password sign-in so that each consumer should use an SSH key. Go to the identical sshd_config file we mentioned earlier than:
sudo nano /and so forth/ssh/sshd_config
Find PasswordAuthentication sure, and alter it to no:
# Instance of overriding settings on a per-user foundation
#Match Person anoncvs
#       X11Forwarding no
#       AllowTcpForwarding no
#       PermitTTY no
#       ForceCommand cvs server
PasswordAuthentication no
PermitRootLogin no
Bear in mind to restart the sshd daemon:
sudo systemctl restart sshd
Deploy your undertaking
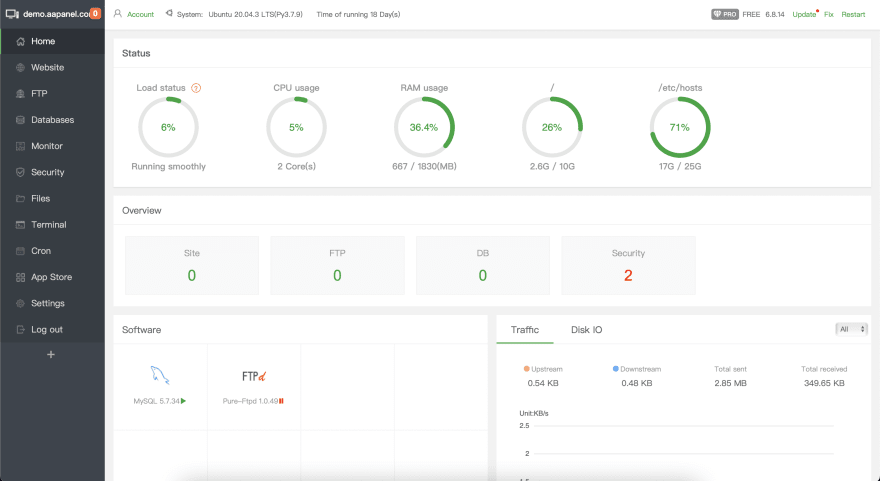
Now your server must be safe and prepared, and it is time to deploy your undertaking. For a typical internet software, you will want a minimum of a server software equivalent to Apache or Nginx, and a database equivalent to MySQL or PostgreSQL. These purposes might be very tough to put in and configure, particularly in case you are a newbie. So, for this half, I like to recommend utilizing a server management panel.
Probably the most well-known choice could be CPanel, however sadly, it will price you $15.99 monthly. That is very expensive for a private undertaking, so in case you are searching for a free different, I discovered this aaPanel that does many of the job for me.
The panel could be simply put in utilizing the next command:
wget -O set up.sh http://www.aapanel.com/script/install-ubuntu_6.0_en.sh && sudo bash set up.sh aapanel
You may be requested to substantiate this set up:

You may also be prompted to improve your kernel. If that is the case, simply press ENTER:

After the Bash script completed operating (it’s regular for this course of to take 10 to twenty minutes, please be affected person right here), it’s best to see this output telling you the right way to entry your panel:

Comply with the instruction and log into your panel, and set up no matter software program you may want in your undertaking. Bear in mind to make use of compile mode in case you are organising a manufacturing setting:

After the set up course of is completed, head over to the Web site tab and create a brand new web site, as we mentioned within the respective Laravel or Django tutorials.
Select a website
Now let’s speak about what occurs after you have deployed your undertaking. Proper now, your undertaking must be accessible by visiting the server’s IP handle immediately, however this isn’t best. For the web site to be accessible to the general public, you could give it a website.
There are lots of area registers so that you can select from, and on this article, let’s use GoDaddy for example. Register an account on their web site and seek for a website title:

After you have bought a website, it’s best to see it below My Merchandise.
Scroll all the way down to the All Merchandise and Providers part, discover your area title and click on the DNS button:

A DNS server is sort of a cellphone e book of the web, it maps domains to IP addresses. While you go to a website in your browser, you’re truly visiting a DNS server first, that DNS server will discover the corresponding IP handle and route you there.
So what you could do right here is to register your area with a DNS server by creating DNS information. There are lots of several types of DNS information, however for now, we solely care about A document and CNAME information. The A document is the first document, and it ought to level to your server’s IP handle. The CNAME information, however, are alias information. They create aliases (www.instance.com, me.instance.com, weblog.instance.com…) that would level to an present A document, or a distinct server. For instance:
| Kind | Host | Factors to | TTL |
|---|---|---|---|
| A | @ | server_ip_address | 1 hour |
| CNAME | www | @ | 1 hour |
| CNAME | gallery | different_ip_address | 1 hour |
On your first A document, its host must be @, which refers to your first-level area (instance.com), and it ought to level to your server. TTL determines how lengthy the DNS server would cache this document. The document will probably be refreshed mechanically after it expires.
The primary CNAME creates an alias (www.instance.com), which factors to the A document we simply outlined. The second CNAME creates one other alias (gallery.instance.com), which factors to a distinct server the place you’ll be able to host your gallery app.
Save the adjustments and await the DNS server to replace. This course of might take as much as 48 hours to finish, so please be affected person. After that, it’s best to be capable to entry your app by visiting your area.
