
A Gantt chart is a well-liked and invaluable undertaking administration device that has been in use for the reason that 1900s. A Gantt chart is a specialised sort of bar chart that’s used to visualise the timeline of a undertaking by representing every of the duties comprising the undertaking as a horizontal bar, the size of which is proportional to the allotted time for that process.
A Gantt chart additionally reveals the relationships between the duties in a undertaking. Duties additional down the undertaking timeline are at all times to the precise of duties earlier within the timeline, and duties that depend upon a earlier process are linked to that process with arrows.
In response to Wikipedia, the Gantt chart as we all know it was created and popularized by Henry Gantt in the course of the years 1910 to 1915. He initially designed this device to assist measure the productiveness ranges of his staff, however as time handed, the Gantt chart grew to become increasingly widespread throughout many industries. The Gantt chart was even utilized in World Conflict I!
On this article, we’ll information you thru the method of constructing a Gantt chart in your net software utilizing a JavaScript library known as Frappe Gantt.
To observe together with this tutorial, you’ll want the next:
- A textual content editor
- Node.js put in regionally
- A working information of HTML, CSS, and JavaScript
Desk of contents
What’s Frappe Gantt?
Frappe Gantt is a free, open supply JavaScript library created and maintained by the Frappe crew. Frappe Gantt makes it extraordinarily straightforward so that you can construct interactive, simply customizable Gantt charts with JavaScript.
Frappe Gantt presents the next options for Gantt charts:
- Adjustable progress indicators
- Adjustable process period
- Various time scales, together with half day, day, week, and month
- Particulars of every process seem in a popup when the duty is clicked
Undertaking method
On this tutorial, you’ll construct a Gantt chart to handle the event of an internet site. We’ll observe the steps within the order beneath:
- Undertaking setup
- Initialize the chart with duties
- Add a number of time scales to the chart
- Add occasion listeners to the chart
- Customise the duty popup
Constructing the chart
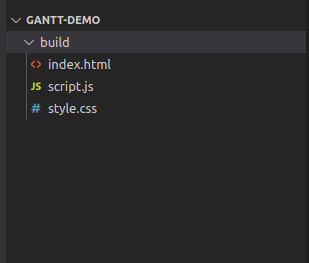
Let’s create the construction for our undertaking and set up Frappe Gantt. Begin by making a listing for the undertaking and name it gantt-demo. Inside gantt-demo, create a folder known as construct. Create three information inside construct, index.html, type.css, and script.js.
Your file construction ought to appear like the next:
Subsequent, we’ll write some foundational markup for our Gantt chart. Paste the next code in construct/index.html:
<!DOCTYPE html>
<html lang="en">
<head>
    <meta charset="UTF-8">
    <meta http-equiv="X-UA-Suitable" content material="IE=edge">
    <meta identify="viewport" content material="width=device-width, initial-scale=1.0">
    <hyperlink rel="stylesheet" href="https://weblog.logrocket.com/gantt-chart-javascript-frappe-gantt/type.css">
    <title>Gantt</title>
</head>
<physique>
    <div>
        <svg id="gantt">
        </svg>
    </div>

    <script src="script.js"></script>
</physique>
</html>
Together with Frappe Gantt
There are a few methods that you could embrace Frappe Gantt in your undertaking. For one, you should utilize the library from CDN, or you may set up it regionally with npm. Putting in it with npm is beneficial, so we’ll use that method.
Putting in Frappe Gantt with npm
Open your terminal and navigate to the gantt-demo listing, then run the next command:
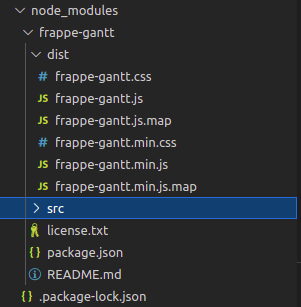
npm set up frappe-gantt
The code above will create a folder known as node_modules inside gantt-demo, containing a sub-folder known as frappe-gantt. The construction of your node_modules folder ought to appear like the next:
Copy the dist folder from node_modules/frappe-gantt and paste it into construct. After that, add the next code to the pinnacle of your construct/index.html file:
<script src="https://weblog.logrocket.com/gantt-chart-javascript-frappe-gantt/dist/frappe-gantt.min.js"></script>
<hyperlink rel="stylesheet" href="dist/frappe-gantt.min.css">
Should you’re utilizing Frappe Gantt in a undertaking that already has a bundler arrange, like a Vue or React undertaking, you don’t want to repeat the dist folder. Merely go to the JavaScript file you need to use Frappe Gantt in and add the next code to your import statements:
import Gantt from 'frappe-gantt'
Initialize the chart with duties
Now that our setup is full, our subsequent job is to create the chart with an preliminary set of duties. For the reason that chart is for an internet site growth undertaking, you’ll be creating the chart with these duties:
- Purchase internet hosting (Jan 22 – Jan 23)
- Draw wireframes (Jan 23 – Jan 25)
- Visible design (Jan 25 – Jan 27)
- Construct the frontend (Feb 1 – Feb 3)
- Construct the backend(Feb 3 – Feb 7)
- Deploy web site (Feb 7 – Feb 9)
The web site design process relies on the wireframe process, the frontend process relies on the visible design process, and the deploy process relies on each the frontend process and the backend process. Let’s assume that the internet hosting and wireframe duties have been accomplished already.
How are you going to signify these duties because the bars of a chart? In Frappe Gantt, duties are represented by JavaScript objects with the next construction:
 {
    id: '', // a string that represents the id of a process
    identify: '',// the label the duty could have on the chart
    begin: '',// the beginning date of the duty in year-month-day-time format. The time is non-obligatory, however must be laid out in 24-hour format if offered
    finish: '',// the top date of the duty
    progress: 50,// non-obligatory property, the proportion completion of the duty
    dependencies: 'Process a, Process b',//non-obligatory, comma-separated ids of the duty(s) this process relies on
    custom_class: 'special-task' // non-obligatory property to manage the looks of the duty with a CSS class
}
So as to add your duties to a Gantt chart, you’ll create an object like this for every process, then put all of the duties in an array. Copy the next code into your construct/script.js:
let duties = [
    {
        id: 'Task 1',
        name: 'Buy hosting',
        start: '2022-01-22',
        end: '2022-01-23',
        progress: 100,
    },
    {
        id: 'Task 2',
        name: 'Draw wireframes',
        start: '2022-01-23',
        end: '2022-01-25',
        progress: 100,
    },
    {
        id: 'Task 3',
        name: 'Visual Design',
        start: '2022-01-25',
        end: '2022-01-27',
        progress: 20,
        dependencies: 'Task 2'
    },
    {
        id: 'Task 4',
        name: 'Build frontend',
        start: '2022-02-01',
        end: '2022-02-03',
        progress: 0,
        dependencies: 'Task 3'
    },
    {
        id: 'Task 5',
        name: 'Build backend',
        start: '2022-02-03',
        end: '2022-02-07',
        progress: 0,
    },
    {
        id: 'Task 6',
        name: 'Deploy Website',
        start: '2022-02-07',
        end: '2022-02-09',
        progress: 0,
        dependencies: 'Task 4, Task 5'
    },
]
Then, to render the chart, add the next JavaScript code to your script.js:
let ganttChart = new Gantt("#gantt", duties, {});
The code above makes use of the Gantt constructor to create a Gantt chart out of your record of duties. The primary argument to the Gantt constructor is both a string CSS selector that describes a component within the DOM or a direct JavaScript reference to a HTML aspect. The second argument is the array of process objects.
The final argument to the constructor is an choices object that lets you additional customise your chart. You’ll fill it out later on this tutorial, however go away it empty for now.
Subsequent, add some styling to your chart by pasting the next code in your construct/type.css file:
.gantt-container {
    width: 90vw;
    margin: 0 auto;
}
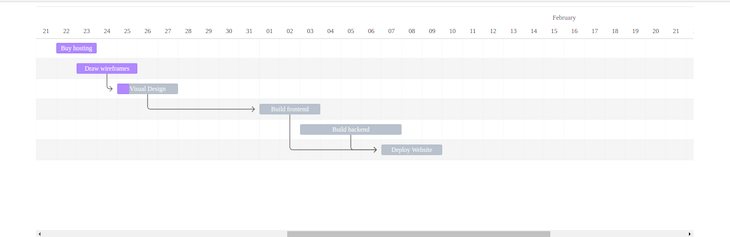
At this level, in the event you open the construct/index.html file in your browser, your webpage ought to appear like the next picture:
Add a number of time scales to the chart
Subsequent, we’ll implement the flexibility for the person to alter the time scale of the chart. The time scale of the chart is the unit of time the chart makes use of to show your duties.
By default, the time in your chart is measured in days, however Frappe Gantt lets you change that. Frappe Gantt offers Quarter day, Half day, Day, Week, and Month as unit of time choices in your charts.
Let’s implement the flexibility for our chart to indicate time in weeks and months in addition to days. To construct some buttons in your chart, begin by including the next markup to your index.html file simply earlier than the script in your physique tag:
<div class="chart-controls">
    <p>Change Chart Timescale</p>
    <div class="button-cont">
        <button id="day-btn">
            Day
        </button>

        <button id="week-btn">
            Week
        </button>

        <button id="month-btn">
            Month
        </button>
    </div>
</div>
Subsequent, type this markup by including the next code to your type.css file:
.chart-controls {
    text-align: heart;
}
.chart-controls > p {
    font-size: 1.2rem;
    font-weight: 500;
}
Lastly, add the next JavaScript code to the top of your script.js file:
doc.querySelector(".chart-controls #day-btn").addEventListener("click on", () => {
    ganttChart.change_view_mode("Day");
})
doc.querySelector(".chart-controls #week-btn").addEventListener("click on", () => {
    ganttChart.change_view_mode("Week");
})
doc.querySelector(".chart-controls #month-btn").addEventListener("click on", () => {
    ganttChart.change_view_mode("Month");
})
The JavaScript code above creates click on occasion listeners for every of the buttons in your markup, then calls the change_view_mode() methodology with the specified unit of time as an argument to alter the timescale of your Gantt chart.
Including occasion listeners to the chart
Frappe Gantt lets you specify code to run when a person performs sure actions in your chart.
Frappe Gantt offers 4 occasion listeners. The on_click listener accepts a perform that’s executed when a person double clicks on a process within the chart, and the perform handed to it receives a process choice as an argument. The on_date_change listener accepts a perform that’s run when the date of a chart is modified. The perform handed to it receives the duty object, and the brand new begin and finish dates of the duty.
The on_progress_change listener accepts a perform that’s run when the progress of a process on the chart is modified. The accepted perform receives a process object and the brand new progress worth as arguments. The on_view_change listener accepts a perform that’s run when the timescale of the chart is modified. The accepted perform receives a process object and the brand new progress worth as arguments.
On this tutorial, you’ll use the on_view_change listener to create a dynamic label that reveals the present timescale of your Gantt chart. Begin by including the markup to your index.html above the div that accommodates your SVG:
<p class="chart-label">
        Timescale: <span id="current-timescale">Day</span>
</p>
Add the next styling to your type.css:
.chart-label {
    font-size: 1.5rem;
    text-align: heart;
    font-weight: 500;
}
Now, we’ll make the label dynamic. Add an occasion listener to your constructor by passing it as a property of the third argument as follows:
let ganttChart = new Gantt("#gantt", duties, {
    on_view_change: perform(mode) {
        doc.getElementById("current-timescale").innerText = mode;
    },
});
The chart timescale label is now absolutely dynamic.
With Frappe Gantt, you may decide the contents of the popup that seems when your person clicks on a process in your chart by returning customized HTML for every process.
First, you’ll present a property to the third argument to your constructor, known as custom_popup_html. The worth of this property is a perform that accepts a process object as an argument.
Add the next JavaScript code contained in the third argument to your constructor:
custom_popup_html: perform(process) {
        return `
          <div class="details-container">
            <h5>${process.identify}</h5>
            <p>Process began on: ${process._start.getDate()}</p>
            <p>Anticipated to complete by ${process._start.getDate()}</p>
            <p>${process.progress}% accomplished!</p>
          </div>
        `;
}
Subsequent, add the next styling to your kinds.css file:
gantt-container .popup-wrapper {
    width: 200px;
    padding: 0 5px;
}
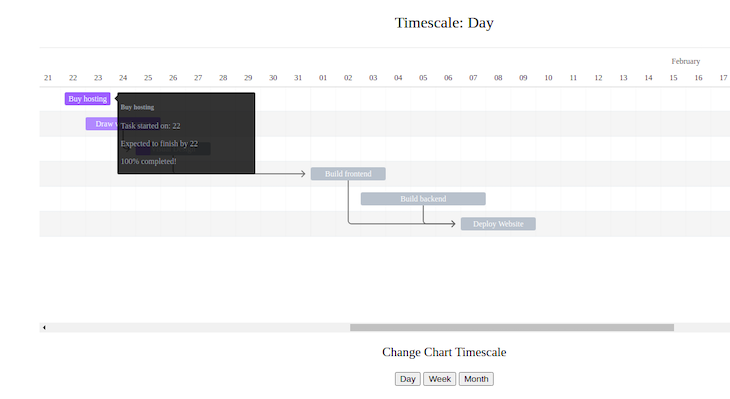
Every process ought to now have a customized popup that ought to seems like the next:
Conclusion
On this article, we lined constructing a Gantt chart utilizing Frappe Gantt, an attention-grabbing, open supply library that enormously simplifies producing Gantt charts. A Gantt chart is a superb device for managing groups, and we discovered to simply customise ours to finest swimsuit our wants.
You may take a look at a dwell demo of Frappe Gantt, in addition to a assortment of helpful examples. Thanks for studying!
Are you including new JS libraries to enhance efficiency or construct new options? What in the event that they’re doing the other?
There’s little doubt that frontends are getting extra complicated. As you add new JavaScript libraries and different dependencies to your app, you’ll want extra visibility to make sure your customers don’t run into unknown points.
LogRocket is a frontend software monitoring resolution that permits you to replay JavaScript errors as in the event that they occurred in your personal browser so you may react to bugs extra successfully.

LogRocket works completely with any app, no matter framework, and has plugins to log extra context from Redux, Vuex, and @ngrx/retailer. As a substitute of guessing why issues occur, you may mixture and report on what state your software was in when a problem occurred. LogRocket additionally screens your app’s efficiency, reporting metrics like shopper CPU load, shopper reminiscence utilization, and extra.
Construct confidently — Begin monitoring without spending a dime.
