
Introduction
We’ve got all come throughout a progress bar on a cellular machine not less than as soon as, equivalent to whereas putting in something from Google.
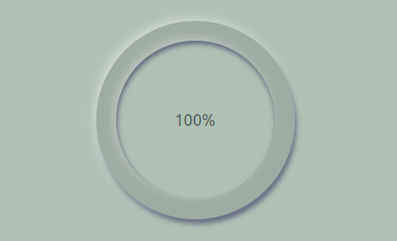
Our objective on this article is to construct an animated, neumorphic progress bar utilizing React and CSS. The progress bar graphics shall be accompanied by a textual illustration of the progress in a proportion format starting from 1–100.
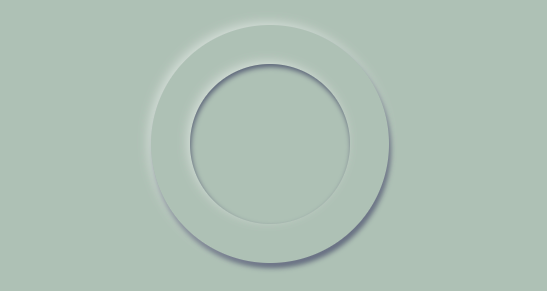
On the finish of this tutorial, that is what we should always have:

On this article, we are going to learn to construct and elegance a neumorphic progress bar in React by way of the next sections:
What’s neumorphism?
Neumorphism, often known as delicate UI or the development of skeuomorphism, makes use of highlights and the box-shadow properties in CSS to make components seem as in the event that they float above the UI.
If skeuomorphism, effectively, neumorphism is the brand new model of it. It’s a product of flat and skeuomorphic designs. In keeping with many assets on the market, Alexander Plyuto is the daddy of this design, as he was the primary to submit a design utilizing this fashion on dribble in 2019.
Establishing the event space
Stipulations
Readers ought to have foreknowledge of utilizing SVGs in React and also needs to set up:
- React 18
- Node.js ≥ v16.14.0
Step one to getting our venture operating is to create a folder for the venture. I named mine progress-bar.
Set up React. I’ll do that by operating this in my code editor:
npx create-react-app progress-bar @model 18
Become the progress-bar folder and run:
npm begin
Our React app ought to present up in your browser. Lastly, to get every part all set, delete the unneeded information and every part returned in our JSX.
Properties of neumorphism
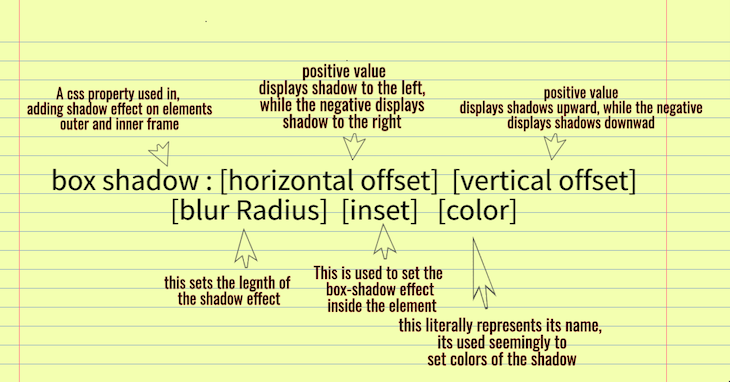
This eye-catching design is feasible thanks to at least one main CSS property utilized in its improvement: the box-shadow. It’s advisable to know your means across the box-shadow property in CSS, as a result of there may be actually no option to implement neumorphism with out this property.
Right here’s a fast refresher in case you want it:
Create a progress-bar part
There are three main steps to attaining our objective:
- Create a neumorphic circle
- Create an SVG circle
- Add JavaScript performance
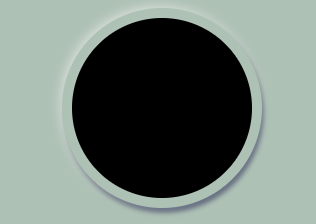
Create a neumorphic circle
We are going to want a neumorphic part to get began; we are able to title it Neumorphism.js. This part could have two divs, which have classNames connected to them for styling.
Let’s import these into our fundamental App.js to allow it to render in browsers at localhost:3000.
//IMPORT COMPONENT
import React from 'react';
import Neumorphism from './Neumorphism';
import './App.css';

perform App() {
 return (
   <fundamental>
     <Neumorphism />
   </fundamental>

 );
}

export default App;
Our part file ought to appear like this:
//NEUMORPHISM.JS

import React from 'react';
import './App.css';

perform App() {
 return (
   <fundamental className="container">
     <div className="outside-progress-bar">
    <div className="inside-progress-bar">
      <p> Neurmophism</p>
    </div>
   </div>
   </fundamental>
 );
}
Over with the divs, we’d like the styling and animation for this utility.
Styling with CSS
Step one of our venture is making a neumorphic circle in our neumorphism.js part. Since we’re making a progress bar, centering our div is advisable. Let’s get it executed.
.container {
   top: 100Vh;
   show: flex;
   align-items: middle;
   justify-content: middle;
   background-color: rgb(178, 190, 181);
}

//you may as well add 30px of padding to middle the container
Including the neumorphism impact
For our neumorphic impact, we’ll must create two circles of the scale 160px and 140px, respectively, to show the development impact. Let’s get that executed by including primary kinds to our classNames:
.circle1 {
   top: 160px;
   width: 160px;
   border: 1px strong black;
   border-radius: 50%;
   padding: 3%;
}

.circle2 {
   top: 140px;
   width: 140x;
   border: 1px strong black;
   border-radius: 50%;
   top: 100%;
}
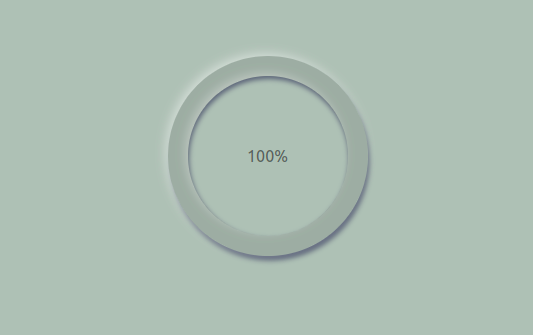
That is the place we add a box-shadow to create the results of neumorphism on our circle:
.circle1 {
   top: 160px;
   width: 160px;
   border-radius: 50%;
   padding: 3%;
   box-shadow: -3px -3px 10px #ffffff73,
               2px 5px 5px rgba(94, 104, 121, 288);
}

.circle2 {
   top: 140px;
   width: 140x;
   border-radius: 50%;
   top: 100%;
   box-shadow: -3px -3px 10px #ffffff73,
               inset 1px 3px 5px rgba(94, 104, 121, 288);
}
Undoubtedly, this seems to be actually nice.
Implementing the progress bar
We have to show a quantity that we are able to add performance to, so it may show the proportion of our app’s development. A div and kinds are wanted to perform this.
<div>
   <p>100%</p>
</div>
//middle the paragraph

show: flex;
align-items: middle;
justify-content: middle;
Utilizing SVGs
Now, we’ll use SVG tags in React to suit into our neumorphic circle and show our development.
How can we make a circle that would slot in our neumorphic circle? It’s logical to get the dimensions of the circle, which will be gotten from the browser’s console utilizing the ctrl+shift+i command within the browser.
In our case, we’ve got the outer-circle set to 200px by 200px, and the inner-circle set to 160px x 160px, with padding of 20px. This provides us an thought of precisely what the scale of our SVG circle ought to be.
Let’s get this executed. Listed below are the steps:
- First, we create a part for our SVG
- Then, get the SVG tag in our JSX
- Lastly, we enter the scale of the circle
cx,cy, andrCSS attribute
import React from 'react';
import './progress.css';

perform Progress(){
 return(
   <fundamental className="container">
       <div>
       <svg  className="circle">
         <circle cx="100px" cy="100px" r="90px"  />
       </svg>
     </div>
   </fundamental>
)
}

export default Progress
We have to import this part into our fundamental app.js, so we are able to render it in our browser as we did earlier.
import React from 'react';
import Neumorphism from './Neumorphism';
import Progress from './Progress';
import './App.css';

perform App() {
 return (
   <fundamental>
     <Neumorphism />
     <Progress />
   </fundamental>

 );
}

export default App;
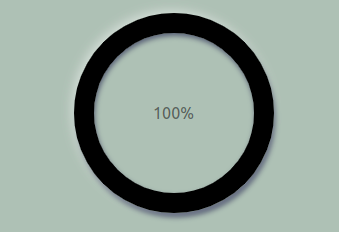
Here’s what it seems to be like in our browser now:

At this level, we have to make our SVG circle slot in our neumorphic circle above. With little doubt, the position-absolute CSS property will get the job executed quickest.
 .circle {
       top: 300px;
       width: 300px;
       place: absolute;
       backside: 20%;
       proper: 34.3%;
   }
I diminished the peak and width of the circle to indicate how position-absolute will get the job executed.
We clearly can’t go away the SVG show development over our neumorphic circle whereas it’s crammed, which takes us to our subsequent step.
Set the fill to none and add a stroke of 20px to slot in completely:
stroke-width: 20px;
fill: none;
stroke: black;
Now, let’s add a blur to the stroke, simply because it makes it extra engaging:
stroke: rgba(0, 0, 0, 0.1);
Our subsequent step is to animate our stroke. Utilizing a stroke-dasharray to hint out the sample of dashes utilized in our circle, we’ll define the animation of this form extra simply. In our case, it’s 565px.
We’ll additionally use a stroke-dashoffset to take off regardless of the stroke-dasharray has rendered. We wanted the stroke-dasharray as a result of, when the stroke-dasharray renders the total form of the circle, the offset takes the rendered stroke-dasharray off so it may be refilled by animation. We are going to set this to 565px so as to enable animation carry out the refilling development.
Our final step is so as to add the animation property to the SVG circle. In my case, I named it development and gave it 1s to progress ahead. We additionally must set @keyframes for our development to be 100%, and our stroke-dashoffset to 0, to get it animated.
Beneath are the kinds added:
// Types
{
stroke-dasharray: 565px;
   stroke-dashoffset: 565px;
   animation: progress 1s linear forwards;
}

@keyframes progress {
   100% {
       stroke-dashoffset: 0;
   }
}
Now, each time we refresh, we’ve got our progress bar effectively animated.
Displaying numerical progress with the useState and useEffect React Hooks
You will have seen that, regardless of creating the animation, our progress bar shows a static variety of 100%. As a way to get the right amount of development displayed numerically, we have to use the useState and useEffect Hooks to make it show our progress in percentages. These Hooks shall be imported into our neumorphism.js part.
import React, { useState,useEffect } from 'react';
Utilizing the useState Hook, our state shall be a quantity, ideally ranging from 0.
const [progress, setprogress] = useState(0);
Subsequent, we’d like a useEffect Hook with no dependencies, so we create an interval to run each 2ms. The essential job of this interval is to set our progress. To have higher management, we use the callback type from the set progress to increment by 1.
To clear up this interval and keep away from an infinite loop, we make use of an if assertion, so when it reaches 98 or it equates to 100, it stops operating, and we return the worth, which ought to be 100%.
Lastly, we have to cross our progress in our JSX, so we are able to see it increment. Let’s see this all executed.
import React, { useState,useEffect } from 'react';
import './App.css';
perform Neumorphism() {
 const [progress, setprogress] = useState(0);

useEffect(()=>{
 const interval= setInterval(()=>{
   setprogress((oldvalue)=>{

     let newValue=oldvalue + 1;

     if(newValue>98){
       clearInterval(interval);
     }

     return newValue;

   })
 },20)
 },[]);

 return (
   <fundamental className="container">
     <div className="circle1">
       <div className="circle2">
         <div>
           <p className="textual content">{progress}%</p>
         </div>
       </div>
     </div>
   </fundamental>
 )
}

export default Neumorphism;
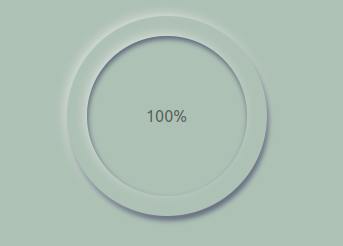
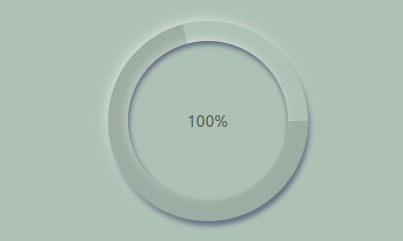
Here’s what we lastly have:
Conclusion
We’ve got been capable of construct a progress bar with a neumorphic impact. In our case, we used it to fashion a progress bar to show downloaded information. Having this kind of neumorphic design in your utility makes your UI extra engaging, and given how straightforward it may be to implement in your current React apps, I hope you strive it out quickly.
Full visibility into manufacturing React apps
Debugging React functions will be tough, particularly when customers expertise points which can be arduous to breed. If you happen to’re fascinated about monitoring and monitoring Redux state, routinely surfacing JavaScript errors, and monitoring gradual community requests and part load time, strive LogRocket. 

LogRocket is sort of a DVR for net and cellular apps, recording actually every part that occurs in your React app. As a substitute of guessing why issues occur, you may mixture and report on what state your utility was in when a problem occurred. LogRocket additionally displays your app’s efficiency, reporting with metrics like shopper CPU load, shopper reminiscence utilization, and extra.
The LogRocket Redux middleware bundle provides an additional layer of visibility into your person classes. LogRocket logs all actions and state out of your Redux shops.
Modernize the way you debug your React apps — begin monitoring totally free.
