Think about that you’re an knowledgeable Android developer with an thought for a killer app. You might be assured that you could construct an app for Android simply, however usually are not so positive about iOS.
If in case you have expertise growing cellular UIs for Android, you’ll be able to in all probability observe some SwiftUI tutorials and get by simply fantastic. However what in regards to the core of the app? Even when you’ve got expertise with iOS improvement, rewriting the identical core for iOS will be redundant.
So how will you execute your thought with a minimal studying curve? Enter Kotlin Multiplatform Cellular, or KMM.
Based on their official web site, “Kotlin Multiplatform Cellular (KMM) is an SDK designed to simplify the event of cross-platform cellular purposes.”
With KMM, you’ll be able to write the core of your app in Kotlin and use it in each Android and iOS purposes. You solely want to write down platform-specific code like UI.
On this submit, we’ll be taught KMM by constructing a small note-taking software with native database operations. We’ll additionally see how widespread enterprise logic, like database operations, will be reused. However first, we have to clear some stipulations.
Atmosphere setup
First, we have to set up Android Studio. If we wish to attempt the iOS facet of issues, we’ll want to put in Xcode, too. We are able to construct and run the Android app with KMM code with out Xcode.
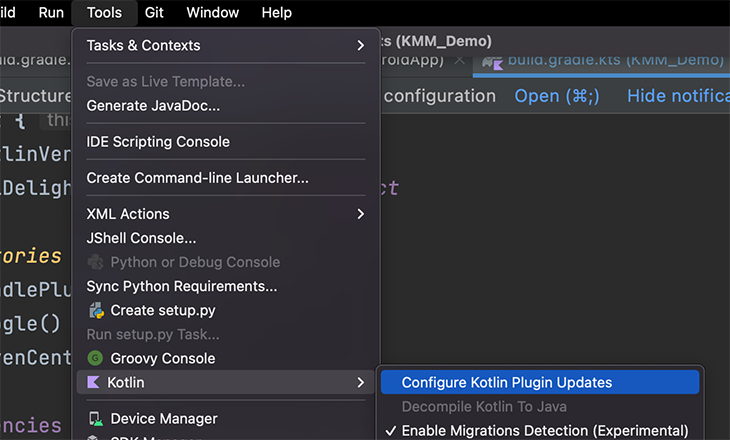
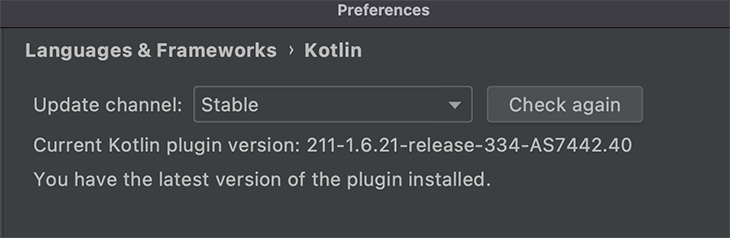
Subsequent, we’d like to verify we now have the most recent Kotlin plugin put in. Go to Android Studio Instruments after which hover over Kotlin. Subsequent, click on Configure Kotlin Plugin Updates adopted by Test once more. You’ll be able to see a visible under.
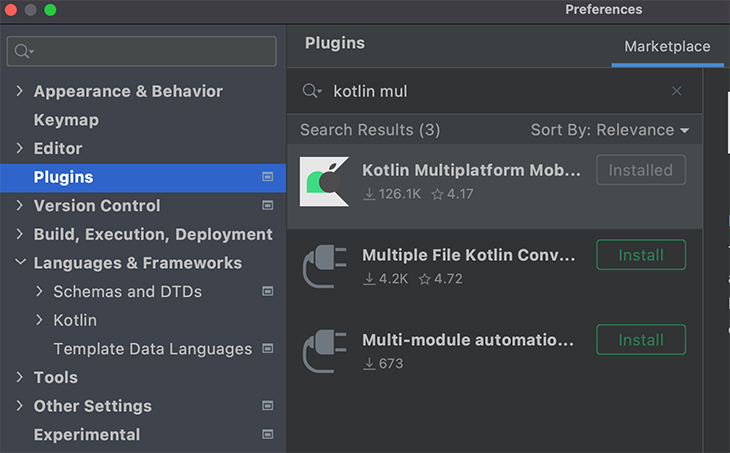
After that, seek for the KMM plugin within the Plugin part of the Preferences menu. Click on on Set up Kotlin Multiplatform Cellular plugin and set up it.
Evidently, we additionally must have JDK put in. Watch out with this, as it may be a bit difficult. We might must set the JDK set up path in System Paths to get this to work. Fortunately, Stack Overflow has assets and solutions for any troubles.
If it’s important to work with SQLDelight, make certain to put in this plugin as nicely to make it simpler to work with.
Making a KMM mission
Now that the setting is about, let’s create a KMM mission.
If you have already got an Android/iOS mission that you just wish to prolong with KMM, you have to so as to add the KMM module into your Android mission, restructure the code to maneuver widespread code into shared modules, and configure the iOS mission to hyperlink to the KMM framework. You’ll be able to reference this course of right here, however let’s ignore this difficult case whereas beginning out.
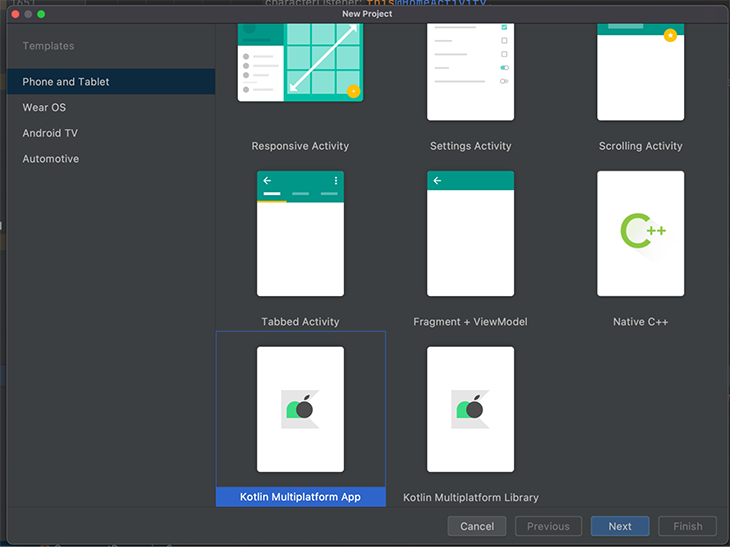
First, let’s create a brand new mission in Android Studio by going to File -> New -> New Mission. Then, choose Kotlin Multiplatform App. This’ll come up if we end the setting setup efficiently:
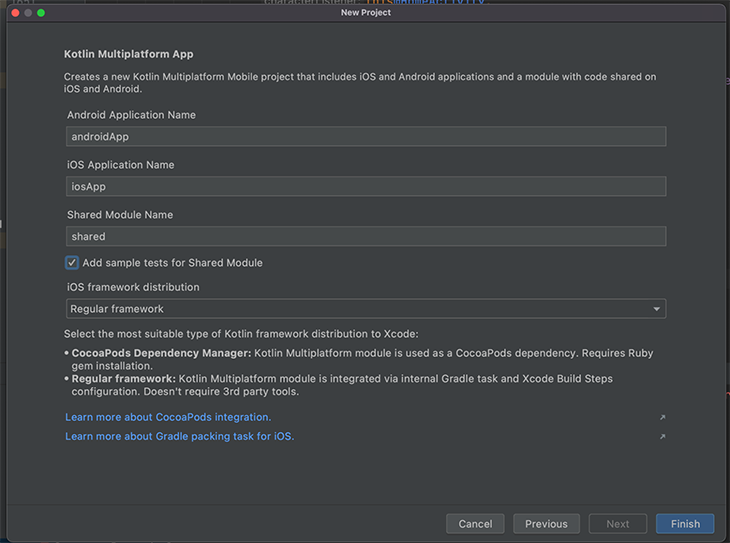
Subsequent, fill within the package deal title and mission path.
The third step is new, and particular to KMM. Right here, we will rename the Android, iOS, or shared module names. Since we are attempting out KMM for the primary time, let’s preserve these choices the identical.
Allow the checkbox for Add Pattern Assessments for Shared Module if you wish to check out check executions and choose Common Framework for iOS framework distribution. It ought to appear to be this:
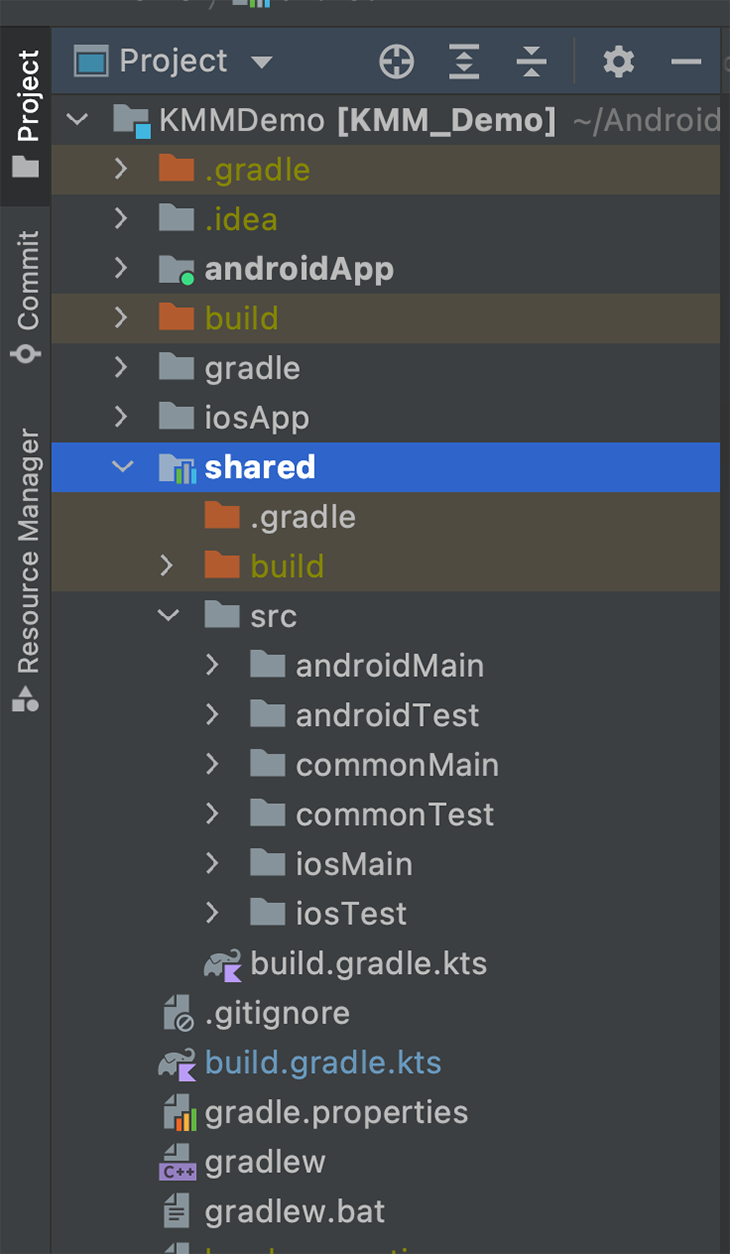
Now, the mission will probably be prepared very quickly! As soon as it’s set, we will change the Mission Information View from Android to Mission and look at the whole construction. Please remember that quite a bit has occurred behind the scenes, which we’ll focus on subsequent.
KMM mission construction
A KMM mission has three modules: Android, shared, and iOS.
Android module
The Android module is our regular app module that builds into an Android software. In our case, we named it androidApp.
Shared module
This can be a Kotlin Multiplatform module that compiles into an Android library and iOS framework. The shared module holds all of the widespread, reusable code for the app. There are three elements inside it: commonMain, androidMain, and iosMain.
commonMain is just not platform-specific and holds all of the code that may immediately run on each platforms. There are Kotlin libraries which can be KMM-compatible in sure use circumstances. For instance, we’ll use SQLDelight for databases or Ktor for community calls.
In androidMain, some code within the widespread module may have a unique API or conduct. This module holds the Android-specific code.
iosMain is androidMain’s counterpart. It holds the iOS-specific code of commonMain. Having androidMain and iosMain contained in the shared module could seem counterintuitive, however it would develop into clear as soon as we do some hands-on work.
iOS module
This module is an Xcode mission that builds as an iOS software and consumes our shared KMM module as a framework. If you happen to recall, we chosen Common Framework for iOS within the third step of the earlier part.
Please word that though this module is created inside our root mission listing, it isn’t linked to another a part of the mission (aside from consuming the shared module).
How does the Xcode mission know in regards to the shared framework?
As we simply coated, the shared module is compiled into an iOS framework and is then consumed by the iOS app inside the basis mission. However how does it learn about it? Do we have to join them manually? No!
While you create a brand new KMM mission in Android Studio, it robotically configures the construct paths for the framework and different required settings.


There’s a gradle activity referred to as embedAndSignAppleFrameworkForXcode that executes every time the iOS app is constructed to generate a brand new framework.
Fingers-on with Kotlin Multiplatform Cellular
To solidify the above ideas and see KMM in motion, we are going to construct a small software. Particularly, we’ll construct an on-device database and carry out some operations utilizing widespread code for each Android and iOS.
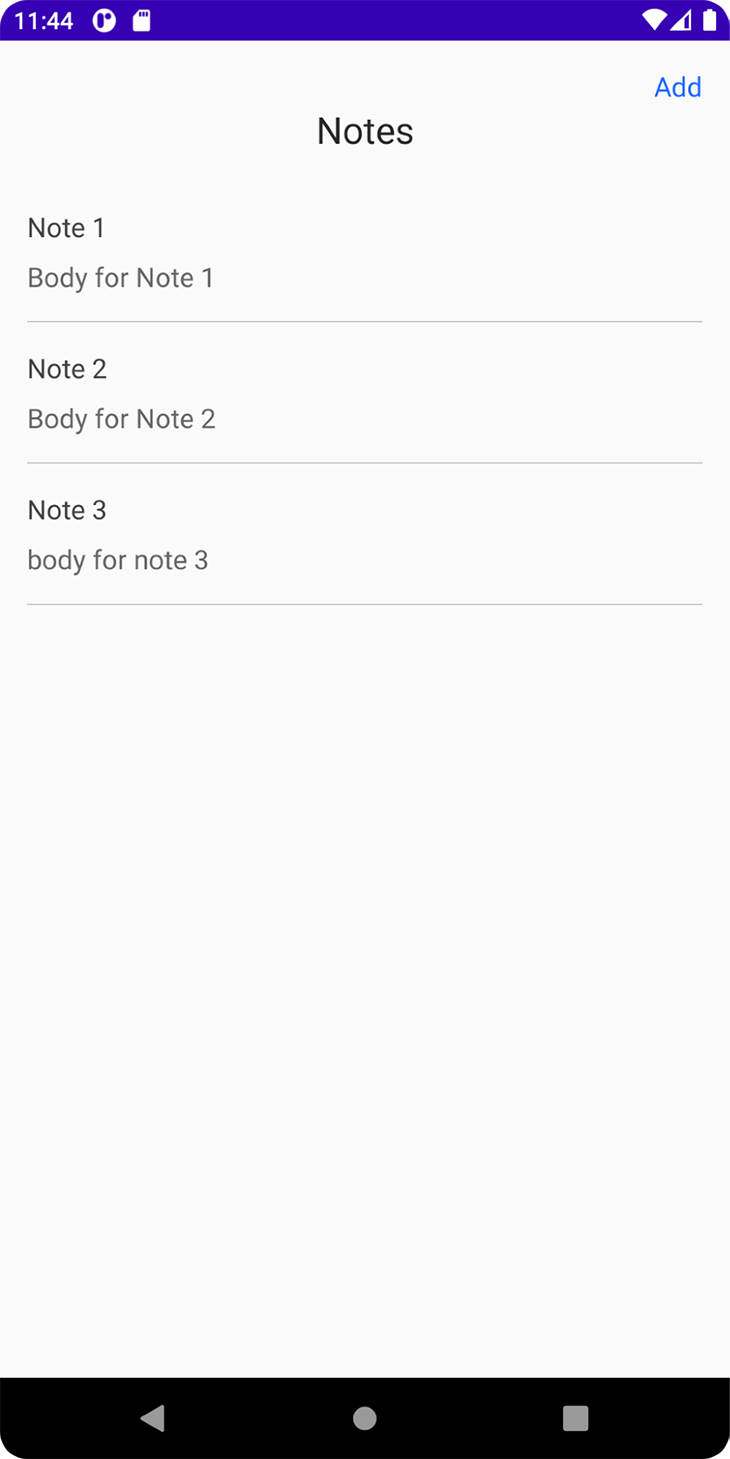
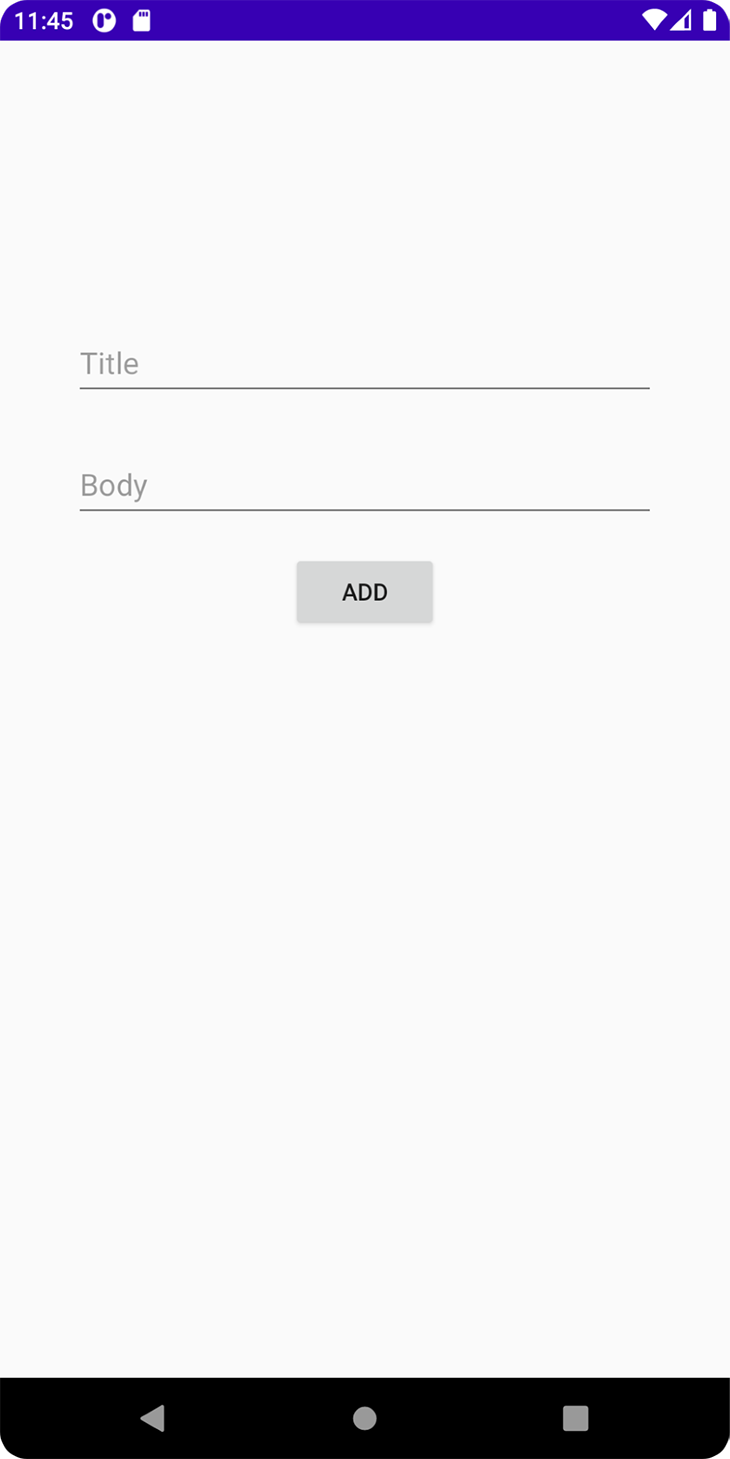
Particularly for Android, we’ll have a launch display with an inventory of notes retrieved from an on-device database and a CTA for including new notes, seen under:
If the consumer clicks Add, the app will take them to a brand new display so as to add a brand new word and put it aside to the database. The app will refresh the primary display with new knowledge, like this:
For iOS, nonetheless, we can have just one display the place we are going to clear the database on every launch, insert new automated notes with timestamp, and fetch and show them on a display:

Disclaimer – I’m not an iOS developer. Since our aim right here is to display how widespread enterprise logic code will be executed on each platforms, doing all three operations on iOS ought to suffice for the aim of this text.
The mission will be cloned from my GitHub repo or you’ll be able to observe alongside and construct a brand new mission. You’ll be able to observe the steps within the “Making a KMM mission” part of this text and create a brand new Android KMM software.
Including dependencies
There aren’t many exterior dependencies for this mission, so we will consider how the dependencies are structured.
Beginning with project-level construct.gradle, this wants the same old gradle-related dependencies together with the SQLDelight-related dependencies.
classpath("org.jetbrains.kotlin:kotlin-gradle-plugin:1.6.21")
classpath("com.android.instruments.construct:gradle:7.1.3")
classpath("com.squareup.sqldelight:gradle-plugin:$sqlDelightVersion")
App-level construct.gradle additionally has all the usual gadgets, however there’s one further requirement. We now have so as to add a dependency on the shared module within the dependencies block:
implementation(mission(":shared"))
The shared module construct.gradle has all the foremost modifications:
plugins {
   kotlin("multiplatform")
   id("com.android.library")
   id("com.squareup.sqldelight")
}

kotlin {
   android()


   listOf(
       iosX64(),
       iosArm64(),
       iosSimulatorArm64()
   ).forEach {
       it.binaries.framework {
           baseName = "shared"
       }
   }

   val coroutinesVersion = "1.6.1"
   val ktorVersion = "1.6.1"
   val sqlDelightVersion: String by mission

   sourceSets {
       val commonMain by getting {
           dependencies {
               implementation("com.squareup.sqldelight:runtime:$sqlDelightVersion")
           }
       }
       val commonTest by getting {
           dependencies {
               implementation(kotlin("check"))
           }
       }
       val androidMain by getting {
           dependencies {
               implementation("com.squareup.sqldelight:android-driver:$sqlDelightVersion")
           }
       }
       val androidTest by getting
       val iosX64Main by getting
       val iosArm64Main by getting
       val iosSimulatorArm64Main by getting
       val iosMain by creating {
           dependsOn(commonMain)
           iosX64Main.dependsOn(this)
           iosArm64Main.dependsOn(this)
           iosSimulatorArm64Main.dependsOn(this)
           dependencies {
               implementation("com.squareup.sqldelight:native-driver:$sqlDelightVersion")
           }
       }
       val iosX64Test by getting
       val iosArm64Test by getting
       val iosSimulatorArm64Test by getting
       val iosTest by creating {
           dependsOn(commonTest)
           iosX64Test.dependsOn(this)
           iosArm64Test.dependsOn(this)
           iosSimulatorArm64Test.dependsOn(this)
       }
   }
}

android {
   compileSdk = 31
   sourceSets["main"].manifest.srcFile("src/androidMain/AndroidManifest.xml")
   defaultConfig {
       minSdk = 21
       targetSdk = 31
   }
}

sqldelight {
   database("KmmDemoDB") {
       packageName = "com.outliers.kmmdemo.shared.cache"
   }
}
Excluding exterior dependencies declaration, all the pieces else is robotically added whereas creating a brand new KMM mission. We do, nonetheless, want to know varied blocks to know the place so as to add dependencies.
Beginning with the plugins block, discover that we now have utilized the library plugin together with the robotically added multiplatform plugin. The sqldelight plugin is for our database SDK and might not be wanted for different tasks and, thus, must be added manually.
SQLDelight additionally wants the final block to outline the database title and the package deal/path the place queries are outlined. The dependencies wanted for code written within the androidMain of the shared module are declared within the androidMain block inside sourceSets. The identical factor applies for iosMain and commonMain.
Now let’s take a look at the supply code. The crux right here is the shared module. We are going to arrange the database SDK, SQLDelight.
First, create a listing path sqldelight/your-package-name/shared/cache contained in the commonMain folder of the shared module, the place your-package-name is the package deal title you had outlined whereas creating the mission (on this case, the trail is sqldelight/com/outliers/kmmdemo/shared/cache).
Right here, we have to create a file <your database title>.sq that may maintain all our SQL queries, corresponding to insert or choose all. For this demo, I named the file KmmDemoDB.sq.
The database title and package deal title should match with what we now have outlined within the sqldelight block in shared/construct.gradle. SQLDelight makes use of this file to generate code comparable to the offered queries at ~/shared/construct/generated/sqldelight.
If you happen to discover this complicated, please take a while to navigate by way of the mission and determine the recordsdata we’re discussing. You’ll be able to take consolation in the truth that that is solely particular to the SQLDelight library and thus will be totally realized from their documentation.
To really execute the SQL queries in Kotlin widespread code, we’d like an object named SqlDriver. However this SqlDriver is created utilizing totally different APIs for Android and iOS platforms.
Right here comes the function of androidMain and iosMain. We are going to first outline a category referred to as DatabaseDriverFactory, declaring it as count on in widespread sourceset (commonMain):
count on class DatabaseDriverFactory {
   enjoyable createDriver(): SqlDriver
}
The count on key phrase tells the compiler to search for an precise implementation of this class within the platform-specific sourceset (androidMain and iosMain) in the identical package deal (commonMain/com/outliers/kmmdemo/shared/cache) in all sourcesets.
This allows using platform-specific APIs to create SqlDriver, after which all the pieces is similar. Here’s what the precise implementations of androidMain and iosMain appear to be:
precise class DatabaseDriverFactory(personal val context: Context) {
   precise enjoyable createDriver(): SqlDriver {
       return AndroidSqliteDriver(KmmDemoDB.Schema, context, "notes.db")
   }
}

precise class DatabaseDriverFactory {
   precise enjoyable createDriver(): SqlDriver {
       return NativeSqliteDriver(KmmDemoDB.Schema, "notes.db")
   }
}
Please word that we use totally different APIs to create and return an occasion of SqlDriver — specifically, AndroidSqliteDriver and NativeSqliteDriver. These APIs can be found to androidMain and iOSMain by way of the totally different dependencies declared for every sourceset within the construct.gradle file of the shared module.
Now, we’ll create a wrapper class referred to as Database in the identical package deal that internally creates a SqlDriver object utilizing DatabaseDriverFactory and exposes capabilities to do database operations.
class Database(databaseDriverFactory: DatabaseDriverFactory) {
   personal val database = KmmDemoDB(databaseDriverFactory.createDriver())
   personal val dbQuery = database.kmmDemoDBQueries

   inner enjoyable getAllNotes(): Listing<Word> {
       return dbQuery.selectAllNotes().executeAsList()
   }

   inner enjoyable getLastNote(): Word {
       return dbQuery.selectLastNote().executeAsOne()
   }

   inner enjoyable insertNote(title: String, physique: String?) {
       return dbQuery.insertNote(title, physique)
   }

   inner enjoyable deleteAll() {
       return dbQuery.deleteAll()
   }
}
Subsequent, let’s create one other SDK root class. This creates the Database object and exposes all of the operations. This can develop into our level of entry into the shared library for Android/iOS apps.
class KmmSDK(dbDriverFactory: DatabaseDriverFactory) {
   personal val database: Database = Database(dbDriverFactory)

   enjoyable getAllNotes(): Listing<Word> {
       return database.getAllNotes()
   }

   enjoyable getLastNote(): Word {
       return database.getLastNote()
   }

   enjoyable insertNote(title: String, physique: String?) {
       database.insertNote(title, physique)
   }

   enjoyable deleteAll() {
       database.deleteAll()
   }
}
That is the category that Android and iOS apps will instantiate and carry out core work. This class takes in an occasion of DatabseDriverFactory. Thus, when iOS instantiates this class, the compiler will choose the implementation from iosMain.

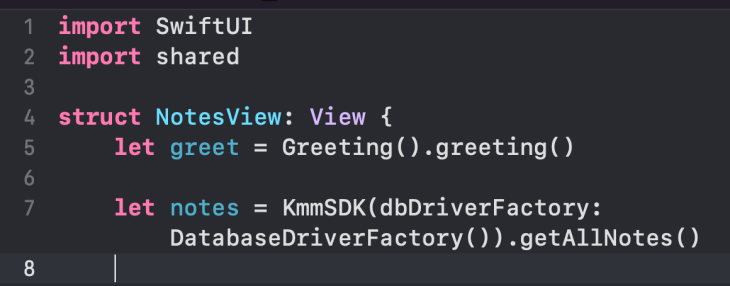
Now, all it’s important to do is import KmmSDK in Android or shared in iOS and name their strategies, as proven above. The remaining is all UI improvement, which we’re a lot too aware of. Go the notes record to a RecyclerViewAdapter and show it on display. Comparable logic is applied for iOS, too.
Conclusion
Phew! We now have coated a whole lot of floor right here. However, there may be nonetheless one factor to mull over: If we now have written all of our code in Kotlin, how does iOS perceive it?
It’s due to the Kotlin compiler. The Kotlin compiler first converts the Kotlin code to intermediate illustration (bytecode for Android JVM), which, in flip, is transformed into the platform’s native code.
And that’s it! We now have coated a lot of the issues one wants to begin working with Kotlin Multiplatform.
Be at liberty to say hello to me on my LinkedIn and GitHub profiles!
Additional references:
LogRocket: Full visibility into your net apps

LogRocket is a frontend software monitoring answer that permits you to replay issues as in the event that they occurred in your personal browser. As an alternative of guessing why errors occur, or asking customers for screenshots and log dumps, LogRocket helps you to replay the session to shortly perceive what went unsuitable. It really works completely with any app, no matter framework, and has plugins to log further context from Redux, Vuex, and @ngrx/retailer.
Along with logging Redux actions and state, LogRocket data console logs, JavaScript errors, stacktraces, community requests/responses with headers + our bodies, browser metadata, and customized logs. It additionally devices the DOM to document the HTML and CSS on the web page, recreating pixel-perfect movies of even probably the most complicated single-page apps.
