
Wi-fi communications are repeatedly present process developments and enhancements, resulting in extra widespread, superior options, like tap-to-pay with bank cards. These days, at nearly any service provider, you’ll be able to pay immediately by simply tapping your bank card on their machine.
We are able to use that very same know-how in our cell phones in order that we don’t should manually kind our bank card particulars into the cost system. NFC, or close to discipline communication, permits us to learn card particulars in the same approach. On this tutorial, we’ll learn to accumulate card particulars by merely tapping the bank card on an NFC-enabled smartphone.
Observe that on the time of writing, you can’t accumulate card particulars via NFC on Apple iPhone gadgets. Apple has restricted this performance to Apple Pay, and also you want approval everytime you intend to make use of NFC for functionalities apart from funds. Subsequently, it’s best to check out this tutorial on any NFC-enabled Android machine as an alternative.
To observe together with this tutorial, you’ll want the next:
- Working data of React Native
- NFC-enabled Android machine: This tutorial received’t work on Android Studio emulators as a result of they can not simulate NFC, so that you’ll want a bodily machine
- Bank card for testing that has NFC performance: Any not too long ago issued bank card can have this performance built-in
When you’ve fulfilled these necessities, you’re all set to get began constructing the appliance!
Desk of contents
NFC is a know-how that makes use of radio waves to ascertain contact between two gadgets in order that they will talk and share info with one another.
NFC-enabled gadgets also can talk utilizing NFC tags. NFC tags don’t have any energy supply, nevertheless, when introduced close to an NFC enabled machine, NFC tags emit radio waves that enable the machine to speak with the NFC tag.
There are various actual world functions for NFC tags. For instance, when driving to a different metropolis, an NFC reader is used to detect the NFC tag hooked up to your automobile, which is able to then cost you toll charges with out you having to manually pay to the personnel.
The identical is true for bank cards. These days, bank card readers include NFC readers, which might learn the cardboard particulars via NFC tags embedded into the bank card. Subsequently, you’ll be able to pay rapidly and simply with none bodily contact with the cardboard reader.
Create a React Native software
To create a brand new React Native software, open the terminal, navigate to a secure listing, and run the next command:
npx react-native init <project-name>
You’ll be able to change <project-name> with any alphanumeric title, for instance nfccardreader123. After working the command above, the React Native set up software will start to obtain the templates and create your React Native app. Relying in your system and the velocity of your web connection, this may take a while.
After the app has completed putting in, navigate to your challenge listing. Test your Gradle model by going into the Android listing and checking the construct.gradle file. The Gradle model impacts the instructions you’ll use to put in the react-native-nfc-card-reader package deal, which is able to help us in studying card particulars.
When you’re utilizing Gradle ≤v7.0, run the next command:
npm set up react-native-nfc-card-reader
When you’re utilizing Gradle ≥7.0, run the command beneath:
npm set up "https://github.com/jackbayliss/react-native-nfc-card-reader.git#gradle7.0" --save
You’ll find extra details about the set up steps for various Gradle variations within the README.md file on this GitHub repository. This web page is up to date usually in case any new command is required for future Gradle variations.
Utilizing NFC with Android
Now, it’s worthwhile to add the point out to Android that you just’ll use NFC with this software. To take action, navigate to android/app/src/essential, open the AndroidManifest.xml file, and add the exercise beneath:
<exercise android:title="com.jackbayliss.nfcreader.NfcCardReaderActivity"/>
Your AndroidManifest.xml file ought to look one thing like the next code, nevertheless, the essential structure may change as a result of React Native updates:
<manifest xmlns:android="http://schemas.android.com/apk/res/android"
  package deal="com.e">
    <uses-permission android:title="android.permission.INTERNET" />
    <software
      android:title=".MainApplication"
      android:label="@string/app_name"
      android:icon="@mipmap/ic_launcher"
      android:roundIcon="@mipmap/ic_launcher_round"
      android:allowBackup="false"
      android:theme="@fashion/AppTheme">
      <exercise
        android:title=".MainActivity"
        android:label="@string/app_name"
        android:configChanges="keyboard|keyboardHidden|orientation|screenLayout|screenSize|smallestScreenSize|uiMode"
        android:launchMode="singleTask"
        android:windowSoftInputMode="adjustResize"
        android:exported="true">
        <intent-filter>
            <motion android:title="android.intent.motion.MAIN" />
            <class android:title="android.intent.class.LAUNCHER" />
        </intent-filter>
      </exercise>
      <exercise android:title="com.jackbayliss.nfcreader.NfcCardReaderActivity"/>
    </software>
</manifest>
Now, run the app utilizing the next command:
npx react-native run-android
Be certain that your Android machine is plugged in with USB debugging on. You’ll be able to add this configuration in developer settings, and it’s best to see the essential React Native boilerplate.
Designing the structure
Go to App.js within the challenge root listing and create the next structure:
import React, {useState} from 'react';
import {
  Button,
  SafeAreaView,
  ScrollView,
  StatusBar,
  TextInput,
  useColorScheme,
  View,
} from 'react-native';
import {Colours} from 'react-native/Libraries/NewAppScreen';
const App = () => {
  const [cardNumber, setCardNumber] = useState('');
  const [expiry, setExpiry] = useState('');
  const [name, setName] = useState('');
  const isDarkMode = useColorScheme() === 'darkish';
  const backgroundStyle = {
    backgroundColor: isDarkMode ? Colours.darker : Colours.lighter,
  };
  const scanCard = async () => {};
  return (
    <SafeAreaView fashion={backgroundStyle}>
      <StatusBar
        barStyle={isDarkMode ? 'light-content' : 'dark-content'}
        backgroundColor={backgroundStyle.backgroundColor}
      />
      <ScrollView
        contentInsetAdjustmentBehavior="automated"
        fashion={backgroundStyle}>
        <View
          fashion={{
            flex: 1,
          }}>
          <TextInput
            fashion={{
              margin: 10,
              padding: 10,
              borderWidth: 1,
              borderColor: 'grey',
            }}
            placeholder="Card quantity"
            worth={cardNumber}
            onChangeText={t => setCardNumber(t)}
          />
          <TextInput
            fashion={{
              margin: 10,
              padding: 10,
              borderWidth: 1,
              borderColor: 'grey',
            }}
            placeholder="Expiry"
            worth={expiry}
            onChangeText={t => setExpiry(t)}
          />
          <TextInput
            fashion={{
              margin: 10,
              padding: 10,
              borderWidth: 1,
              borderColor: 'grey',
            }}
            placeholder="Title on card"
            worth={title}
            onChangeText={t => setName(t)}
          />
          <Button title="Scan Card" onPress={scanCard} />
        </View>
      </ScrollView>
    </SafeAreaView>
  );
};
export default App;
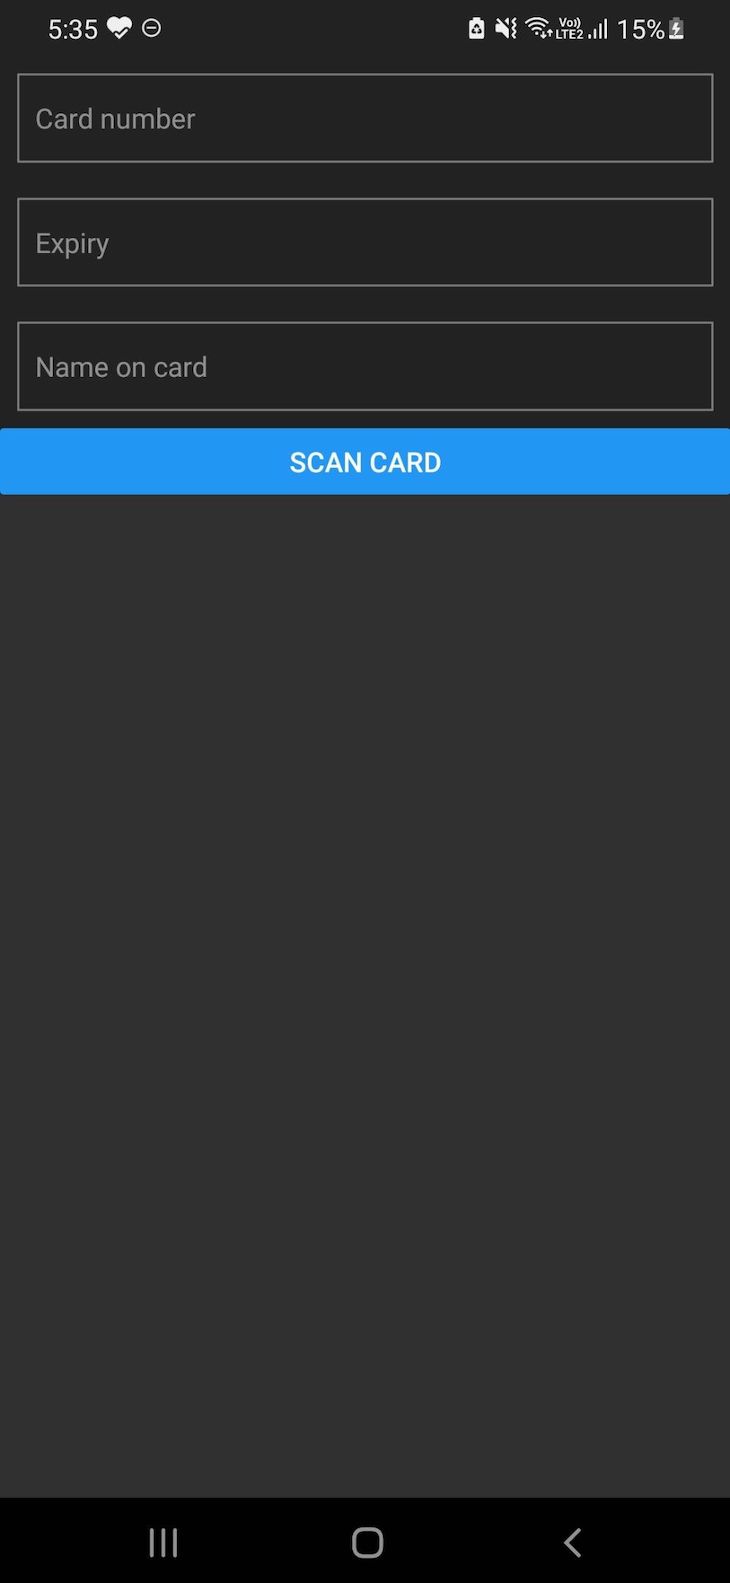
Within the code block above, we’ve created the essential structure and mapped the inputs to a state in order that we will alter them afterward after we scan the card. We’ve additionally created an empty perform known as scanCard, which we’ll work on now. The structure you generate ought to seem like the next picture:
Now, import react-native-nfc-card-reader on the highest of this file:
Extra nice articles from LogRocket:
import NfcCardReader from 'react-native-nfc-card-reader';
Within the scanCard() perform, we simply must name a perform to invoke the machine’s NFC reader in order that we will learn the cardboard particulars:
NfcCardReader.startNfc(perform(cardDetails){
     setCardNumber(cardDetails.cardNumber)
     setExpiry(cardDetails.expiryDate)
     setName(cardDetails.firstName + cardDetails.lastName)
 })
Doing so ought to map the state and present the info within the textbox. Now, your App.jsx file ought to seem like the code beneath:
import React, {useState} from 'react';
import {
  Button,
  SafeAreaView,
  ScrollView,
  StatusBar,
  TextInput,
  useColorScheme,
  View,
} from 'react-native';
import {Colours} from 'react-native/Libraries/NewAppScreen';
import NfcCardReader from 'react-native-nfc-card-reader';
const App = () => {
  const [cardNumber, setCardNumber] = useState('');
  const [expiry, setExpiry] = useState('');
  const [name, setName] = useState('');
  const isDarkMode = useColorScheme() === 'darkish';
  const backgroundStyle = {
    backgroundColor: isDarkMode ? Colours.darker : Colours.lighter,
  };
  const scanCard = () => {
    NfcCardReader.startNfc(perform (cardDetails) {
      setCardNumber(cardDetails.cardNumber);
      setExpiry(cardDetails.expiryDate);
      setName(cardDetails.firstName + cardDetails.lastName);
    });
  };
  return (
    <SafeAreaView fashion={backgroundStyle}>
      <StatusBar
        barStyle={isDarkMode ? 'light-content' : 'dark-content'}
        backgroundColor={backgroundStyle.backgroundColor}
      />
      <ScrollView
        contentInsetAdjustmentBehavior="automated"
        fashion={backgroundStyle}>
        <View
          fashion={{
            flex: 1,
          }}>
          <TextInput
            fashion={{
              margin: 10,
              padding: 10,
              borderWidth: 1,
              borderColor: 'grey',
            }}
            placeholder="Card quantity"
            worth={cardNumber}
            onChangeText={t => setCardNumber(t)}
          />
          <TextInput
            fashion={{
              margin: 10,
              padding: 10,
              borderWidth: 1,
              borderColor: 'grey',
            }}
            placeholder="Expiry"
            worth={expiry}
            onChangeText={t => setExpiry(t)}
          />
          <TextInput
            fashion={{
              margin: 10,
              padding: 10,
              borderWidth: 1,
              borderColor: 'grey',
            }}
            placeholder="Title on card"
            worth={title}
            onChangeText={t => setName(t)}
          />
          <Button title="Scan Card" onPress={scanCard} />
        </View>
      </ScrollView>
    </SafeAreaView>
  );
};
export default App;
Now, we will begin testing! Open the app in your telephone, let React Native bundle JavaScript, after which click on on scan card. You may not obtain any alerts, however while you convey an NFC-embedded bank card close to, you’ll see your card particulars robotically entered into the fields!
Conclusion
The alternatives that include NFC are countless. On this tutorial, we realized the way to implement a tap-to-pay function in our Android gadgets utilizing NFC. We explored how NFC tags work, then arrange our React Native challenge to make use of NFC in our Android machine.
On this tutorial, we didn’t see the way to proceed with funds with the cardboard particulars, however you should use any supplier, for instance, Stripe, for this objective. I hope you loved this tutorial, and you’ll want to depart a remark you probably have any questions.
LogRocket: Immediately recreate points in your React Native apps.

LogRocket is a React Native monitoring answer that helps you reproduce points immediately, prioritize bugs, and perceive efficiency in your React Native apps.
LogRocket additionally helps you enhance conversion charges and product utilization by displaying you precisely how customers are interacting along with your app. LogRocket’s product analytics options floor the the explanation why customers do not full a selected move or do not undertake a brand new function.
Begin proactively monitoring your React Native apps — attempt LogRocket free of charge.
