On this article, you’ll construct a full-stack app utilizing GraphQL and Node.js within the backend. In the meantime, our frontend will use the graphql-request library to carry out community operations on our backend.
We’ll cowl the next steps:
Why use graphql-request and TypeScript?
Each time builders construct a GraphQL server utilizing Apollo, the library generates a “frontend” which seems to be like so:
This interface permits customers to make question or mutation requests to the server through code. Nonetheless, let’s tackle the elephant within the room: it doesn’t look very person pleasant. Because the frontend doesn’t function any buttons or any useful interface parts, it is likely to be onerous for a lot of customers to navigate round your app. Consequently, this shrinks your person base. So how can we clear up this drawback?
That is the place graphql-request is available in. It’s an open supply library which lets customers carry out queries on a GraphQL server. It boasts the next options:
- Light-weight — This library is simply over 21 kilobytes minified, which ensures your app stays performant
- Promise-based API — This brings in assist for asynchronous functions
- TypeScript assist —
graphql-requestis one among many libraries which permits for TypeScript. One main benefit of Typescript is that it permits for secure and predictable code
For instance, take a look at the next program:
let myNumber = 9; //right here, myNumber is an integer
myNumber="hi there"; //now it's a string.
myNumber = myNumber + 10; //despite the fact that we're including a string to an integer,
//JavaScript will not return an error. In the actual world, it would carry sudden outputs.
//Nonetheless, in Typescript, we will inform the compiler..
//what knowledge varieties we have to select.
let myNumber:quantity = 39; //inform TS that we wish to declare an integer.
myNumber = 9+'hi there'; //returns an error. Subsequently, it is simpler to debug this system
//this guarantees stability and safety.
On this article, we are going to construct a full-stack app utilizing GraphQL and TypeScript. Right here, we are going to use the apollo-server-express package deal to construct a backend server. Moreover, for the frontend, we are going to use Subsequent and graphql-request to eat our GraphQL API.
Constructing our server
Venture initialization
To initialize a clean Node.js undertaking, run these terminal instructions:
mkdir graphql-ts-tutorial #create undertaking folder
cd graphql-ts-tutorial
npm init -y #initialize the app
When that’s performed, we now have to inform Node that we have to use TypeScript in our codebase:
#configure our Typescript:
npx tsc --init --rootDir app --outDir dist --esModuleInterop --resolveJsonModule --lib es6 --module commonjs --allowJs true --noImplicitAny true
mkdir app #our most important code folder
mkdir dist #Typescript will use this folder to compile our program.
Subsequent, set up these dependencies:
#growth dependencies. Will inform Node that we are going to use Typescript
npm set up -d ts-node @varieties/node typescript @varieties/specific nodemon
#Putting in Apollo Server and its related modules. Will assist us construct our GraphQL
#server
npm set up apollo-server-express apollo-server-core specific graphql
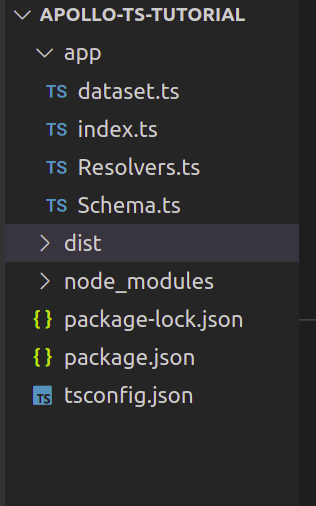
After this step, navigate to your app folder. Right here, create the next recordsdata:
index.ts: Our most important file. It will execute and run our Specific GraphQL serverdataset.ts: It will function our database, which will probably be served to the consumerResolvers.ts: This module will deal with person instructions. We’ll study resolvers later on this articleSchema.ts: Because the identify suggests, this file will retailer the schematics wanted to ship knowledge to the consumer
Ultimately, your folder construction ought to appear like so:
Creating our database
On this part, we are going to create a dummy database which will probably be used to ship requested knowledge. To take action, go to app/dataset.ts and write the next code:
let individuals: { id: quantity; identify: string }[] = [
  { id: 1, name: "Cassie" },
  { id: 2, name: "Rue" },
  { id: 3, name: "Lexi" },
];
export default individuals;
- First, we created an array of objects known as
individuals - This array may have two fields:
idof kindquantity, andidentifyof kindstring
Defining our schema
Right here, we are going to now create a schema for our GraphQL server.
To place it merely, a GraphQL schema is an outline of the dataset that purchasers can request from an API. This idea is much like that of the Mongoose library.
To construct a schema, navigate to the app/Schema.ts file. There, write the next code:
import { gql } from "apollo-server-express"; //will create a schema
const Schema = gql`
  kind Individual {
    id: ID!
    identify: String
  }
  #deal with person instructions
  kind Question {
    getAllPeople: [Person] #will return a number of Individual situations
    getPerson(id: Int): Individual #has an argument of 'id` of kind Integer.
  }
`;
export default Schema;
//export this Schema so we will use it in our undertaking
Let’s break down this code piece by piece:
- The
Schemavariable incorporates our GraphQL schema - First, we created a
Individualschema. It’s going to have two fields:idof kindIDandidentifyof kindString - In a while, we instructed GraphQL that if the consumer runs the
getAllPeoplecommand, the server will return an array ofIndividualobjects - Moreover, if the person makes use of the
getPersoncommand, GraphQL will return a singleIndividualoccasion
Creating resolvers
Now that we have now coded our schema, our subsequent step is to outline our resolvers.
In easy phrases, a resolver is a bunch of features that generate response for a GraphQL question. In different phrases, a resolver serves as a GraphQL question handler.
In Resolvers.ts, write the next code:
import individuals from "./dataset"; //get the entire out there knowledge from our database.
const Resolvers = {
  Question: {
    getAllPeople: () => individuals, //if the person runs the getAllPeople command
    //if the person runs the getPerson command:
    getPerson: (_: any, args: any) => {
      console.log(args);
      //get the article that incorporates the desired ID.
      return individuals.discover((particular person) => particular person.id === args.id);
    },
  },
};
export default Resolvers;
- Right here, we created a
Questionobject that handles all of the incoming queries going to the server - If the person executes the
getAllPeoplecommand, this system will return all of the objects current in our database - Furthermore, the
getPersoncommand requires an argumentid. It will return aIndividualoccasion with the matching ID - Ultimately, we exported our resolver in order that it may very well be linked with our app
Configuring our server
We’re nearly performed! Now that we have now constructed each our schema and resolver, our subsequent step is to hyperlink them collectively.
In index.js, write this block of code:
import { ApolloServer } from "apollo-server-express";
import Schema from "./Schema";
import Resolvers from "./Resolvers";
import specific from "specific";
import { ApolloServerPluginDrainHttpServer } from "apollo-server-core";
import http from "http";

async perform startApolloServer(schema: any, resolvers: any) {
  const app = specific();
  const httpServer = http.createServer(app);
  const server = new ApolloServer({
    typeDefs: schema,
    resolvers,
    //inform Specific to connect GraphQL performance to the server
    plugins: [ApolloServerPluginDrainHttpServer({ httpServer })],
  }) as any;
  await server.begin(); //begin the GraphQL server.
  server.applyMiddleware({ app });
  await new Promise<void>((resolve) =>
    httpServer.hear({ port: 4000 }, resolve) //run the server on port 4000
  );
  console.log(`Server prepared at http://localhost:4000${server.graphqlPath}`);
}
//in the long run, run the server and move in our Schema and Resolver.
startApolloServer(Schema, Resolvers);
Let’s check it out! To run the code, use this Bash command:
npx nodemon app/index.ts
It will create a server on the localhost:4000/graphql URL.
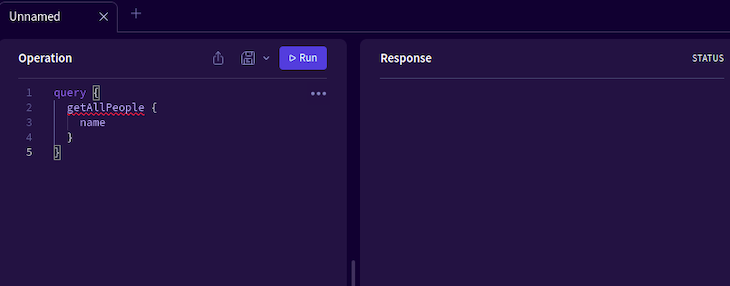
Right here, you may see your out there schemas throughout the UI:
Which means our code works!
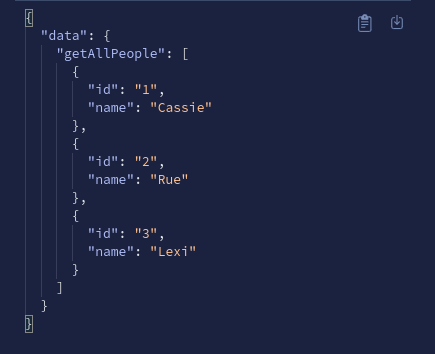
All of our GraphQL queries will go throughout the Operation panel. To see it in motion, kind this snippet inside this field:
#make a question:
question {
  #get the entire individuals out there within the server
  getAllPeople {
    #procure their IDs and names.
    id
    identify
  }
}
To see the end result, click on on the Run button:
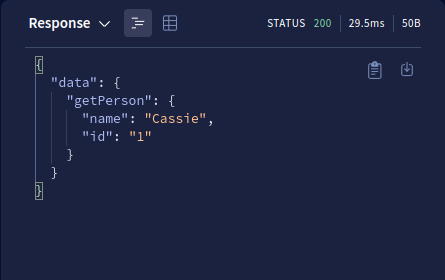
We are able to even seek for a particular entity through the getPerson question:
question ($getPersonId: Int) { #the argument will probably be of kind Integer
  getPerson(id: 1) {
    #get the particular person with the ID of 1
    identify
    id
  }
}
Creating mutations
Within the GraphQL world, mutations are instructions that carry out uncomfortable side effects on the database. Widespread examples of this embody:
- Including a person to the database — When a consumer indicators up for an internet site, the person performs a mutation to save lots of their knowledge of their database
- Enhancing or deleting an object — If a person modifies or removes knowledge from a database, they’re primarily making a mutation on the server
To deal with mutations, go to your Schema.ts module. Right here, throughout the Schema variable, add the next traces of code:
const Schema = gql`
  #different code..
  kind Mutation {
    #the addPerson commmand will settle for an argument of kind String.
    #it's going to return a 'Individual' occasion.
    addPerson(identify: String): Individual
  }
`;
Our subsequent step is to create a resolver to deal with this mutation. To take action, throughout the Resolvers.ts file, add this block of code:
const Resolvers = {
  Question: {
    //..additional code..
  },
  //code so as to add:
  //all our mutations go right here.
  Mutation: {
    //create our mutation:
    addPerson: (_: any, args: any) => {
      const newPerson = {
        id: individuals.size + 1, //id subject
        identify: args.identify, //identify subject
      };
      individuals.push(newPerson);
      return newPerson; //return the brand new object's end result
    },
  },
};
- The
addPersonmutation accepts aidentifyargument - When a
identifyis handed, this system will create a brand new object with an identicalidentifykey - Subsequent, it’s going to use the
pushmethodology so as to add this object to theindividualsdataset - Lastly, it’s going to return the brand new object’s properties to the consumer
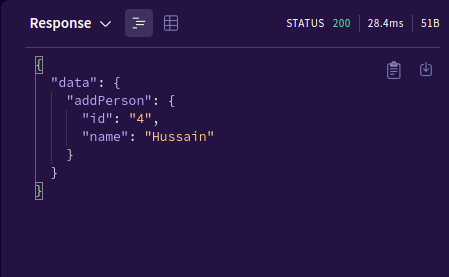
That’s it! To check it out, run this code throughout the Operations window:
#carry out a mutation on the server
mutation($identify: String) {
  addPerson(identify:"Hussain") { #add a brand new particular person with the identify "Hussain"
    #if the execution succeeds, return its 'id' and 'identify` to the person.
    id
    identify
  }
}
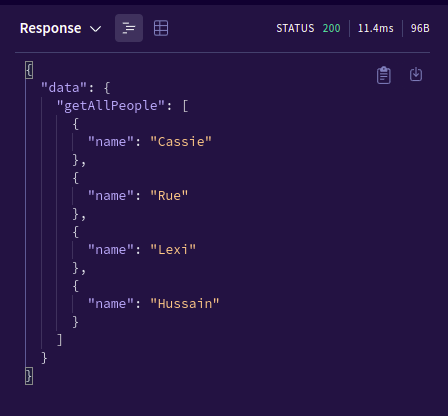
Let’s confirm if GraphQL has added the brand new entry to the database:
question {
  getAllPeople { #get all the outcomes throughout the 'individuals' database.
  #return solely their names
  identify
  }
}
Constructing our consumer
We’ve got efficiently constructed our server. On this part, we are going to construct a consumer app utilizing Subsequent that may take heed to the server and render knowledge to the UI.
As a primary step, initialize a clean Subsequent.js app like so:
npx [email protected] graphql-client --ts
contact constants.tsx #our question variables go right here.
To carry out GraphQL operations, we are going to use the graphql-request library. It is a minimal, open supply module that may assist us make mutations and queries on our server:
npm set up graphql-request graphql
npm set up react-hook-form #to seize person enter
Creating question variables
On this part, we are going to code our queries and mutations to assist us make GraphQL operations. To take action, go to constants.tsx and add the next code:
import { gql } from "graphql-request";
//create our question
const getAllPeopleQuery = gql`
  question {
    getAllPeople { #run the getAllPeople command
      id
      identify
    }
  }
`;
//Subsequent, declare a mutation
const addPersonMutation = gql`
  mutation addPeople($identify: String!) {
    addPerson(identify: $identify) { #add a brand new entry. Argument will probably be 'identify'
      id
      identify
    }
  }
`;
export { getAllPeopleQuery, addPersonMutation };
- Within the first half, we created the
getAllPeopleQueryvariable. When the person runs this question, this system will instruct the server to get all of the entries current within the database - In a while, the
addPersonmutation tells GraphQL so as to add a brand new entry with its reveredidentifysubject - Ultimately, we used the
exportkey phrase to hyperlink our variables with the remainder of the undertaking
Performing queries
In pages/index.ts, write the next code:
import kind { NextPage, GetStaticProps, InferGetStaticPropsType } from "subsequent";
import { request } from "graphql-request"; //permits us to carry out a request on our server
import { getAllPeopleQuery } from "../constants";
import Hyperlink from "subsequent/hyperlink";
const Dwelling: NextPage = ({
  end result, //extract the 'end result' prop
}: InferGetStaticPropsType<typeof getStaticProps>) => {
  return (
    <div className={kinds.container}>
      {end result.map((merchandise: any) => { //render the 'end result' array to the UI
        return <p key={merchandise.id}>{merchandise.identify}</p>;
      })}
    <Hyperlink href="https://weblog.logrocket.com/addpage">Add a brand new entry </Hyperlink>
    </div>
  );
};
//fetch knowledge from the server
export const getStaticProps: GetStaticProps = async () => {
  //the primary argument is the URL of our GraphQL server
  const res = await request("http://localhost:4000/graphql", getAllPeopleQuery);
  const end result = res.getAllPeople;
  return {
    props: {
      end result,
    }, // will probably be handed to the web page part as props
  };
};
export default Dwelling;
Here’s a breakdown of this code piece by piece:
- Within the
getStaticPropsmethodology, we instructed Subsequent to run thegetAllPeoplecommand on our GraphQL server - In a while, we returned its response to the
Dwellinguseful part. Which means we will now render the end result to the UI - Subsequent, this system used the
mapmethodology to render the entire outcomes of thegetAllPeoplecommand to the UI. Every paragraph factor will show theidentifyfields of every entry - Moreover, we additionally used a
Hyperlinkpart to redirect the person to theaddpageroute. It will enable the person so as to add a brand newIndividualoccasion to the desk
To check out the code, run the next terminal command:
npm run dev
This would be the end result:
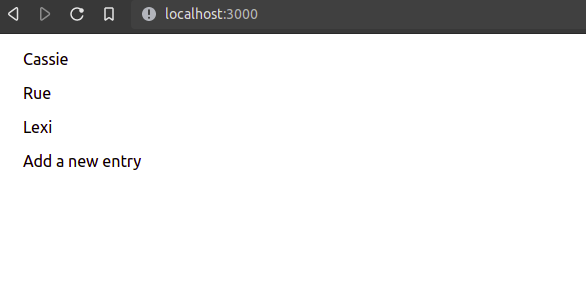
Our GraphQL server even updates in actual time.
Performing mutations
Now that we have now efficiently carried out a question, we will even carry out mutations through the graphql-request library.
Inside your pages folder, create a brand new file known as addpage.tsx. Because the identify suggests, this part will enable the person so as to add a brand new entry to the database. Right here, begin by writing the next block of code:
import kind { NextPage, GetStaticProps, InferGetStaticPropsType } from "subsequent";
import { request } from "graphql-request";
import { addPersonMutation } from "../constants";
const AddPage: NextPage = () => {
  return (
    <div>
      <p>We'll add a brand new entry right here. </p>
    </div>
  );
};
export default AddPage;
On this piece of code, we’re making a clean web page with a chunk of textual content. We’re doing this to make sure whether or not our URL routing system works.
Which means we used routing efficiently! Subsequent, write this snippet in your addpage.tsx file:
import { useForm } from "react-hook-form";
const { register, handleSubmit } = useForm();
//if the person submits the shape, then this system will output the worth of their enter.
const onSubmit = (knowledge: any) => console.log(knowledge);
return (
  <div>
    <type onSubmit={handleSubmit(onSubmit)}> {/*Bind our handler to this manner.*/}
      {/* The person's enter will probably be saved throughout the 'identify' property */}
      <enter defaultValue="check" {...register("identify")} />
      <enter kind="submit" />
    </type>
  </div>
);
This would be the output:
Now that we have now efficiently captured the person’s enter, our final step is so as to add their entry to the server.
To take action, change the onSubmit handler positioned in pages/addpage.tsx file like so:
const onSubmit = async (knowledge: any) => {
  const response = await request(
    "http://localhost:4000/graphql",
    addPersonMutation,
    knowledge
  );
  console.log(response);
};
- Right here, we’re performing a mutation request to our GraphQL server through the
requestperform - Moreover, we additionally handed within the
addPersonmutation command to our request header. It will inform GraphQL to carry out theaddMutationmotion on our server
This would be the end result:
And we’re performed!
Conclusion
Right here is the total supply code of this undertaking.
On this article, you realized learn how to create a full-stack app utilizing GraphQL and TypeScript. They each are extraordinarily essential expertise throughout the programming world since they’re in excessive demand these days.
In case you encountered any issue on this code, I counsel you to deconstruct the code and play with it so as to totally grasp this idea.
Thanks a lot for studying! Joyful coding!
200’s solely  Monitor failed and gradual community requests in manufacturing
Deploying a Node-based internet app or web site is the straightforward half. Ensuring your Node occasion continues to serve assets to your app is the place issues get more durable. In case you’re excited by guaranteeing requests to the backend or third occasion companies are profitable, attempt LogRocket.  https://logrocket.com/signup/
LogRocket is sort of a DVR for internet and cellular apps, recording actually every thing that occurs whereas a person interacts along with your app. As a substitute of guessing why issues occur, you may mixture and report on problematic community requests to rapidly perceive the basis trigger.
LogRocket devices your app to document baseline efficiency timings comparable to web page load time, time to first byte, gradual community requests, and in addition logs Redux, NgRx, and Vuex actions/state. Begin monitoring without spending a dime.
