
Desk of Contents
Clipping photographs can enable extra flexibility when it comes to house occupied within the UI, picture attraction, and elegance. Clipping additionally lets you take away pointless elements of an image, serving to customers give attention to a focal point.
For instance, it’s widespread to see your profile image in a round structure on social media platforms. Is that this since you uploaded a round picture? Most frequently, no. You merely add no matter picture you want and the clipping is finished for you, decreasing the quantity of house your profile image takes up on the location. That is significantly vital for cell apps.
On this put up, I’ll cowl the few methods you possibly can circle clip (and extra) photographs in your Flutter app. Earlier than we use our first widget for picture clipping, let’s arrange our app and get an precise picture to make use of.
Organising the Flutter app
Create an app utilizing flutter create circle_clipper_demo.
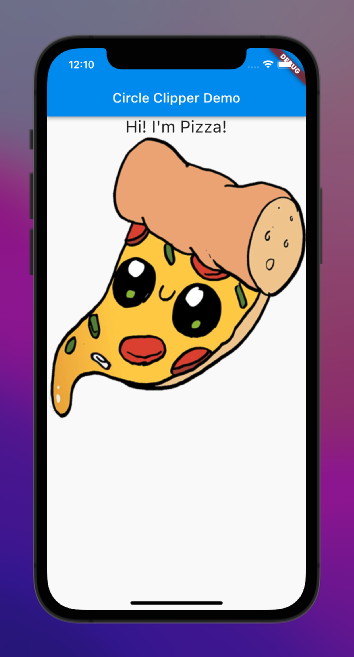
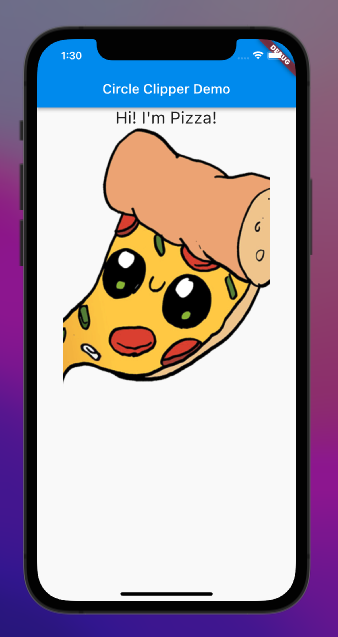
In your widget construct physique, make use of the SingleChildScrollView widget. For this widget’s little one property, use the Column widget and provides it a middle alignment. For the Column's little one, use a Widget checklist, which is able to comprise a Textual content widget and a Heart widget. See under.
SingleChildScrollView(
       little one: Column(
         mainAxisAlignment: MainAxisAlignment.heart,
         youngsters: <Widget>[
           const Text(
             "Hi! I'm Pizza!",
             style: TextStyle(fontSize: 25),
           ),
           Center(
             child: /// widget for picture,
           ),
         ],
       ),
     ),
Subsequent, we have to add the widget used for our picture. For this, we are able to use an Picture widget.
const Picture(picture: AssetImage('./property/pic.png'));
All that’s left to do now’s to create an property listing within the root of our venture and discover a image we are able to use. I obtained a picture from ClipArtMax. Whenever you create the listing and add the image to it, you should specify your new asset in your pubspec.yaml.
# So as to add property to your software, add an property part like this:
 property:
   - property/
Run flutter pub get to make sure your pubspec.yaml adjustments are picked up, then let’s see how our app appears to be like earlier than any clipping.
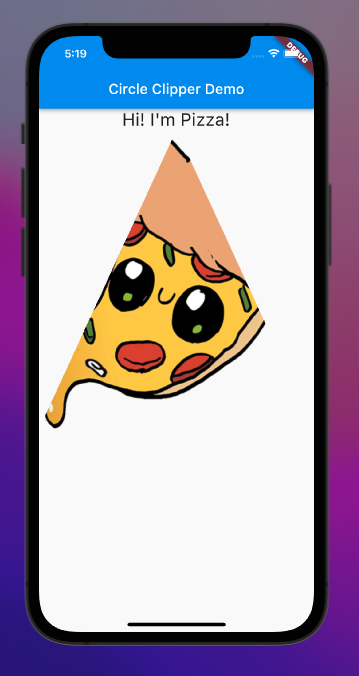
Now that now we have our app established, let’s have a look at how we are able to clip our picture by making use of ClipRRect.
Utilizing ClipRRect in Flutter to clip circles
ClipRRect is a widget used particularly for clipping its little one with a rounded rectangular form inherently. We are able to use this one to create a round clipping round our picture. It’s comparatively simple to implement, because it basically wraps our authentic Picture widget and applies a border radius to it.
ClipRRect(
     borderRadius: BorderRadius.round(300.0),
     little one: const Picture(picture: AssetImage('./property/pic.png')),
   );
We’re utilizing the identical authentic Picture widget, however we’re wrapping it in ClipRRect and making use of a border radius to around the provided clipping. See the 2 photographs in contrast under.

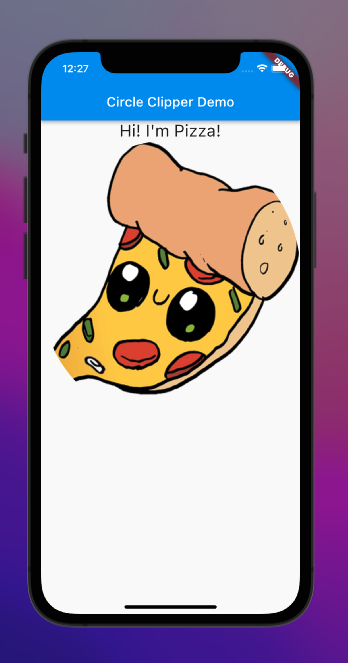
ClipRRectDiscover that our picture on the suitable has a spherical edge that cuts off (or clips) a few of our authentic picture. You’ll be able to differ your stage of clipping, too, by altering the border radius worth. The upper the radius, the extra round it’s. Straightforward, no?
Let’s cowl the subsequent approach we are able to circle clip our photographs. We are able to use a widget that not solely permits us to circle clip with ease but in addition to assign a background shade to our clipped picture (assuming your image has the background eliminated). This widget known as CircleAvatar.
Utilizing CircleAvatar to clip photographs in Flutter
CircleAvatar is a widget offered by Materials. It’s a circle that represents a person. I discover it significantly helpful as a result of it’s as simple to implement as ClipRRect, however it additionally permits for straightforward backgroundColor addition to your picture.
CircleAvatar(
         backgroundColor: Colours.amber,
         backgroundImage: AssetImage('./property/pic.png'),
         radius: 200.0
);
It’s just like ClipRRect within the sense that it makes use of radius (known as borderRadius in ClipRRect) to find out the extent of circularity utilized to a clipped picture. It’s vital to level out, nevertheless, that if you’d like your image to be clipped accurately, you should assign it to the backgroundImage property and never little one. For those who had been to use it to little one, the picture would get away of the clipping. Let’s see these two examples under.
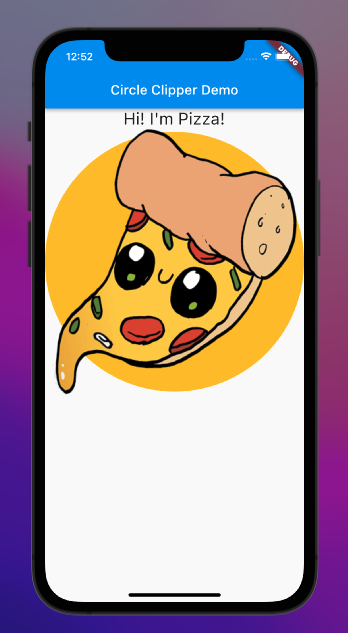
little one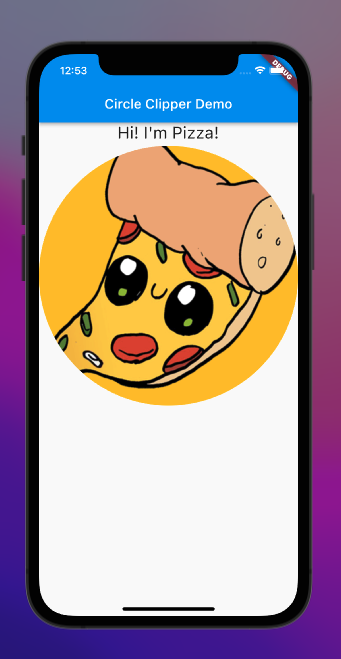
backgroundImageI like this widget as a result of it really works equally to ClipRRect, permits flexibility for background shade, and you may add a little one if you wish to embody one thing in addition to the picture (equivalent to a badge or an “on-line” gentle) that’s saved in a separate property from the picture itself (reasonably than setting a Widget checklist to be assigned to little one). When it comes to syntax, I believe it’s cleaner.
For instance, you should utilize an AssetImage reasonably than wrapping AssetImage in an Picture widget. Additionally, radius is only a double reasonably than having to be a property of BorderRadius. There’s extra flexibility with clipBehavior for ClipRRect, however for fast circle clipping (one thing that turns out to be useful for, say, a social media avatar) I actually like CircleAvatar.
If, nevertheless, you need clipping that’s nearer to an oval than a circle, this subsequent widget is ideal for you.
Creating ovals in Flutter with ClipOval
ClipOval is a widget that clips the kid to be within the form of an oval. It’s very simple to make use of when you want ovular clipping. See under.
ClipOval(
         little one: Picture(picture: AssetImage('./property/pic.png'))
);
It’s similar to ClipRRect with out having so as to add a borderRadius property.
What when you don’t need a round or ovular clipping path and as a substitute, need to clip your picture as a daily rectangle? For this, you should utilize ClipRect.
Utilizing ClipRect to clip rectangles in Flutter
ClipRect could be considered like ClipRRect, minus the rounded half (therefore why it’s lacking the second “R”). It applies an oblong clipping path to a baby widget with out inherently making use of rounded edges. It’s nice when used with different widgets that tend to color exterior their bounds, equivalent to Align. See under.
ClipRect(
         little one: Align(
           alignment: Alignment.heart,
           widthFactor: 0.8,
           heightFactor: 1.0,
           little one: Picture(
             picture: AssetImage('./property/pic.png')
           ),
       ),
     );
Right here, we’re utilizing Align to maintain our picture centered and adjusting the widthFactor to be lower than one. See the comparability with our authentic picture under.
ClipRectBy wrapping it in our clipper, we are able to create an oblong clipping impact for our picture. You’ll be able to alter the extent of clipping by altering the widthFactor on the Align little one.
We coated circle clipping with ClipRRect and CircleAvatar, in addition to oval clipping and rectangle clipping with ClipRect. However what different shapes can we clip, and what if we need to create a extra custom-made form to clip our picture? With our last widget of the put up, we are able to just do that.
ClipPath in Flutter
ClipPath is a widget that permits the developer to customise their clipping form (or path) to swimsuit their meant impact. See the starter code under.
ClipPath(
         clipper: MyTriangle(),
         little one: const Picture(picture: AssetImage('./property/pic.png')),
     );
The construction is just like our different clipping widgets, however we’re making use of an vital property known as clipper.
Let’s strive clipping within the form of a triangle. We are able to do that by creating our personal clipping widget that extends the CustomClipper class. In our new clipping widget — let’s name it MyTriangle — we are able to outline two capabilities.
The primary is getClip, which known as every time the customized clip must be up to date, equivalent to when our ClipPath widget first renders with our picture. shouldReclip known as when a brand new occasion of the clipper class is offered. For now, this perform will simply return false.
Our getClip, nevertheless, is the meat and potatoes of our customized clipping.
Path getClip(Dimension dimension) {
     last path = Path();
     path.moveTo(dimension.width/2, 0.0);
     path.lineTo(dimension.width, dimension.peak);
     path.lineTo(0.0, dimension.peak);
     path.shut();
     return path;
 }
A number of issues are taking place right here. First, we instantiate the Path class. You’ll be able to consider this class as a line being drawn onto the UI from level A, and, through the use of built-in strategies (moveTo and lineTo), you can also make it transfer to level B, to level C, to Level D, and so forth.
Then, once you’re prepared, you possibly can shut the trail (shut), which brings it again to the place to begin. The perform takes an inherent Dimension occasion as an argument, which has two properties, width and peak.
moveTo and lineTo create what are known as sub-paths. moveTo begins a brand new subpath at a given set of coordinates (for this reason it comes first in our case), and moveTo provides a straight line phase from the present level to a brand new offered level. Right here is the order of operations for our coordinates.
- The primary X coordinate offered is
dimension.width/2as a result of this offers us the midway by level of the width (or horizontal center) of the picture. The Y coordinate is0.0as a result of it’s on the high of our picture. Collectively, this begins us on the high center of our picture – the primary nook of our triangle - The second X coordinate is
dimension.widthas a result of that’s the right-most level for our picture. The Y coordinate isdimension.peakas a result of it’s on the backside of the picture. Collectively, this offers us the bottom-right nook of our picture, the second level on the triangle - The third X coordinate is just
0.0as a result of it’s the left-most a part of our picture (horizontally). The Y coordinate remains to bedimension.peakas a result of we don’t need our path to maneuver up or down but. By protecting it the peak of our picture, the trail drawn creates the underside facet of our triangle — and the convergence of our final coordinates kinds the third and last nook of our triangle shutestablishes a last subpath between our final level (0.0, dimension.peak) and our first level (dimension.width/2, 0.0).
Now, we simply have to go MyTriangle to the clipper property for our ClipPath widget. We should always get the under outcome.
CustomClipperYou should utilize ClipPath to create any form of bizarre and wild shapes you possibly can consider just by together with numerous coordinates for nevertheless many lineTo capabilities you need to execute. You’ll be able to clone the code for this venture from GitHub and experiment with these clipping widgets for your self! Thanks for studying!
