
On this information, we are going to discuss RegEx and the way it’s utilized in Kotlin. RegEx stands for “common expression”. In layman’s phrases, it checks if a string matches a sample. Common expressions come in useful in instances of validation of enter.
Why is that this an enormous deal? As an alternative of getting quite a few IF and ELSE operators, RegEx handles these validations all of sudden.
That brings us to the intention of this information. On this article, we are going to information you on methods to use common expression as a way of validation in Kotlin by constructing a easy app to validate a cellular quantity.
Stipulations
I like to recommend readers of this information have the next:
- Fundamental data of Kotlin syntax
- A Kotlin compiler on their gadget to run Kotlin code within the terminal
(Notice: You’ll additionally must have your android studio up and operating in your working system)
Checking enter patterns utilizing RegEx
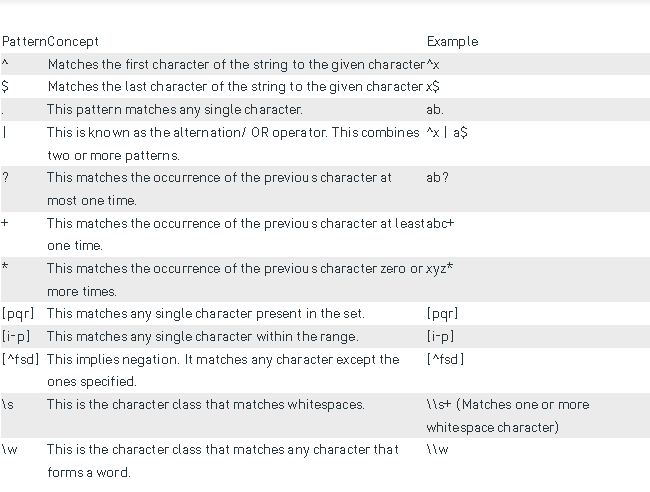
Common expression patterns can usually be complicated to work with, so we are going to learn to test for patterns in a string utilizing RegEx. Under are a few of the RegEx patterns in Kotlin:
To test an enter sample with RegEx, create a RegEx class with the variable title “sample.” This variable will comprise the sample we wish to match.
Equally, we are going to create one other variable with the title “end result” to specify the RegEx string. Under is an implementation of this rationalization:
enjoyable fundamental ()
{
  var sample = Regex("wa");
  var end result = sample.containsMatchIn("Muyiwa");

  println(end result);
}
The output is true since “wa” is inside the regex string “Muyiwa.”
(Notice: That is case delicate, so, “WA” is completely different from “wa,” however we will overlook this case utilizing IGNORE_CASE)

RegexOption (IGNORE_CASE)
This part will present you methods to test patterns in a string no matter its case sensitivity. To do that, we are going to cross RegexOption.IGNORE_CASE because the parameter to the RegEx constructor. Thus, the code will probably be as beneath:
enjoyable fundamental ()
{
  var sample = "WA".toRegex(RegexOption.IGNORE_CASE)
  var end result = sample.containsMatchIn("Muyiwa");

  println(end result);
}
There are related processes between the 2 (sample above), with the one distinction being if there’s a sample, the code above will acknowledge it no matter its case.
Cellular quantity validation
This mission will present you methods to validate a cellular quantity utilizing RegEx. For a simple stream, we’ll put the processes step-by-step. Thus, to get began, comply with the beneath steps accordingly:
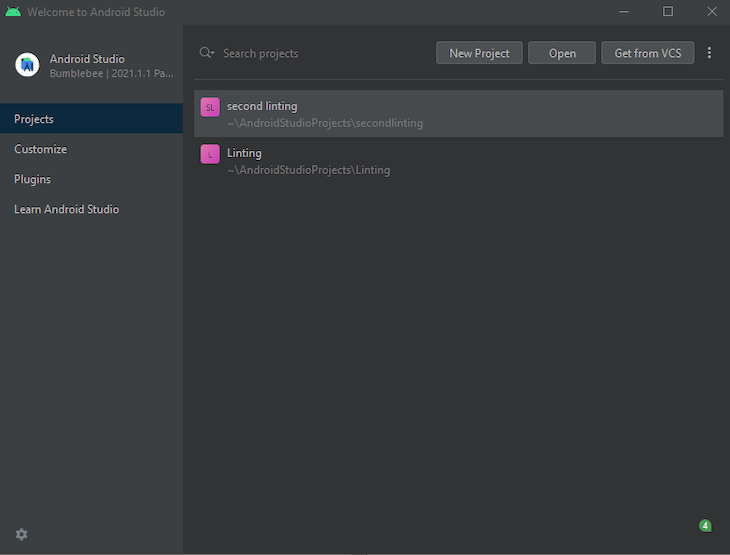
First, begin up your android studio and choose “New Challenge”.
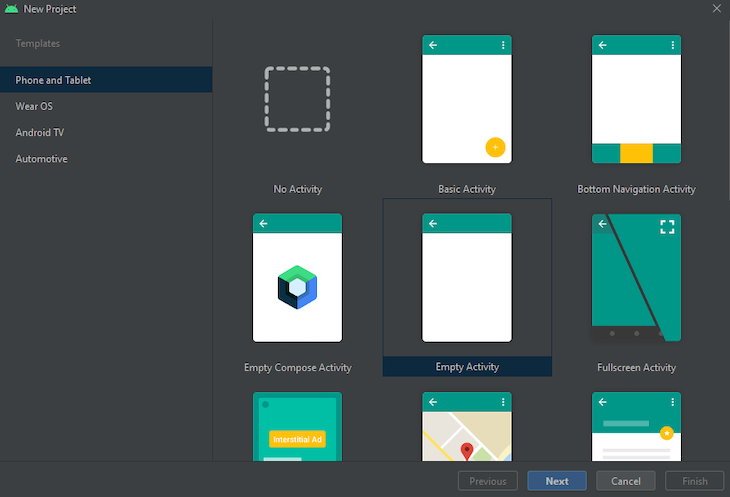
After this, choose “Empty Exercise” as your mission template and click on on “Subsequent”.
On this web page, use any title of your alternative — for this mission’s, I’ve known as it “PhoneNumberValidation”. Choose the language of your alternative (Kotlin) and click on on “End”.
Let’s give a fast rundown of what we wish to do — we wish to create a easy button and “Edit textual content” space. On this course of, we wish the button enabled as soon as a person enters a legitimate cellphone quantity, and whether it is an invalid cellphone quantity, the message displayed needs to be “Invalid cellphone quantity.”
Now, we will start with the design.
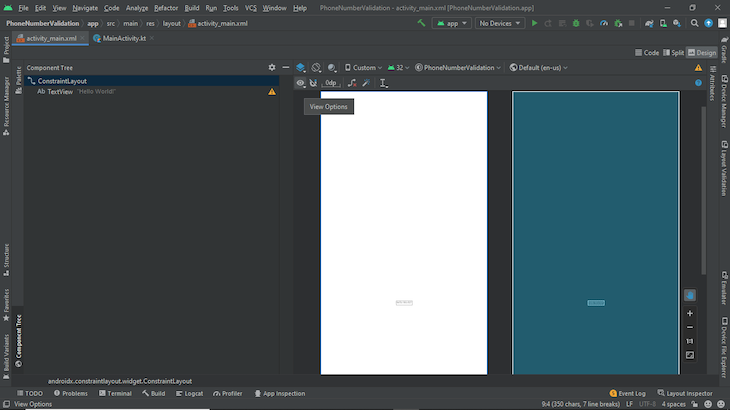
First, in your new mission, click on on activity_main.xml and choose “Present System UI” within the design part. Click on on the attention icon to search out this.
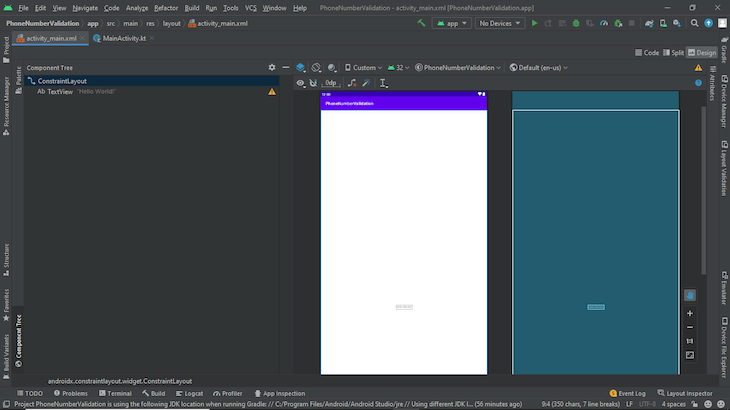
Subsequent, click on on “Cut up” and take away the default textview as we are not looking for it in that place. Click on on the palette, then choose “Textual content” and drag and drop the cellphone textual content into the system UI (click on on the wand icon so as to add the constraint to the EditText).
Add a touch to EditText with the textual content “Enter Cellphone Quantity”. For extra simple causes, we are going to change the ID to edit. Thus our EditText listener will appear to be this:
(Notice: It’s as much as you if you wish to change the default ID in EditText)
Subsequent, we are going to want a button. To do that, we are going to comply with an identical course of to how we added the textual content space, with the distinction being we’re including a button as a substitute. On this case, we’d like the button to be disabled; thus, we set the enabled property as “false”.
android:enabled="false"
So, the code for the button will probably be as beneath:
<Button
  android:id="@+id/button2"
  android:layout_width="wrap_content"
  android:layout_height="wrap_content"
  android:layout_marginTop="6dp"
  android:textual content="Button"
  android:enabled="false"
  app:layout_constraintEnd_toEndOf="guardian"
  app:layout_constraintStart_toStartOf="guardian"
  app:layout_constraintTop_toBottomOf="@+id/edit" />
Binding Kotlin to XML
Earlier than continuing, we might want to bind our Android view with Kotlin. Up to now, performing this operation was pretty straightforward utilizing Kotlin synthetics.
All you must do is add the next plugin to construct.gradle(:app) and name the view by their ID within the Kotlin file:
id 'kotlin-android'
id 'kotlin-android-extensions'
However, this has change into deprecated and isn’t contained in new Android Studio initiatives by default.
The issue with Kotlin synthetics was although we may name these views by their ID, all of this might probably be null; which means we may entry views that don’t belong to the format.
Alternatively, view binding breaks that hole as a result of it ensures that the views accessed in an exercise or fragment are usually not null. Thus, there isn’t any means a null pointer exception can happen.
(Notice: Information binding is an alternative choice to view binding, however view binding occurs to be less complicated, and look at binding will solely bind your views)
Here’s a step-by-step technique on methods to use view binding in your views:
First, head on to your construct.gradle(:app), as a result of you must explicitly allow that you just wish to use view binding in your mission.
Within the Android block, add the brand new block beneath to it and sync your Gradle file:
buildFeatures {
  viewBinding true
}
Head to the MainActivity.kt file. In there, we wish to reference the EditText.
View binding generates a binding class utilized in accessing our views. So, we are going to create a non-public lateinit var known as binding with kind ActivityMainBinding (that is the category view binding generated for us).
Principally, for each XML file in our mission, view binding will try this, and we don’t must rebuild our mission since annotation processing isn’t required.
Now that we’ve got binding, to initialize it, we are going to use the code beneath:
binding = ActivityMainBinding.inflate(layoutInflater)
layoutInflater principally provides views from one group to a different. Lastly, we are going to set the content material view to binding.root utilizing the code beneath:
setContentView(binding.root)
Now to have entry to the view, use the code binding.id (ID of the views). Now we’re good to go.
We wish the button to be enabled as soon as the person enters a legitimate cellular quantity. To do that, head to the MainActivity.kt file. We might want to write the code for the important thing pressed. Under is the Kotlin code required for the complete course of:
package deal com.instance.phonenumbervalidation

import androidx.appcompat.app.AppCompatActivity
import android.os.Bundle
import android.textual content.Editable
import android.textual content.TextWatcher
import com.instance.phonenumbervalidation.databinding.ActivityMainBinding
import java.util.regex.Sample

class MainActivity : AppCompatActivity() {

  non-public lateinit var binding: ActivityMainBinding

  override enjoyable onCreate(savedInstanceState: Bundle?) {
    tremendous.onCreate(savedInstanceState)
    binding = ActivityMainBinding.inflate(layoutInflater)
    setContentView(binding.root)
// starting
    binding.edit.addTextChangedListener(object:TextWatcher{
      override enjoyable beforeTextChanged(p0: CharSequence?, p1: Int, p2: Int, p3: Int) {
      }

      override enjoyable onTextChanged(p0: CharSequence?, p1: Int, p2: Int, p3: Int) {
        if (mobileValidate(binding.edit.textual content.toString()))
          binding.button2.isEnabled=true
        else{
          binding.button2.isEnabled=false
          binding.edit.setError("Invalid Cellphone quantity")
        }
      }

      override enjoyable afterTextChanged(p0: Editable?) {
      }
    })
  }

  non-public enjoyable mobileValidate(textual content: String?): Boolean {
    val p = Sample.compile("[0][7-9][0-1][0-9]{8}")
    val m = p.matcher(textual content)
    return m.matches()
  }
}
Explaining the code snippet
TextWatcher screens the modifications made to the EditText utilizing any of its three callback strategies:
beforeTextChangedonTextChangedafterTextChanged
Right here is a hyperlink to a useful resource if you wish to find out about these strategies. In onTextChanged, we create an if assertion to test for the mobileValidate perform with the argument binding.edit.textual content.toString().
Initially, doing this may throw an error as we should not have a perform known as mobileValidate, so press Alt+Enter to routinely create a perform in MainActivity. Change the argument from Editable to String because you need the enter as a string.
Within the mobileValidate perform, we wish our textual content to match a sure sample: a typical Nigerian cellphone quantity (often 070, 080, 081, 090, 091, and a complete of 11 digits).
Thus, we compile a sample for 4 completely different intervals, with the primary three having just one mixture, and break up the final interval into eight mixtures of 0-9 intervals. So, principally, any digit exterior of every interval will flag the quantity as invalid, and the button will stay disabled.
Subsequent, we are going to declare our matcher occasion utilizing the p.matcher() perform. Then, we are going to parse the enter in our matcher perform and return m.matches(). The end result returns true if our enter matches the sample and the button is enabled — and false if there isn’t any match.
Again within the if assertion, the button needs to be enabled if the situation of the button stays true. We even have an else assertion in case the situation modifications to false. We set an error message to throw in a notification that “The quantity is invalid.”
After this, you possibly can run the app in your required emulator to check it out.
Conclusion
RegEx’s versatility makes it a necessary device in quite a few programming languages, and its capacity to test for patterns has made it an environment friendly device for validation.
Its benefits when it comes to versatility additionally include a number of disadvantages: its advanced syntax, for one, which makes RegEx considerably tough for even veteran programmers.
Nonetheless, it’s completely advantageous having the data of ReGex in your repertoire, as a result of at some point, it is going to come in useful so long as you’re within the improvement house!
