Testing is a crucial a part of modern-day software program improvement; the truth is, the TDD paradigm, brief for test-driven improvement, stresses the significance of writing exams earlier than writing even a single line of code.
For backend purposes, this may be simple; nevertheless, testing UI-centric purposes might be fairly difficult. Right here, Misplaced Pixel is useful; Misplaced Pixel is an open supply device that helps determine regressions within the consumer interface with each push that we make to the appliance.
On this article, we’ll discover ways to take a look at a couple of Storybook elements utilizing Misplaced Pixel. Let’s get began!
What’s Misplaced Pixel?
In accordance with the Misplaced Pixel GitHub web page, Misplaced Pixel is an open supply visible regression testing device. Misplaced Pixel renders precise pictures of elements; once we make any adjustments to the part, Misplaced Pixel compares the unique pictures to the modified ones, thereby detecting regression.
Misplaced Pixel’s strategy is kind of totally different from snapshot testing utilizing Jest, through which the total part is represented in its verbose, textual format, after which in contrast with the modified model.
On the time of writing, Misplaced Pixel helps Storybook, Ladle, Subsequent.js, Gatsby, and Remix. On this article, we’ll discover utilizing Misplaced Pixel alongside Storybook elements.
What’s Storybook?
Storybook is a device that may assist us optimize our React improvement workflow. In accordance with the official Storybook documentation, Storybook is a device for UI improvement that isolates elements, making improvement sooner and simpler.
We are able to consider Storybook as a platform that lets us code the constructing blocks for our purposes independently of one another. Once we lastly put all of them collectively into significant purposes, we’ll encounter fewer bugs and surprises in conduct. As well as, Storybook offers free documentation of all our elements. To get extra readability on how all of that works, let’s construct a hands-on challenge with Storybook, React, and Vite.
Establishing Storybook with React
Storybook with React and Vite
On this article, we’ll arrange Storybook in a React challenge. For that, we’ll first want a base React challenge. First, let’s create our React challenge utilizing Vite:
npm create [email protected]
We’ll observe the prompts on the display screen to create a React challenge with JavaScript. As soon as that finishes operating, we will run the challenge that we simply created by going into that listing and beginning the dev server:
cd storybook-testing
npm run dev
You must see the Vite + React homescreen operating on http://127.0.0.1:5173/ by visiting the identical URL within the browser:
Storybook setup
Now, we’ll arrange Storybook on this repo by operating the next code:
npx storybook init
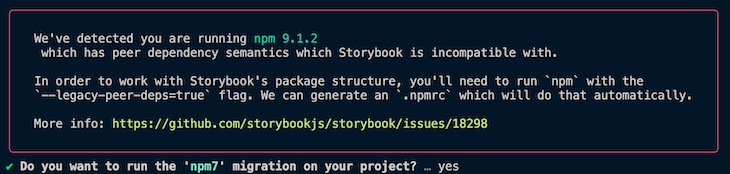
The command above will add the mandatory recordsdata and make the required adjustments to the bundle.json for Storybook to work. For those who get an error just like the one under, choose sure to create a brand new .npmrc file within the repo:
Subsequent, we will run Storybook utilizing the command under:
npm run storybook
The command above will deliver up the Storybook homepage on http://localhost:6006/, which seems to be like the next picture:
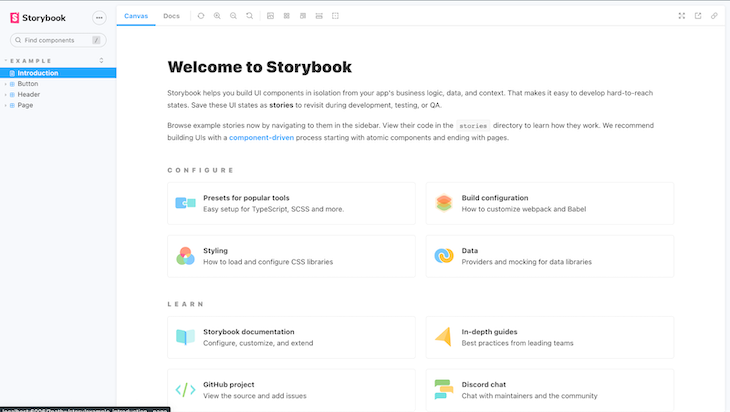
Discover that Storybook has already created a couple of button elements that we will discover utilizing the UI:
We’ll use Misplaced Pixel to carry out regression testing on these pre-defined buttons.
Repo setup
With these adjustments, we will push the code to a brand new GitHub repo as follows:
git init
git add --all
git commit -m 'first commit'
git distant add origin <repo_origin_url>
git push -u origin fundamental
Now that the repo is prepared, we’ll add the Misplaced Pixel code.
Misplaced Pixel setup
With our UI arrange, we’ll introduce Misplaced Pixel into the identical repository. First, we set up Misplaced Pixel utilizing the command under:
npm set up lost-pixel
Subsequent, we create a lost-pixel.config.js file on the root of our Vite challenge:
import { CustomProjectConfig } from 'lost-pixel';
export const config: CustomProjectConfig = {
  storybookShots: {
    storybookUrl: './storybook-static',
  },
  generateOnly: true,
  failOnDifference: true,
};
Within the code above, we’re telling Misplaced Pixel the place to seek out the Storybook elements. In our case, as soon as the Storybook construct command runs, the Storybook elements will likely be discovered on the ./storybook-static URL.
Subsequent, we have to create two GitHub workflows. Within the root of the repo, create a folder named .github and one other folder named workflows within it. We’ll place the next two recordsdata contained in the workflows folder.
lost-pixel-update.yml
The lost-pixel-update.yml workflow will assist Misplaced Pixel create the baselines in opposition to which it should carry out regression testing. Whereas performing the exams, Misplaced Pixel must know the fitting solution to render the part with the intention to decide whether or not the part has diverged from that conduct.
The lost-pixel-update.yml file seems to be like the next:
on: [workflow_dispatch]
jobs:
  construct:
    runs-on: ubuntu-latest
    steps:
      - title: Checkout
        makes use of: actions/[email protected]
      - title: Setup Node.js
        makes use of: actions/[email protected]
        with:
          node-version: 16.x
         cache: 'npm'
      - title: Set up dependencies
        run: npm ci
      - title: Construct Storybook elements
        run: npm run build-storybook
      - title: Run Misplaced Pixel container
        id: lp
      makes use of: lost-pixel/[email protected]
        env:
          LOST_PIXEL_MODE: replace
      - title: Create Pull request
        makes use of: peter-evans/[email protected]
        if: ${{ failure() && steps.lp.conclusion == 'failure' }}
        with:
          token: ${{ secrets and techniques.GH_TOKEN }}
          commit-message: replace lost-pixel baselines
          delete-branch: true
          department: "lost-pixel-baselines/${{ github.ref_name }}"
          title: "Misplaced Pixel updating baselines - ${{ github.ref_name }}"
          physique: Automated baseline replace PR - misplaced pixel
Discover that the steps on this GitHub motion are simple. We create a Node.js container, construct our Storybook elements, after which run Misplaced Pixel utilizing the pre-built motion launched on the GitHub motion retailer, lost-pixel/[email protected].
This motion runs the Misplaced Pixel motion in replace mode. Nonetheless, discover that the final step is particular, making a pull request with the modified elements in order that these might be merged with the repo and act as the brand new baseline elements. We’re utilizing the secrets and techniques.GH_TOKEN to authenticate whereas we create the pull request, which we’ll evaluate later.
lost-pixel-test.yml
The lost-pixel-test.yml workflow will likely be triggered on each push to the repo, thereby producing the brand new pictures for the elements and evaluating them in opposition to these generated whereas operating the baseline exams. If there’s any distinction between the 2, the take a look at will fail. The lost-pixel-test.yml file seems to be like the next code:
on: [push]
jobs:
  construct:
    runs-on: ubuntu-latest
    steps:
      - title: Checkout
        makes use of: actions/[email protected]
      - title: Setup Node
        makes use of: actions/[email protected]
        with:
          node-version: 16.x
          cache: 'npm'
      - title: Set up dependencies
        run: npm ci
      - title: Construct Storybook
        run: npm run build-storybook
      - title: Misplaced Pixel
        id: lp
        makes use of: lost-pixel/[email protected]
This motion is nearly the identical because the earlier motion with some slight variations. The final step that creates a PR is lacking, and we’re additionally not operating Misplaced Pixel in replace mode. As we seen within the lost-pixel-update.yml file, the PR creation step requires that we provide secrets and techniques.GH_TOKEN.
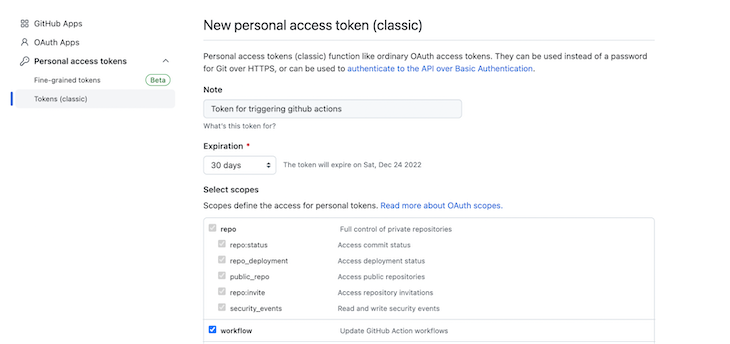
Generate GitHub auth token
Take a look at this GitHub repo for the detailed steps to generate a private entry token. In brief, the steps are as follows:
- Go to your GitHub profile settings
- Click on on Developer settings after which Private entry token
- Click on on Tokens (basic) after which Generate new token
- Choose the scope for the token as workflow
As soon as the token is generated, copy it to the clipboard. We have to add it as a secret within the repo:
- On the repository web page, click on on Settings
- Click on on Secrets and techniques after which Actions
- Click on on New repository secret
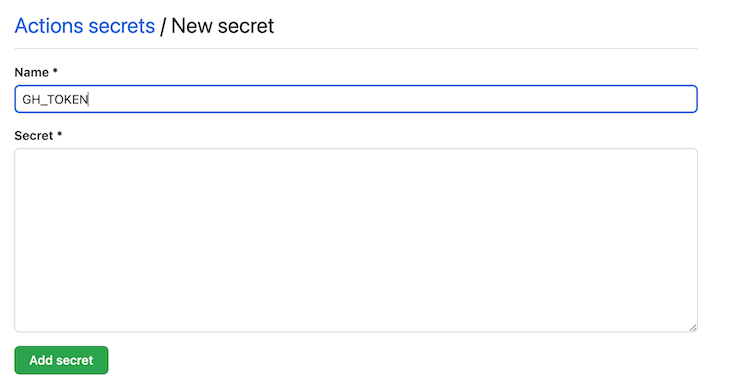
Identify the key GH_TOKEN, paste the key, after which click on on Add secret. This can add the key to the repo in order that the PR creation step goes by way of easily.
Producing baselines
With this setup finished, we will now run the motion to generate the baselines for all our of Storybook elements. Add the 2 newly created .yml recordsdata, create a commit, and push it to the distant repo. We are able to see that the take a look at will get triggered instantly on a code push, however it fails as a result of there are not any baselines:

Let’s run the workflow to generate baselines. Go to the Actions tab of the GitHub repo, then choose the lost-pixel-update.yml workflow. Click on on Run workflow:
![]()
With all of the earlier steps accomplished, the workflow runs easily and creates a pull request consequently:
![]()
Merge the pull request in order that the .png recordsdata similar to the baselines get merged within the repo.
Testing visible regressions
With the baselines configured, let’s introduce some visible regressions in our Storybook part. Go to the tales Button.tales.jsx file and alter the label of the first button to say Take a look at Button:
export const Major = Template.bind({});
// Extra on args: https://storybook.js.org/docs/react/writing-stories/args
Major.args = {
  major: true,
  label: 'Take a look at Button',
};
Save the file, commit, and push to the distant:
git commit -m 'testing regression'
git pull --rebase
git push
You must see that the lost-pixel-test.yml workflow is triggered instantly. It runs, efficiently stating that there’s a regression within the major button model of the part:
![]()
If that is an anticipated regression, we will set off the lost-pixel-update.yml workflow as earlier than, and the baselines could be up to date.
Conclusion
Misplaced Pixel offers us with an alternate technique to carry out UI regression testing, which is considerably totally different from the usual apply of snapshot testing. In case your challenge makes use of a number of Storybook elements, and also you’re not involved about further .png pictures being pushed to the repository, you possibly can discover Misplaced Pixel in your tasks for detecting UI regressions.
Reduce by way of the noise of conventional React error reporting with LogRocket
LogRocket
is a React analytics resolution that shields you from the a whole bunch of false-positive errors alerts to just some really essential gadgets. LogRocket tells you probably the most impactful bugs and UX points truly impacting customers in your React purposes.


LogRocket
routinely aggregates consumer facet errors, React error boundaries, Redux state, sluggish part load instances, JS exceptions, frontend efficiency metrics, and consumer interactions. Then LogRocket makes use of machine studying to inform you of probably the most impactful issues affecting probably the most customers and offers the context it’s essential to repair it.
Deal with the React bugs that matter —
strive LogRocket in the present day.
